wikiHow is a “wiki,” similar to Wikipedia, which means that many of our articles are co-written by multiple authors. To create this article, volunteer authors worked to edit and improve it over time.
wikiHow marks an article as reader-approved once it receives enough positive feedback. This article received 21 testimonials and 92% of readers who voted found it helpful, earning it our reader-approved status.
This article has been viewed 186,198 times.
Learn more...
Halogen ovens use a special halogen heating element in the lid of the machine to heat the device faster than conventional ovens can, and a fan inside the machine promotes better air circulation and even cooking. Even though a halogen oven differs from a conventional oven in many regards, it is actually quite simple to bake nearly any standard dish in this handy machine.
Steps
Part One: Understanding the Basic Operation
-
1Choose a baking dish that fits inside the machine. Before you begin to prepare your recipe, make sure that the baking dish or baking tray you transfer the food to will fit inside of the halogen oven.
- Any ovenproof dish or tray should be fine, including most metal, silicon, and Pyrex dishes.
- The halogen oven is smaller than a standard oven, so you will need smaller bakeware. Make sure that the bakeware you choose is smaller than the oven itself to make removal easier.
-
2Follow your chosen recipe. Regardless of whether you use a halogen-specific recipe or a standard baking recipe, the preparation instructions can be followed exactly as written.
- A halogen-specific recipe can be followed straight through, from start to finish.
- For a non-halogen recipe, follow the preparation instructions but alter the baking temperature and bake time as needed.
Advertisement -
3Be careful when using foil. You can wrap foil over your baking dish if the recipe calls for it, but only do so if you can wrap the edges of the foil securely around the sides of the dish.
- Aluminum foil can help prevent food from browning too quickly.
- The fan inside of the halogen oven is very strong, however, and loose foil will be easily blown off. If the foil becomes loose, it could float around the inside of the machine and could damage the heating element.
-
4Consider preheating the halogen oven. Set the temperature dial to the correct cooking temperature three to five minutes before placing the dish inside your halogen oven.
- Many recipes will not mention a preheating step since the halogen oven takes such a short amount of time to reach a high temperature. Nonetheless, preheating your oven will still produce the best results.
- Some machines have a preheat button. Pressing it will preheat the oven to 500 degrees Fahrenheit (260 degrees Celsius) for six minutes. Other machines will require you to set your desired temperature to preheat them.
-
5Put the dish in your halogen oven. Carefully place the baking dish onto the lower rack of the halogen oven. Once the dish is securely inside, close the oven lid.[1]
- Halogen ovens usually have a top rack and a bottom rack. Use the bottom rack for baking, roasting, defrosting, steaming, re-heating, and most other forms of cooking. Use the top rack for grilling, browning, or toasting.
- Leave at least 1/2 inch (1 cm) gap in between the bakeware and the sides, bottom, and top of the machine. Doing so will provide better air circulation and ensure proper heating.
-
6Set the time. Turn the timer clockwise until you reach the desired time. Push down on the safety handle after setting the time. A red power light should turn on.
- Most halogen oven timers can be programmed for times up to 60 minutes.
- Note that the oven will turn off as soon as the timer setting has been reached. As a result, a halogen oven is less likely to overbake or burn food than a normal oven if that food is left inside a little longer than intended.
-
7Set the temperature to start the machine. Turn the temperature dial clockwise until you reach the desired temperature. If the timer is already set, the power light should turn green and the oven should automatically turn on.
- Make sure that the lid is in position before turning on the machine.
- Usually, the machine will not work unless the safety handle is set in its down position.
- Removing the lid in the middle of the cooking process will usually stop the heater and the fan. To resume cooking, place the lid back on the machine and set the handle in the down position again.
-
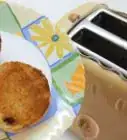
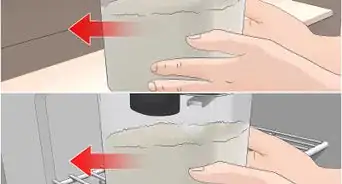
8Remove the finished dish carefully. Most halogen ovens are sold with a tool designed to help you lift food out when done. If you do not have this tool or if you cannot use it to get a good grip on your bakeware, use a set of long-handled tongs.
- As with conventional ovens, the baking dish will be hot when you remove it. Wear oven mitts to protect your hands and wrists.
- Place the hot dish on a towel, cooling rack or other heat-resistant base after removing it from the halogen oven.


Using Correct Cooking Times and Temperatures
-
1Follow a halogen oven recipe as written. If you are following a recipe specifically designed for use with a halogen oven, you can follow the preparation guidelines, temperature setting, and baking time exactly as instructed.
- For non-halogen recipes, you will need to alter the baking times and temperatures. Follow either the general recommended cooking specifications based on the type of baked good, or alter the specifications mentioned in the recipe based on the alteration guidelines.
-
2Note the general recommended cooking times and temperatures. While each recipe can be different, there are a few guidelines to consider when baking certain types of food in a halogen oven.[2]
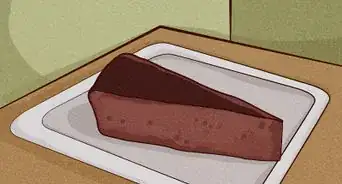
- Brownies: 18 to 20 minutes at 300 degrees Fahrenheit (150 degrees Celsius)
- Buns: 10 to 12 minutes at 390 degrees Fahrenheit (200 degrees Celsius)
- Layer cakes: 18 to 20 minutes at 300 degrees Fahrenheit (150 degrees Celsius)
- Loaf cakes: 30 to 35 minutes at 300 degrees Fahrenheit (150 degrees Celsius)
- Cornbread: 18 to 20 minutes at 350 degrees Fahrenheit (180 degrees Celsius)
- Drop cookies: 8 to 20 minutes at 320 degrees Fahrenheit (160 degrees Celsius)
- Rolled cookies: 10 to 12 minutes at 320 degrees Fahrenheit (160 degrees Celsius)
- Muffins: 12 to 15 minutes at 350 degrees Fahrenheit (180 degrees Celsius, 150 if you have a strong halogen)
- Pastries and pie crust: 8 to 10 minutes at 390 degrees Fahrenheit (200 degrees Celsius)
- Pies with filling and no top crust: 25 to 30 minutes at 320 degrees Fahrenheit (160 degrees Celsius)
- Pies with filling and two crusts: 35 to 40 minutes at 350 degrees Fahrenheit (180 degrees Celsius)
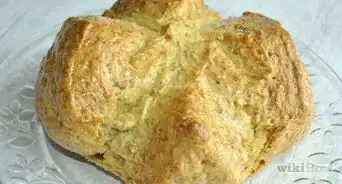
- Bread rolls: 12 to 15 minutes at 350 degrees Fahrenheit (180 degrees Celsius)
- Bread loaves: 25 to 30 minutes at 320 degrees Fahrenheit (160 degrees Celsius)
-
3Adjust the baking temperature when using a non-halogen recipe. When adapting a non-halogen recipe for use in a halogen oven, lower the cooking temperature. If baked according to the original instructions, the outside will likely burn while the center may remain partially uncooked.
- For cake recipes, lower the temperature by 50 degrees Fahrenheit (10 degrees Celsius).
- For all other recipes, you will usually need to lower the temperature of uncovered dishes 70 to 100 degrees Fahrenheit (20 to 40 degrees Celsius) in your halogen oven.
- Monitor the food as it cooks by looking through the glass bowl. Some foods may bake faster than instructed.


Community Q&A
-
QuestionWhat temperature is best for rolls?
 ImapoetninoitCommunity AnswerFor uncooked rolls, 350 for about 20 minutes or until golden brown. For rolls that are already baked and just need to be heated: 350 with dots of butter atop each one for about 10 to minutes -- but watch them, as you don't want to overheat them.
 -
QuestionCan I use paper muffin cups in a halogen oven?
 Community AnswerYes, anything that can be used in a regular oven can be used in a halogen oven.
 -
QuestionCan I cook ready-made meals in foil containers in a halogen oven?
 Community AnswerYes, you can. Most reheat temperatures are 350°F/176°C, so I would set my halogen to 300°F/148°C. If a recipe calls for a cooking time of 30 minutes, I would start checking at 20 minutes.
Warnings
- Do not use steel wool or abrasive cleaners when cleaning the machine.⧼thumbs_response⧽
- Do not use the halogen oven outdoors.⧼thumbs_response⧽
- Do not use the machine if the cord, plug, or any other component has been damaged.⧼thumbs_response⧽
- Do not immerse the cord, plug, or lid in water or any other liquid. Doing so could cause electrical shock.⧼thumbs_response⧽
- Supervise children around the halogen oven. The machine gets very hot, so children should not be allowed to play around the machine while it is on.⧼thumbs_response⧽
Things You'll Need
- Halogen oven
- Small bakeware
- Long-handled tongs
- Oven mitts
References
About This Article
Halogen ovens use a special halogen heating element to heat things faster than a conventional oven can, so you’ll need to make a few simple changes when using them. Halogen ovens are much smaller than standard ovens, so you’ll need smaller bakeware. For recipes that call for covering the dish with aluminum foil, make sure it fits securely around the sides so the fan inside the halogen oven doesn’t blow it off. If you need to adapt a non-halogen recipe, lower your temperatures by 70 to 100 degrees Fahrenheit. Preheat your oven for 3 to 5 minutes before putting your dish in. To begin cooking, turn the timer and temperature dial clockwise, then push down on the safety handle. To learn how to safely remove your finished dish from your halogen oven, keep reading!