wikiHow is a “wiki,” similar to Wikipedia, which means that many of our articles are co-written by multiple authors. To create this article, 15 people, some anonymous, worked to edit and improve it over time.
This article has been viewed 208,676 times.
Learn more...
The Arduino hardware-processing platform has become ubiquitous within the technology hobbyist community, and non-techies alike are getting to know it because its so simple to use. However, experienced programmers can also benefit from this physical-computing platform with pre-made code, but may be frustrated by the overly-simplistic GUI that comes with Arduino software. This tutorial will show you how to take full control of your arduino by showing you how to take the C++ code arduino provides you, and use (or modify) this code to create your own C++ programs for the arduino platforms, using the Eclipse C++ IDE, the AVR-GCC compiler, and AVR dude to download your programs to hardware
Steps
-
1Download all the necessary software and files. This includes:
- The Arduino source code, available from [1]. Optionally you can also download the software package for your platform (Windows/Linux/OSX) which includes all the pre-made C++ files that make arduino run, as well as the simple Java GUI aimed at non-programmers.
- AVR-GCC, which is the compiler for the AVR-series of microcontrollers (heart of an Arduino). For Windows users, get WinAVR [2]
- The Java Runtime Environment 32- and 64-bit are both available from Oracle.
- The Eclipse IDE for C/C++ [3], where you will be doing your coding and uploading the code to your Arduino. Download the same version (32-bit or 64-bit) as your version of Java
-
2Setup the Eclipse IDE. First, install WinAVR or AVR-GCC. Then, extract the Eclipse IDE into its own dedicated folder.
- Start-up Eclipse, and choose your default workspace
- Go to Help --> Install New Software
- Enter "http://avr-eclipse.sourceforge.net/updatesite" (no quotes) in the 'Work With' field , and click Add
- Select the AVR Eclipse Plugin, select Next, and install
- When successfully installed, you'll have to re-start Eclipse
Advertisement -
3Create a C++ Project in Eclipse, and use the following settings;
- Make the project type a "AVR Cross Target Application"
- Ensure "Debug" is UN-CHECKED when selecting Build Configurations (and ensure "Release" IS CHECKED)
- When asked for hardware details, make sure you select the correct frequency (typically 16000000 Hz) and the correct microcontroller, according to your arduino type [4]
-
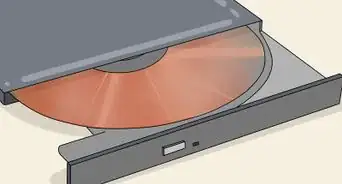
4Extract the latest version of the arduino software from their website. Copy the entire '\hardware\arduino\cores\arduino' folder into your project folder. Now that Eclipse is installed and the plugin is configured, from now on this is the only folder needed to start new Arduino projects from scratch!
-
5Create main.cpp where you write your code for the Arduino in which you will declare as usual the main elements i.e. void setup, void loop and int main. For example( In main.cpp(The main Arduino Code)). Include "WProgram.h" (with quotes) in this header as well; this links it to all the arduino code.NOTE: As of Arduino 1.0, include "Arduino.h" instead of "WProgram.h".Also, include the appropriate "pins_arduino.h" file from arduino-1.0.1\hardware\arduino\variants. Arduino Uno uses the "standard" variant.These changes were made in the 2011.11.30 release of Arduino 1.0, according to the revisions.txt file that installs with the IDE.
-
6Optional: Fix any compiler-errors in arduino software. Compiler errors are going to be different for everyone depending on what your error was, which they you have to find out on your own or in the comments, because it's case dependent. As of arduino v0018, this may include the following changes;
- main.cpp; delete "#include <wprogram.h>" at the top, and ensure your "main.h" is included instead
- Tone.cpp; change the last two includes, <wiring.h> & <pins_arduino.h>, to have quotes instead of brackets ("wiring.h" & "pins_arduino.h")
- Print.h; the function declaration "void function(int inputs) = 0;" must be changed to "void function(int inputs);", or in other words delete the "= 0" so its not a pure-virtual function</pins_arduino.h></wiring.h></wprogram.h>


Community Q&A
-
QuestionWhat code do I put in for voice changer?
 Uzi30 RapidFire-O'アニメラッパーCommunity AnswerIt depends on what software you use, is it Reaper or Wavepad or just your normal Windows mic?
 -
QuestionI would like to see the program on an Arduino-uno, is it upload or download? How do I see the program running on the Arduino?
 Community AnswerIt's not possible to read the program from an Arduino. You are only able to upload programs to it.
-Electric-Shock-Step-9.webp)


-Electric-Shock-Step-9.webp)