This article was co-authored by wikiHow staff writer, Nicole Levine, MFA. Nicole Levine is a Technology Writer and Editor for wikiHow. She has more than 20 years of experience creating technical documentation and leading support teams at major web hosting and software companies. Nicole also holds an MFA in Creative Writing from Portland State University and teaches composition, fiction-writing, and zine-making at various institutions.
This article has been viewed 3,224 times.
Learn more...
As you may have noticed, Google Slides doesn't have a quick Wrap Text option like its sister app Google Docs. But don't worry—if you want text to wrap around an image, video, or other object in your Google Slides, there's a super easy workaround. This wikiHow guide will teach you the easiest way to wrap text around pictures and other objects in Google Slides.
Steps
-
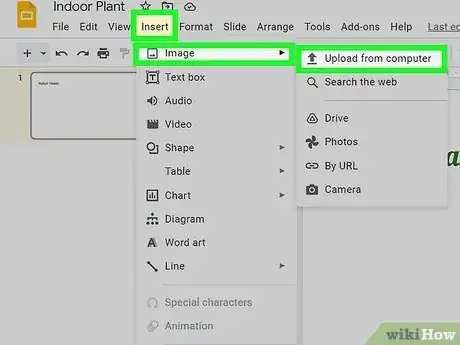
1Insert an image. If you haven't already done so, click the Insert menu, select Image, then select the image you want to add to the slide. You can choose an image from your computer, Google Photos, Google Drive, or search the web for something new.
- You can also use these same steps to wrap text around videos and other objects.
-
2Drag the image to the desired location. You can place your image anywhere on the slide—just click the image once so it's surrounded by a blue bounding box, then drag the image from one of its solid blue lines to the place you'd like it to appear.Advertisement
-
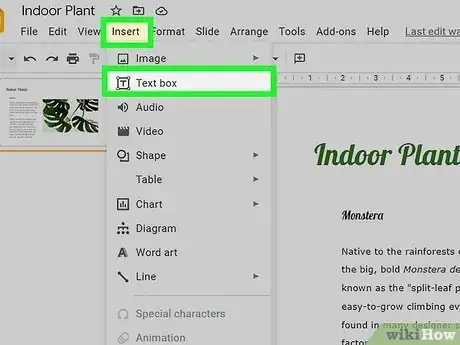
3Add a text box. Click the Insert menu again, but this time choose Text Box.[1]
- If your Google Slides presentation theme already has a text box, you can use that if you'd like. If the current text box is in your way, just click it and press delete on the keyboard before adding a replacement text box.
-
4Type your text. Enter the text you want to wrap. If your text is in another document, you can copy it from that document and paste it into the text box—just right-click the text box and select Paste without formatting so the pasted text uses the same font properties as the rest of your slide.
-
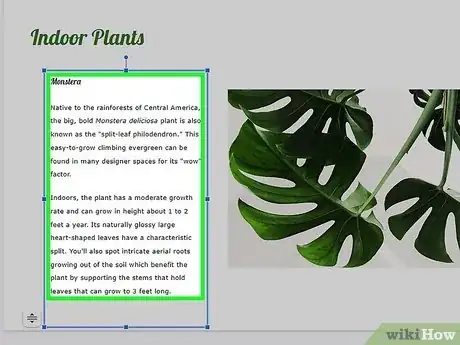
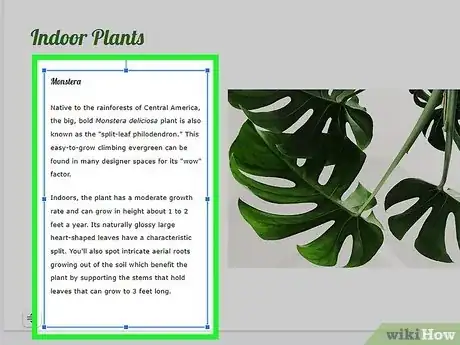
5Adjust the text box to fit alongside the image. Drag the text box from any of its blue surrounding lines so it fits cleanly beside your photo or object. Depending on how much text is in your text box, it might extend below the image, which obviously means it's not wrapping around the image yet.
- You might want to leave a small amount of space between the text box and the image to keep things looking clean.
- If you'd like, you can justify the text in the text box so it's aligned to both sides of the box. To do so, highlight all of the text in the text box, click the Align menu (the 4 horizontal lines with an arrow), then choose Justify (the 4 horizontal lines that are all the same length).
-
6Create another text box. If your text extends below the image it's next to, it won't automatically wrap below the image as you'd expect in a program like Word or Google Docs. But don't worry—you can add the remaining text to a second text box that you can then position below the image. Click Insert and select Text Box to add another text box.
-
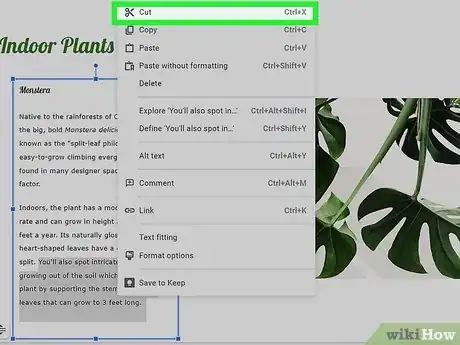
7Cut the extra text that extends past the bottom of the image. This is the text that you'll place into the new box. To do this, highlight the text with your mouse, then press Ctrl + X (PC) or Cmd + X (Mac) to cut it from the selection. This copies the removed text to your clipboard.
-
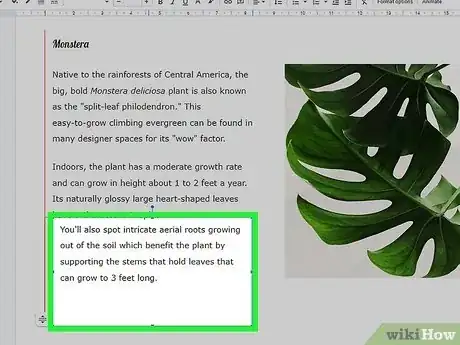
8Add the cut text to the new text box. Just click the new text box (it will highlight in blue once selected), then press Ctrl + V (PC) or Cmd + V (Mac) to paste the text. The text will still look a little wonky, but not for long!
-
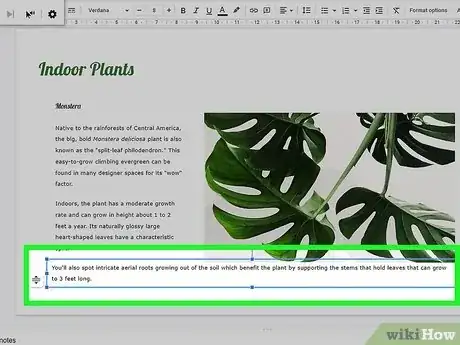
9Drag the new text box so it's flush beneath the existing text box. To do this, click and drag from any of the blue solid lines that surround the second text box, then drag left until you see a red vertical line. Once you see the line, you can release your finger from the mouse, as the text boxes are now flush.
-
10Resize the new text box to create a text wrapping effect. The last step is to adjust your new text box so it looks like the text from the first text box seamlessly joins with the text in the second text box. Here's what you'll do:
- Select the new text box. When the text box is selected, you'll see small blue squares at each corner and one on each side.
- On the right side of the box, you'll see three squares—one at the top-right corner, one in the center, and one at the bottom-right. Click and drag the square at the center of the right edge all the way to the right side of the image until you see a red vertical line—that means the box is flush with the right edge. When you let go of the mouse, you'll have wrapped text.
