This article was co-authored by Marta Nagorska and by wikiHow staff writer, Danielle Blinka, MA, MPA. Marta Nagorska is a Nail Technician and Nail Art Blogger based in London, UK. She runs the blog, Furious Filer, where she gives tutorials on nail care and advanced nail art. She has been practicing nail art for over 5 years and graduated from Northampton College with distinction with a Nail Technician and Manicurist degree in 2017. She has been awarded the top spot in the OPI Nail Art Competition.
There are 9 references cited in this article, which can be found at the bottom of the page.
This article has been viewed 904,870 times.
Discolored nails probably aren’t the look you’re going for, so you likely want to whiten them fast. Things like nail polish, cleaning products, and smoke can take a toll on your nails, leaving them yellow and blotchy. Fortunately, you can get your nails white again by soaking or scrubbing them with a few common household products. Additionally, you can get and keep your nails white by changing your manicure habits.
Steps
Soaking Your Nails
-
1Pour hydrogen peroxide, vinegar, lemon juice, or denture cleaner into a bowl. There are several household products that can safely whiten your nails. Choose the option that works best for you, then add it to a clean glass or plastic bowl. Do 1 of the following:
-
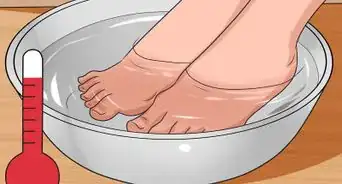
2Soak your nails for up to 10 minutes to bleach them. Set a timer for 10 minutes. Then, dip your nails into the bowl and submerge your fingertips. Relax as your nails soak in the whitening solution.[4]
- If you’re using hydrogen peroxide, you may see results after just 2 minutes.
- If your fingers start to feel irritated, remove them immediately.
Advertisement -
3Rinse your nails off in warm water to remove the solution. After soaking your nails, wash your hands using mild soap and warm water. This will remove the whitening solution . Check your nails to see if they look white.[5]
- If you’re not happy with the results, you can try another whitening treatment. However, it’s best to wait at least a day before you do so because your skin might get irritated.
Tip: Apply hand lotion after you soak your nails to add moisture back to your skin.
-
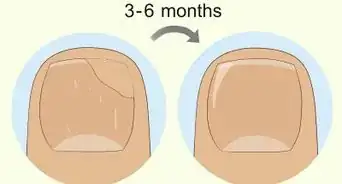
4Soak your nails 2-3 times per week until they’re white. Sometimes deep set stains are hard to remove, so you might need to do several whitening treatments. For best results, repeat your treatments 2-3 times a week to get your nails white without damaging your skin.[6]
If you have an event coming up, you might be able to use whitening treatments every day for up to 3 days. However, this can dry out the skin on your fingertips and may cause redness and irritation.


Scrubbing Your Nails
-
1Apply a whitening toothpaste to your nails and let it sit for 10 minutes. Coat your nails with toothpaste, then set a timer for 10 minutes. Next, use a nail brush or an old toothbrush to scrub the toothpaste into your nails for 1-2 minutes. Then, rinse your hands in warm water until all of the toothpaste is removed.[7]
- It’s best to use a whitening toothpaste that contains hydrogen peroxide and baking soda.
- Your nails may be white after 1 treatment. If they aren’t, you can repeat this treatment once or twice a week until your nails are totally white.
-
2Make a baking soda paste and let it sit on your nails for 30 minutes. Mix equal parts baking soda and warm water to create a paste. Then, dip a nail brush or toothbrush into the paste and scrub it onto your fingernails. Let the paste sit for 30 minutes to treat your nails. Then, rinse it off using warm water and mild soap.[8]
- You can make your paste thicker by using less water. This could help it stay on your nails better.
-
3Scrub a baking soda-lemon juice paste onto your nails and wait 10 minutes. Mix 1 US tbsp (15 mL) of lemon juice with 2 to 3 Tbsp (30 to 45 ml) of baking soda to create a paste. Then, apply the paste to the top of your nails and underneath the tips using a cotton swab. Let the paste sit on your nails for 10-15 minutes, then wash your hands with soap and warm water.[9]
Variation: You can replace the lemon juice with hydrogen peroxide. Mix hydrogen peroxide and baking soda to form a paste, then let it sit on your nails for 10 minutes.
Changing Your Manicure Habits
-
1Wipe your nails down with nail polish remover for polish stains. Soak a cotton swab in nail polish remover, then hold it against your nail for 1-3 seconds. Next, wipe the cotton swab across your nail to remove any polish stains. Apply more nail polish remover and get a new cotton swab as needed.[10]
- A nail polish remover that contains acetone may work better. However, you don’t have to use acetone if you’re avoiding it.
-
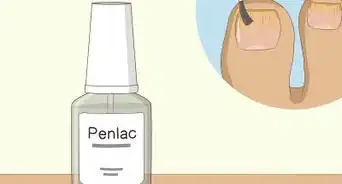
2Color your tips white with a whitening nail pencil for a quick fix. A whitening pencil hides nail discoloration and offers a fast, temporary solution. To use the pencil, moisten the tip of the pencil, then color underneath your nail tips. Reapply the pencil as necessary to keep your nails looking white.[11]
- You may need to reapply the pencil after each time you wash your hands.
- You can find a whitening nail pencil at your local drug store or online. They’re typically sold in the nail care section. They look similar to eyeliner pencils.
-
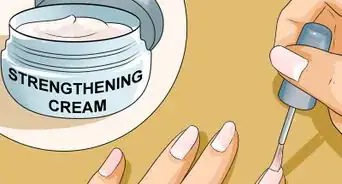
3Use a base coat when painting your nails to prevent yellowing. Nail polish is a common cause of nail discoloration, but wearing a base coat can protect your nails.[12] Always apply a base coat before you paint your nails to prevent the color from soaking into them. This will help keep your nails white so you don’t have to worry about stains.[13]
- You can use any clear base coat to protect your nails. These are typically sold in the nail care section next to the nail polish.
-
4Choose lighter colors of nail polish instead of darker shades. The pigments in dark nail polishes can soak into your nails and stain them. While this can happen with lighter colors, they’re less likely to discolor your nails. If you wear nail polish, use lighter colors more often than darker shades.[14]
- For instance, a pale pink shade is less likely to stain than a dark fuchsia color.

Expert Q&A
-
QuestionWhat if no whitening treatments seem to work?
 Marta NagorskaMarta Nagorska is a Nail Technician and Nail Art Blogger based in London, UK. She runs the blog, Furious Filer, where she gives tutorials on nail care and advanced nail art. She has been practicing nail art for over 5 years and graduated from Northampton College with distinction with a Nail Technician and Manicurist degree in 2017. She has been awarded the top spot in the OPI Nail Art Competition.
Nail ArtistAsk your doctor to take a look. In some cases, yellow nails may be a sign of a nail condition. -
QuestionWhat brightening products can I try?Marta NagorskaMarta Nagorska is a Nail Technician and Nail Art Blogger based in London, UK. She runs the blog, Furious Filer, where she gives tutorials on nail care and advanced nail art. She has been practicing nail art for over 5 years and graduated from Northampton College with distinction with a Nail Technician and Manicurist degree in 2017. She has been awarded the top spot in the OPI Nail Art Competition.
Nail ArtistTry a nail polish brightener or whitener. These products are usually a clear nail polish with a specific tint that counteracts the yellow tinge.
Things You'll Need
Soaking Your Nails
- Glass or plastic bowl
- Water
- Hydrogen peroxide (optional)
- 2 lemons (optional)
- Denture cleaner (optional)
- Vinegar (optional)
- Timer
Scrubbing Your Nails
- Spoon
- Cotton balls or swabs
- Whitening toothpaste (optional)
- Baking soda (optional)
- Lemon juice (optional)
- Hydrogen peroxide (optional)
- Timer
Changing Your Manicure Habits
- Nail polish remover
- Water
- Nail brush or toothbrush
- Whitening nail pencil (optional)
- Base coat (optional)
- Light nail polish (optional)
Warnings
- While buffing your nails can remove stains, it also weakens your nails. It’s best to avoid buffing your nails.⧼thumbs_response⧽
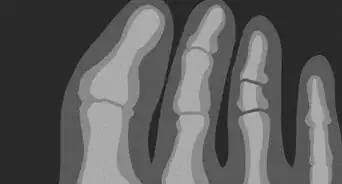
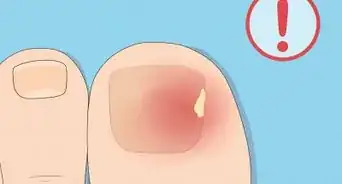
- See your doctor if the discoloration continues or your nails change shape, start to separate from your skin, or become very thick.[15]⧼thumbs_response⧽


References
- ↑ https://www.marieclaire.com/beauty/makeup/how-to/a41/nails-whiten-yellow/
- ↑ https://stylecaster.com/beauty/how-to-make-yellow-nails-white/
- ↑ https://www.healthyway.com/content/whiten-yellow-nails-at-home-with-these-amazing-hacks/
- ↑ https://stylecaster.com/beauty/how-to-make-yellow-nails-white/
- ↑ https://www.marieclaire.com/beauty/makeup/how-to/a41/nails-whiten-yellow/
- ↑ https://www.marieclaire.com/beauty/makeup/how-to/a41/nails-whiten-yellow/
- ↑ https://stylecaster.com/beauty/how-to-make-yellow-nails-white/
- ↑ https://www.healthyway.com/content/whiten-yellow-nails-at-home-with-these-amazing-hacks/
- ↑ https://www.healthyway.com/content/whiten-yellow-nails-at-home-with-these-amazing-hacks/
- ↑ https://www.southernliving.com/fashion-beauty/how-to-whiten-nails-toothpaste
- ↑ https://www.cosmopolitan.com/uk/beauty-hair/nails/a14440104/how-to-whiten-nails/
- ↑ Marta Nagorska. Nail Artist. Expert Interview. 26 May 2021.
- ↑ https://www.marieclaire.com/beauty/makeup/how-to/a41/nails-whiten-yellow/
- ↑ https://www.self.com/story/why-does-nail-polish-turn-nail
- ↑ https://www.mayoclinic.org/healthy-lifestyle/adult-health/in-depth/nails/art-20044954
- Videos provided by New Beauty Magazine
About This Article

If your nails are stained yellow from using nail polish, you can whiten them at home using whitening toothpaste. First, apply a thick layer of whitening toothpaste to each of your nails, and let it sit for 10 to 15 minutes. Then, use a toothbrush to scrub your nails under warm water, and you’re done! For stubborn yellow stains, use diluted hydrogen peroxide. First, mix 3 tablespoons (45 mL) of hydrogen peroxide with 1 cup (240 mL) of warm water. Then, soak your nails in the mixture for 2 minutes. Finally, use a toothbrush to gently buff the surface of your nails. To prevent yellow stains on your nails in the future, remember to always use a base coat when you paint them. To learn how to prevent your nails from developing stains in the first place, scroll down!