This article was co-authored by Kelly Medford and by wikiHow staff writer, Eric McClure. Kelly Medford is an American painter based in Rome, Italy. She studied classical painting, drawing and printmaking both in the U.S. and in Italy. She works primarily en plein air on the streets of Rome, and also travels for private international collectors on commission. She founded Sketching Rome Tours in 2012 where she teaches sketchbook journaling to visitors of Rome. Kelly is a graduate of the Florence Academy of Art.
There are 10 references cited in this article, which can be found at the bottom of the page.
This article has been viewed 15,223 times.
Graphite sticks are rectangular pieces of graphite used for drawing. They resemble charcoal sticks, and come in a variety of densities to produce a range of different shades. Buy a variety of different graphite sticks to produce drawings with a wide range of dark and light marks, and keep a kneaded eraser nearby to erase mistakes and soften harsh lines. Use the pointy corner of the stick to outline shapes and add small details. Then, work in layers and use increasingly darker shades to add texture, definition, and shape to your drawing.
Steps
Picking Your Materials
-
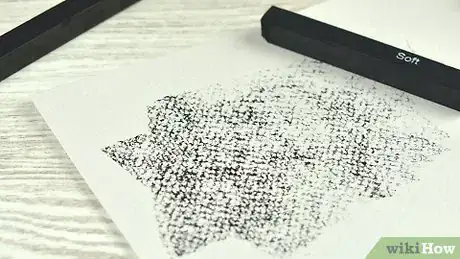
1Use graphite on textured papers for the best results. Graphite leaves a mark behind when you apply it to paper, but it is generally harder to control textures on smoother paper since the graphite doesn’t have as much material to stick to. Rag paper, newsprint, and cold press paper are all excellent options if you’re drawing with a graphite stick.[1]
- You can absolutely use standard paper if you’d like, but the lack of texture on smooth paper makes it harder to achieve a wide range of values.
-
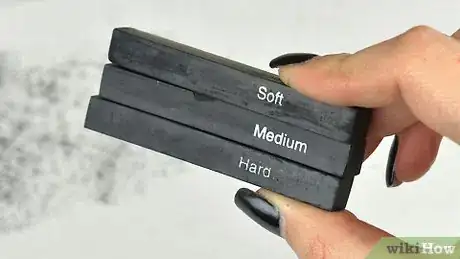
2Get a variety of graphite sticks to achieve light and dark shades. Graphite sticks come in a variety of different densities. The softer the graphite is, the darker the mark it will make. If you want to achieve a wide range of shades, get a pack of graphite sticks in different densities. When using graphite sticks, read the embossed letters on the side of the stick to determine how dark it is.[2]
- The scale for graphite density can be a little confusing. 9H is the lightest shade while 9B is the darkest. The numbers go down from 9H until they hit F, HB, and B before going back up again. For reference, HB is considered the “middle,” and it’s the same density as a #2 pencil.
Advertisement -
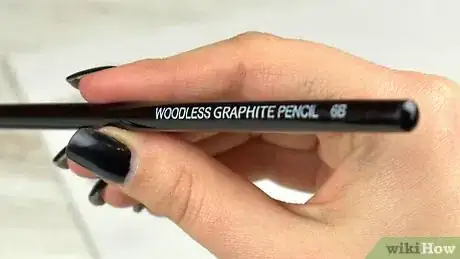
3Pick a graphite pencil for smaller details and strokes. Like charcoal sticks, graphite sticks have broad sides and a flat edge on each end. If you need to add smaller details, get a graphite pencil. Like graphite sticks, graphite pencils list the density of the material on the side of the pencil.[3]
- Graphite pencils aren’t technically graphite sticks, but most artists use a combination of sticks and pencils for more detailed drawings.
- Sharpen graphite pencils the same way that you sharpen standard pencils.
Variation: Some graphite sticks have a cone-shaped tip similar to a pencil, but the tip will wear down rather quickly. Treat these sticks the same way that you treat rectangular sticks and use the sharp tip to make small marks instead of long lines. As you use the stick, the size and shape of this point will change as the tip wears down.
-
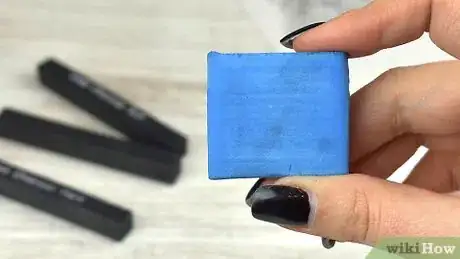
4Use a kneaded eraser to remove marks and add texture. A kneaded eraser is a soft, putty-like material that will erase and soften graphite marks. You can tear it into smaller pieces and soften it in your hand to clean the eraser. To use your kneaded eraser, rub it gently against any graphite mark that you’ve made to soften the mark or remove it completely.[4]
- Kneaded erasers are often called “gum” or “gummy” erasers. They will also work to erase charcoal and colored pencil.
Drawing with a Graphite Stick
-
1Hold the stick like a pencil and use the edge to make small marks. To make small, accurate marks, hold the stick vertically in your hand like you’re holding a pen or pencil. Angle the stick so that the corner where the long edge meets the 2 short edges is pressing against your paper. Use this sharp corner to make longer, or smaller marks.[5]
- If you want to make long, even lines, keep your wrist still while moving your entire forearm across the page.
- As you wear the corner down, readjust your stick to use a different corner. Most artists reorient the stick after a couple of strokes to ensure that they are using an appropriate corner of the stick.
-
2Put your index finger on top of the stick and lower the angle for wider lines. To apply wider lines, wrap your thumb around one side of the graphite. Tuck your middle, ring, and pinky fingers around the other side of the stick. Then, stick your index finger out and put it on top of the stick. Press your index finger down to apply pressure to the stick and make wider marks on the paper.[6]
Tip: You can create a single line with different textures and shades by adjusting the amount of pressure that you apply as you move the graphite stick.
-
3Use the broad-side of the stick to apply lots of graphite. While the small end of the charcoal stick is excellent for adding form and shape, the longer side of the graphite stick is designed to add value and texture. Pinch the graphite on both sides to hold it parallel to your piece of paper. As you move the stick, keep your wrist stiff and adjust your pressure as needed to add large lines to your paper.[7]
-
4Select lighter shades to outline your drawing before adding darker layers. Always start your drawing by using the lightest shade available to outline your facial features, landscapes, and other objects. Once you have a general sense for where everything in your drawing goes, use increasingly darker shades to give form and definition to your drawing.[8]
- It’s easier to erase lighter lines than darker lines, so starting your drawing with lighter lines is always a safe bet.
- Press as lightly as possible to keep the stick from scratching or carving grooves into the paper.
Creating Textures and Shades
-
1Use the long edge of the stick to add even, soft textures. Take your stick and hold the long side of the graphite flat against the paper. Drag the stick across your surface to leave a light, even, pattern of graphite into the paper. This texture creates a great foundation for skies, water, and lighter skin textures.[9]
- Apply even pressure across the stick as you move it to ensure that you distribute graphite evenly as you draw.
- This is a great way to fill lighter shades on the page without leaving the area entirely blank..
-
2Soften harsh lines by blurring them with a napkin. To blend graphite, take a strong, clean napkin and wrap it around your index finger. Then, press your finger into a portion of graphite and use back-and-forth strokes blend the graphite and smooth it out into your preferred shape. Alternatively, you can use a circular pattern to give the graphite a rounder shape. This is perfect for blending skin tones, smoothing out objects, and adding dust or mist.[10]
- You can also blend graphite while softening the shade by brushing your marks with a kneaded eraser.
-
3Twist your wrist and use flicking motions for harsh features. To add dark, expressive textures, grip the graphite stick firmly and lay it at a 45-degree angle. Press it into your paper and twist your wrist while pressing hard into the page. This will create a sharp, solid mark that can be used to add grass, leaves, fences, hair, or other firm lines.[11]
- Adjust the direction of your wrist to control the shape of the mark.
Tip: This can feel kind of awkward if you aren’t used to drawing with charcoal or graphite. Flicking your wrist to mark your paper is a common technique for adding texture while drawing a form at the same time.
-
4Apply uneven pressure to the broad side of the stick to make a gradient. Set your graphite stick flat on the piece of paper. Press one end of the stick harder than the other end. Drag your graphite across your paper leave a thick mark that is dark on one side and light on the other. This is a great technique for adding texture to skies, tree trunks, and other large, distinct surfaces.[12]
Expert Q&A
-
QuestionHow do you do a blind contour drawing?
 Kelly MedfordKelly Medford is an American painter based in Rome, Italy. She studied classical painting, drawing and printmaking both in the U.S. and in Italy. She works primarily en plein air on the streets of Rome, and also travels for private international collectors on commission. She founded Sketching Rome Tours in 2012 where she teaches sketchbook journaling to visitors of Rome. Kelly is a graduate of the Florence Academy of Art.
Professional Artist To do a blind contour drawing, look at the object you're drawing but don't look at the paper you're drawing on. Force your eyes to go really slowly around the object and have your hand follow your eye on the paper.
Things You’ll Need
Picking Your Materials
- Paper
- Graphite sticks
- Graphite pencils
- Kneaded eraser
Creating Textures
- Napkin
References
- ↑ https://www.fitzmuseum.cam.ac.uk/sites/default/files/Graphite.pdf
- ↑ https://youtu.be/Pd7GNiYwA2M?t=84
- ↑ https://www.fitzmuseum.cam.ac.uk/sites/default/files/Graphite.pdf
- ↑ https://youtu.be/Pd7GNiYwA2M?t=32
- ↑ https://youtu.be/vedjfO-L54U?t=51
- ↑ https://youtu.be/Pd7GNiYwA2M?t=282
- ↑ https://anatomiaartistica.files.wordpress.com/2014/09/fisher-and-robinson-teach-yourself-visually-drawing.pdf
- ↑ https://anatomiaartistica.files.wordpress.com/2014/09/fisher-and-robinson-teach-yourself-visually-drawing.pdf
- ↑ https://youtu.be/ImLKucXEk7M?t=56
