This article was co-authored by wikiHow staff writer, Travis Boylls. Travis Boylls is a Technology Writer and Editor for wikiHow. Travis has experience writing technology-related articles, providing software customer service, and in graphic design. He specializes in Windows, macOS, Android, iOS, and Linux platforms. He studied graphic design at Pikes Peak Community College.
This article has been viewed 4,909 times.
Learn more...
Google Fonts is an open-source, free library of over 1,300 font families and icons that can be downloaded and used in web and app design.[1] If you are designing an app for Android using Android Studio 3.0 or higher, you can set your app to download fonts from Google Play services. Android Studio will generate the necessary XML files automatically. If you are skilled with XML and Java or Kotlin, you can use Google Fonts programmatically. To do so, you will need to first declare the Google Fonts you want to use using XML files. Then you will need to add the font programmatically using Java or Kotlin. This wikiHow article teaches you how to use Google Fonts for Android.
Steps
Using Android Studio
-
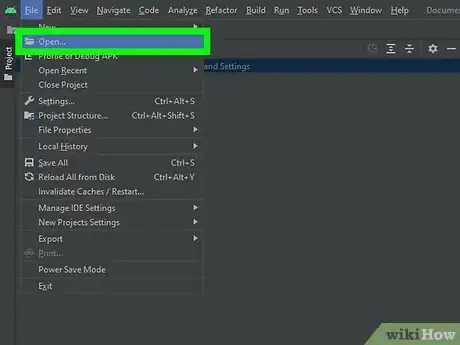
1Open your project in Android Studio. Android Studio has a white icon with a blue image that has an "A" in front. Click Android Studio icon to launch Android Studio. By default, Android studio will load the last project you were working. Click New Project if you need to create a new project. Use the following steps to open an existing project:
- Click File.
- Click Open.
- Select the main folder for your project.
- Click Ok.
-
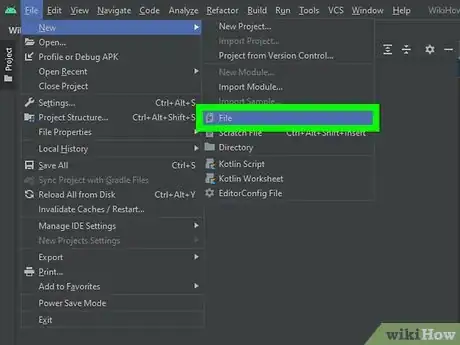
2Open the Layout XML file you want to add text to. Layout XML files display the layout of your app the way they would appear on an Android device. The Layout XML file can be found in the "Layout" folder in the project tree on the left side. If you do not have a "Layout" XML file, use the following steps to create one.
- Click File.
- Hover over New.
- Hover over XML.
- Click XML Layout File.
Advertisement -
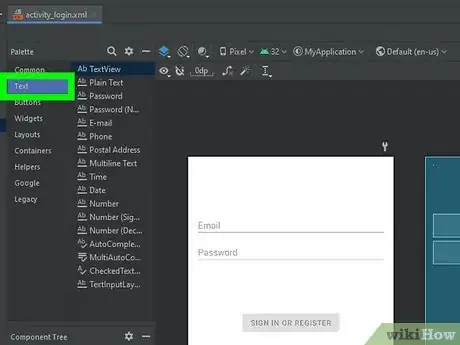
3Add or select a text object. If there is already a text object in the layout, click it to select it. This will display the Attributes panel to the right. If you need to add a text object, use the following steps to do so:
- Click Text below "Palette."
- Click and drag a text object type into the layout.
- Click the text object to select it.
-
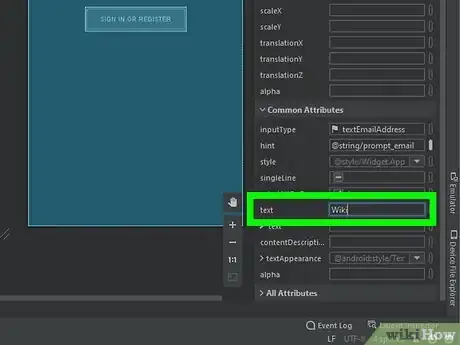
4Type your text next to the "text" attribute. It's below "Common Attributes" in the "Attributes" panel to the left.
-
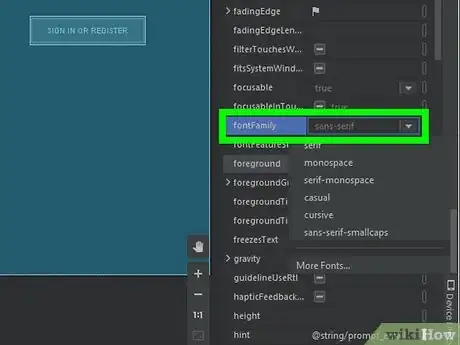
5Open the drop-down menu next to "fontFamily." It's below "All Attributes" in the Attributes Panel to the left. The "All Attributes" list is at the bottom of the attributes panel. Expand the All Attributes panel to view the entire list.
-
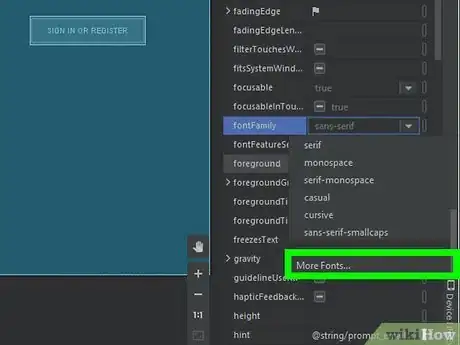
6Click More Fonts. It's at the bottom of the drop-down menu next to "fontFamily" This opens a dialogue box.
-
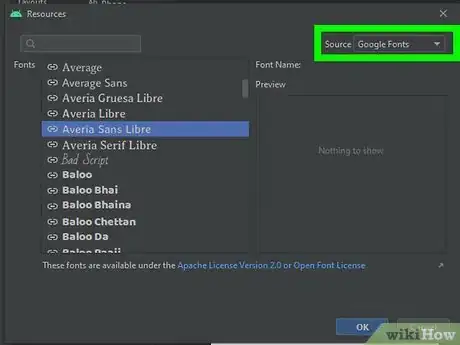
7Ensure "Google Fonts" is the source. If not already selected, use the drop-down menu next to "Source" in the upper-right corner to select "Google Fonts."
-
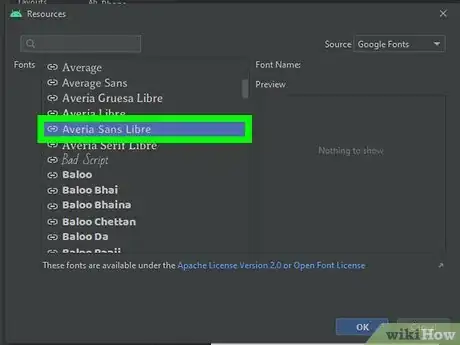
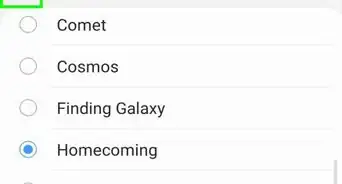
8Select a font. Fonts are listed in the box labeled "Fonts" below "Downloadable Fonts." Fonts appear in the list the way they appear in the app.
-
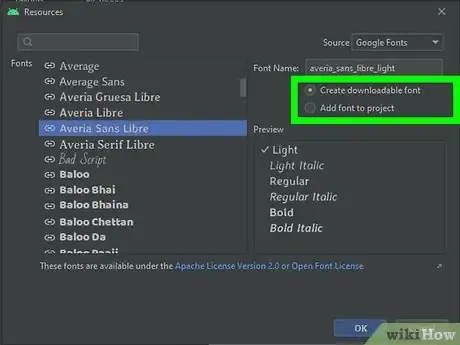
9Select "Create downloadable font" or "Add font to project" and click Ok. Selecting "Create downloadable font" allows your app to interface with the font provider and download the font without having to embed the font files within the app. Select "Add font to project" will add the font files to your project. Android Studio will create the needed XML files needed to properly display the font.[2]
Declaring a Google Fonts as a Resource Using XML
-
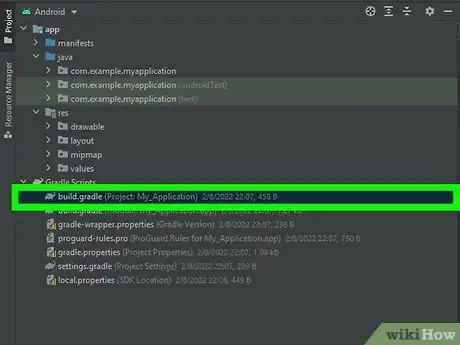
1Add the support library dependency. To do so, open the "build.gradle" file below "Gradle Scripts" in Android Studio, or in the "app" folder for your project. Locate the "dependencies {" section and add the following line to that section:
implementation("com.android.support:support-compat:28.0.0") -
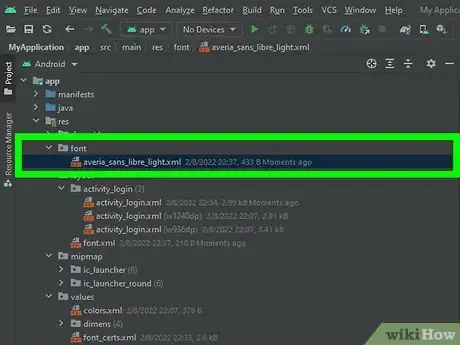
2Create a new XML file in your "res/font" folder. If you want to use Google Fonts programmatically, you'll need to start by declaring the Google Font as a resource using XML. Locate the "font" folder in the "res" folder for your project and create a new XML file. You can do so using any text editor or integrated development environment (IDE). Be sure to save the file using the ".xml" extension.
- You can name the XML file after the font you are declaring. You'll need to create a separate XML file to declare each font you want to use.
- You can browse a list of available Google Fonts at https://fonts.google.com/
-
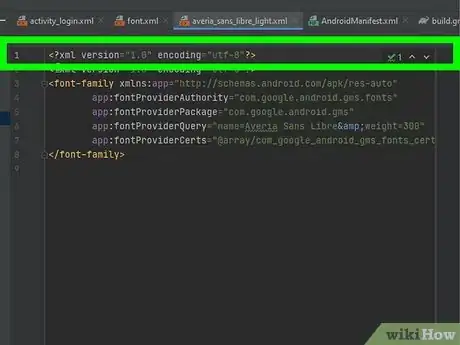
3Add the XML encoding to the top of the file. To do so, type <?xml version="1.0" encoding="utf-8"?> at the top of the XML file as the first line.
-
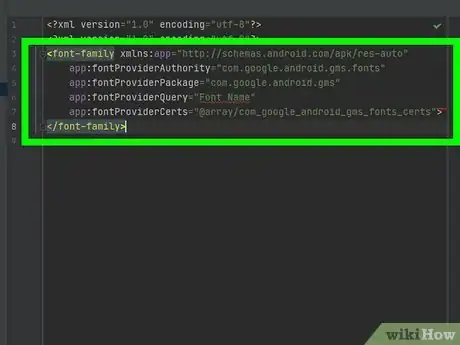
4Set the font family attributes. Replace "Font Name" with the name of the font you want to use. Use the following code to set the font family attributes:[3]
  <font-family xmlns:app="http://schemas.android.com/apk/res-auto"
        app:fontProviderAuthority="com.google.android.gms.fonts"
        app:fontProviderPackage="com.google.android.gms"
        app:fontProviderQuery="Font Name"
        app:fontProviderCerts="@array/com_google_android_gms_fonts_certs">
</font-family>
-
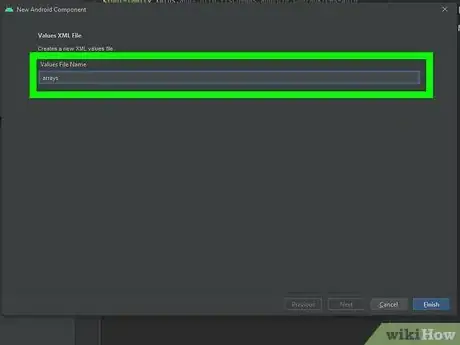
5Create a new "arrays.xml" file in your "values" folder. Your "values" folder should be in your "res" folder ("/res/values/"). Add a new XML file called "arrays.xml" to your values folder. This file pre-declares fonts that need retrieving in the manifest. This is to avoid delays the first time the system tries to request and retrieve fonts from the font provider.
- Be sure to add <?xml version="1.0" encoding="utf-8"?> as the first line of the XML file.
-
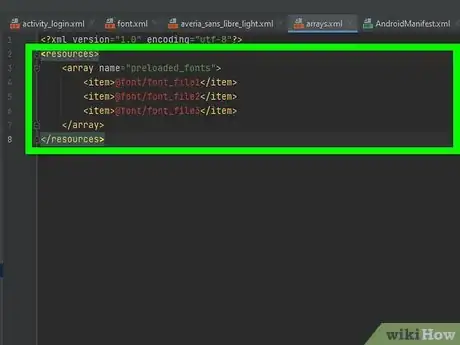
6Create an array for each font you want do declare. You can refer to each XML font file you created as @font/font_file_name. Replace "font_file_name" with the XML file name of the font you want to declare. You'll need to create an "<item>" tag for each font you want to declare. Use the following code example to create an array in your XML file:
<resources>
   <array name="preloaded_fonts">
       <item>@font/font_file1</item>
       <item>@font/font_file2</item>
       <item>@font/font_file3</item>
   </array>
</resources>
-
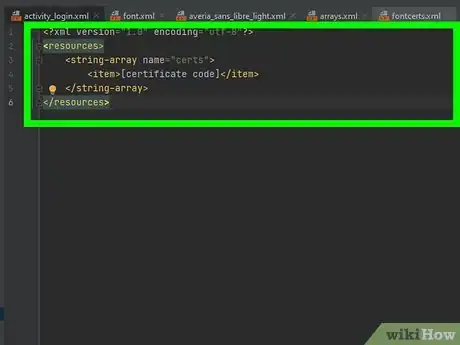
7Add the font certificates. To do so, create a new XML file called "font_certs.xml" in your "values" folder. The system will use these certificates to verify the font provider's identity. Refer to the font provider's documentation for information on the certificates, and replace the "[certificate code]" with the code provided by the font provider. There may be more than one certificate code. Add the following code to your "fonts_certs.xml" file to declare the certificates:
<?xml version="1.0" encoding="utf-8"?>
<resources>
    <string-array name="certs">
       <item>[certificate code]</item>
    </string-array>
</resources>
-
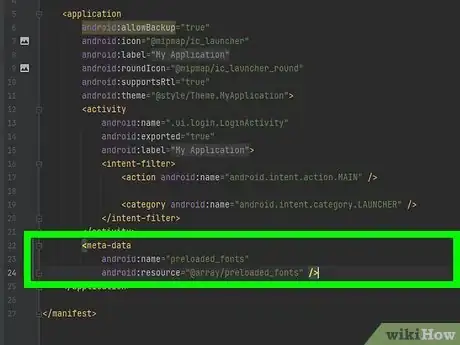
8Declare the resource array in your manifest. The Android Manifest XML file can be found in the "Main" folder in your project, or below "Manifest" in Android Studio. Add the following line of code to your manifest file to declare the resource array: [4]
<meta-data
    android:name="preloaded_fonts"
    android:resource="@array/preloaded_fonts" />
Using Google Fonts in Java
-
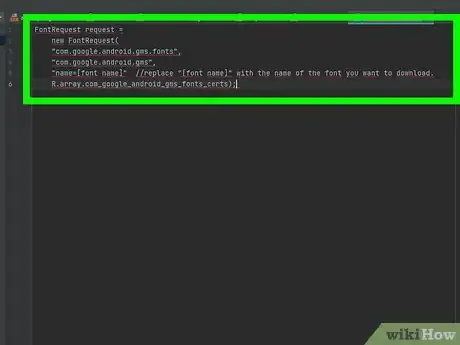
1Create a new font request. When you create a new font request, you need to specify the font provider, font package to verify the provider, font name (and optional attributes), as well as the certificate. Use the following line of code to create a new font request for Google fonts:
  FontRequest request =
       new FontRequest(
               "com.google.android.gms.fonts",
               "com.google.android.gms",
               "name=[font name]"  //replace "[font name]" with the name of the font you want to download.
               R.array.com_google_android_gms_fonts_certs);
- Additionally, when you specify the font name, you can create a string query to specify font properties such as "width" (greater than "0"), weight (between "0" and "1000"), and "italic ("0" for no, "1" for yes). For example "name=Open Sans&weight=800&italic=0"[5]
- Be sure to declare the font you want to download as an asset using XML.
-
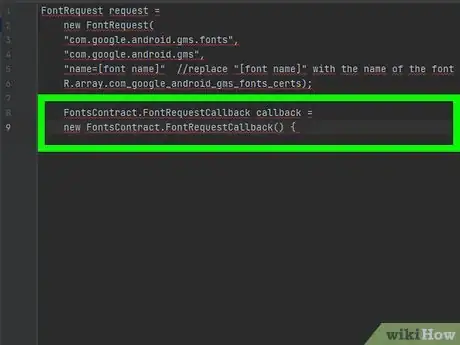
2Create a new instance of the "FontsContract.FontRequestCallback" class. Use the following code to create a new instance of the "FontsContract.FontRequestCallback" class:
 FontsContract.FontRequestCallback callback =
    new FontsContract.FontRequestCallback() {
-
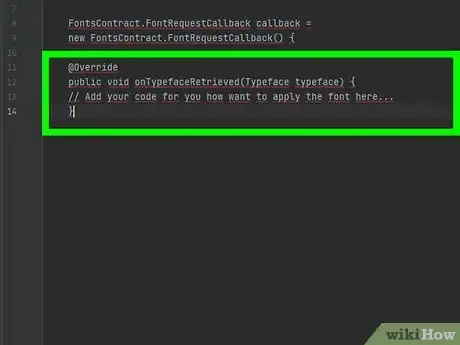
3Override the "onTypefaceRetrieved()" method. When the font request is completed, you will receive a font. You will need to add your own code for how you want to apply the font once it is retrieved. Use the following code to over the "onTypefaceRetrieved()" method:
     @Override
        public void onTypefaceRetrieved(Typeface typeface) {
            // Add your code for you how want to apply the font here...
        }
-
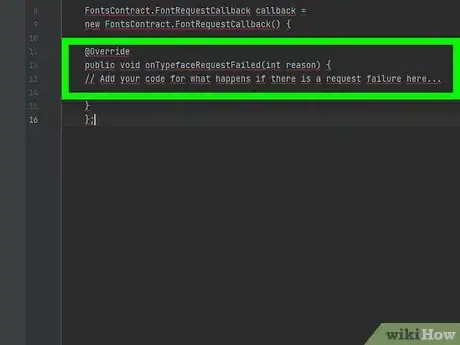
4Override the "onTypefaceRequestFailed()" method. Should the font request fail to retrieve your downloaded font, this allows you to retrieve information about why it failed and add your own code for what you want to do if the font request fails. Use the following code to override the "onTypefaceRequestFailed()" method:
      @Override
        public void onTypefaceRequestFailed(int reason) {
            // Add your code for what happens if there is a request failure here...

        }
};
-
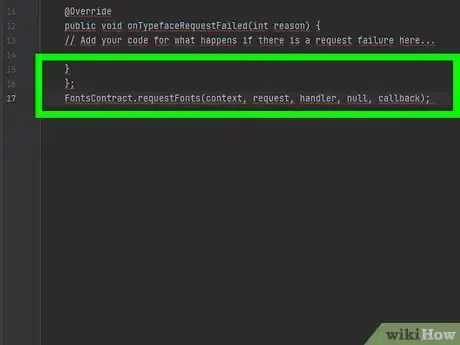
5Call the "FontsContract.requestFont()" method. This checks if the font is in the cache. If it is not, it requests the font from the font provider. Use the following code to call the "FontsContract.requestFont()" method:
FontsContract.requestFonts(context, request, handler, null, callback);
-
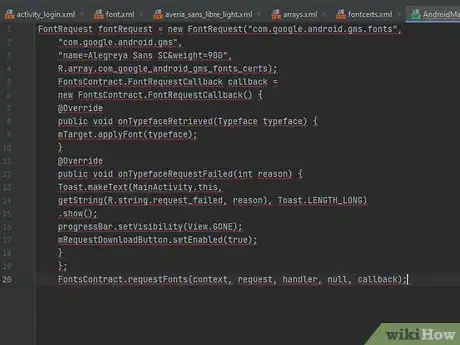
6Double-check your code. Your code should look something like the following example:[6]
FontRequest fontRequest = new FontRequest("com.google.android.gms.fonts",
       "com.google.android.gms",
       "name=Alegreya Sans SC&weight=900",
       R.array.com_google_android_gms_fonts_certs);
 FontsContract.FontRequestCallback callback =
    new FontsContract.FontRequestCallback() {
           @Override
           public void onTypefaceRetrieved(Typeface typeface) {
               mTarget.applyFont(typeface);
           }
            @Override
            public void onTypefaceRequestFailed(int reason) {
                Toast.makeText(MainActivity.this,
                        getString(R.string.request_failed, reason), Toast.LENGTH_LONG)
                        .show();
                progressBar.setVisibility(View.GONE);
                mRequestDownloadButton.setEnabled(true);
            }
        };
FontsContract.requestFonts(context, request, handler, null, callback);
Using Google Fonts with Kotlin
-
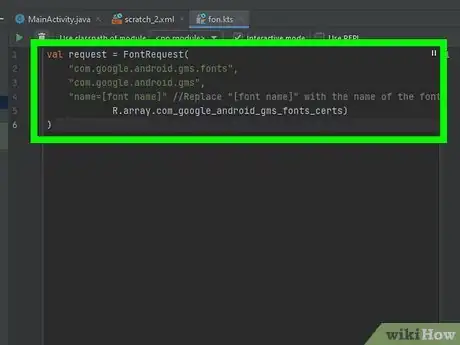
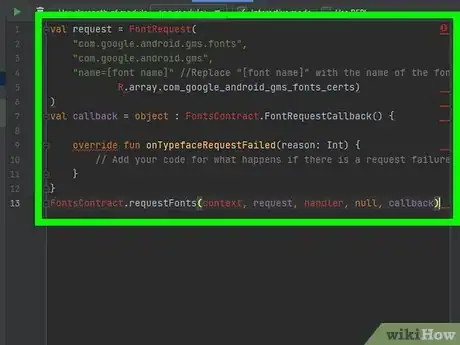
1Create a new font request. When you create a new font request, you need to specify the font provider, font package to verify the provider, font name (and optional attributes), as well as the certificate. Use the following line of code to create a new font request for Google fonts:
          val request = FontRequest(
                "com.google.android.gms.fonts",
                "com.google.android.gms",
                "name=[font name]" //Replace "[font name]" with the name of the font you want to use.
                R.array.com_google_android_gms_fonts_certs)
)
- Additionally, when you specify the font name, you can create a string query to specify font properties such as "width" (greater than "0"), weight (between "0" and "1000"), and "italic ("0" for no, "1" for yes). For example "name=Open Sans&weight=800&italic=0"
- Be sure to declare the font you want to download as an asset using XML.
-
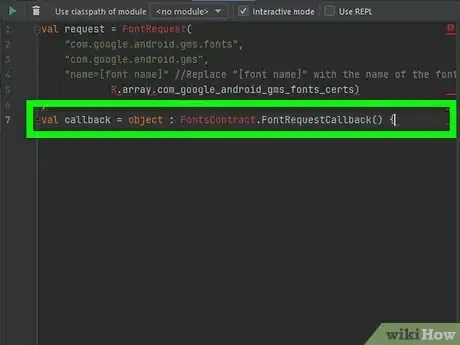
2Create a new instance of the "FontsContract.FontRequestCallback" class. Use the following code to create a new instance of the "FontsContract.FontRequestCallback" class:
val callback = object : FontsContract.FontRequestCallback() {
-
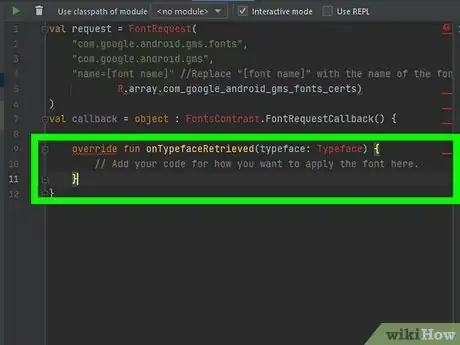
3Override the "onTypefaceRetrieved()" method. When the font request is completed, you will receive a font. You will need to add your own code for how you want to apply the font once it is retrieved. Use the following code to over the "onTypefaceRetrieved()" method:
    override fun onTypefaceRetrieved(typeface: Typeface) {
        // Add your code for how you want to apply the font here.
    }
-
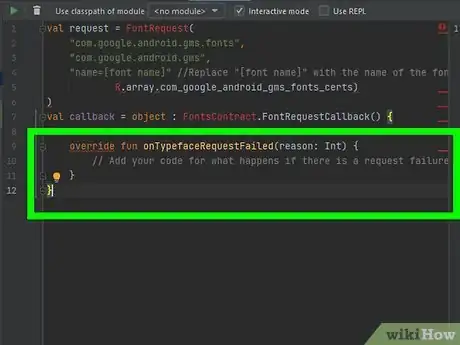
4Override the "onTypefaceRequestFailed()" method. Should the font request fail to retrieve your downloaded font, this allows you to retrieve information about why it failed and add your own code for what you want to do if the font request fails. Use the following code to override the "onTypefaceRequestFailed()" method:
    override fun onTypefaceRequestFailed(reason: Int) {
        // Add your code for what happens if there is a request failure here...
    }
}
-
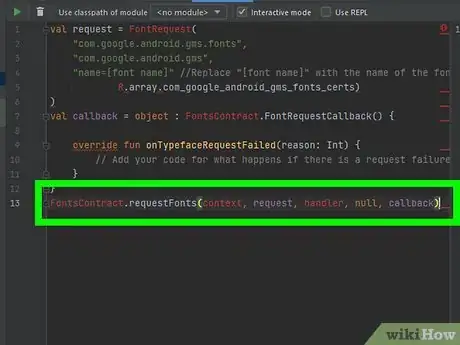
5Call the "FontsContract.requestFont()" method. This checks if the font is in the cache. If it is not, it requests the font from the font provider. Use the following code to call the "FontsContract.requestFont()" method:
FontsContract.requestFonts(context, request, handler, null, callback)
-
6Double-check your code. Your code should look something like the following example:
val request = FontRequest(
        "com.example.fontprovider.authority",
        "com.example.fontprovider",
        "my font",
        certs
)
val callback = object : FontsContract.FontRequestCallback() {

            override fun onTypefaceRetrieved(typeface: Typeface) {
                mDownloadableFontTextView.typeface = typeface
                progressBar.visibility = View.GONE
                mRequestDownloadButton.isEnabled = true
            }

            override fun onTypefaceRequestFailed(reason: Int) {
                Toast.makeText(this@MainActivity,
                        getString(R.string.request_failed, reason), Toast.LENGTH_LONG)
                        .show()
                progressBar.visibility = View.GONE
                mRequestDownloadButton.isEnabled = true
            }
        }
FontsContract.requestFonts(context, request, handler, null, callback)
References
- ↑ https://fonts.google.com/about
- ↑ https://developer.android.com/guide/topics/ui/look-and-feel/downloadable-fonts#kts
- ↑ https://proandroiddev.com/android-downloadable-fonts-8e60d3e146b7
- ↑ https://mobologicplus.com/use-custom-fonts-for-view-and-downloadable-google-font-for-android-studio/
- ↑ https://developers.google.com/fonts/docs/android
- ↑ https://medium.com/google-design/the-android-developers-guide-to-better-typography-97e11bb0e261
