This article was co-authored by James Schuelke. James Schuelke, along with his twin brother David, is the co-owner of the Twin Home Experts, a licensed plumbing, leak detection, and mold inspection company based in Los Angeles, California. James has over 32 years of home service and business plumbing experience and has expanded the Twin Home Experts to Phoenix, Arizona and the Pacific Northwest.
There are 9 references cited in this article, which can be found at the bottom of the page.
wikiHow marks an article as reader-approved once it receives enough positive feedback. This article received 33 testimonials and 88% of readers who voted found it helpful, earning it our reader-approved status.
This article has been viewed 831,037 times.
Slow running or blocked bathroom sink drains are a common household issue often caused by hair or hygiene products that eventually build up and create a blockage. Many people rely on chemical solutions as a quick fix, but there are plenty of other non-corrosive and healthier methods that will often solve the issue.
Steps
Trying Natural Solvents
-
1Gather your materials. Instead of relying on drain cleaner products, which are often corrosive and can cause allergic reactions and respiratory problems, you can use household items you likely already have. You will need:[1]
- Rags
- Baking soda
- Vinegar
- Lemon
- Boiling water
-
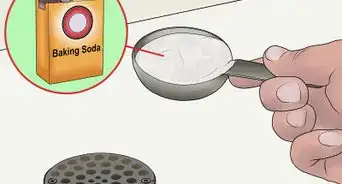
2Measure out your ingredients. Take ¼ cup of baking soda, 1 cup of white vinegar, and 1 large pot of water to boil.[2] Have a rag or sink stopper handy.Advertisement
-
3Pour the baking soda into the drain. Make sure that most of the baking soda falls directly into the drain rather than around it in the sink.
-
4Pour in the cup of vinegar. You may hear a fizzing noise or see bubbles come up due to the chemical reaction. This is completely normal and should mean that the chemicals are eating away at the blockage in your sink.
-
5Plug the drain with a rag or sink stopper. Doing so will stop the bubbles from rising up and will keep the chemical reaction concentrated on the clog.
-
6Wait fifteen minutes. Allow the baking soda and vinegar reaction to fully work their magic here! While waiting, you should heat up the pot of water to boiling point.
-
7Pour in the pot of boiling water. This step will push down the baking soda, vinegar, and blockage. Watch as you pour in the water to see if the sink is draining any faster. If it is, but still not at its normal speed, there may still be a bit of a blockage. Try repeating the process once more if this is the case.
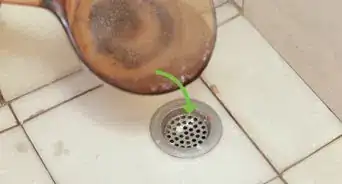
- Prior to pouring in the boiling water, you can also squeeze in the juice of a lemon, particularly if you notice an unpleasant odor coming from the sink.[3] Bathroom sinks are often clogged by bits of hair which can eventually rot and smell bad. This extra step will neutralize the odor and also further help break down the blockage.


Using a Plunger
-
1Gather your tools. For this method, you only need a flashlight and a plunger (you can buy a smaller one specifically made for sinks at any hardware store but a thoroughly cleaned toilet plunger works just as well).
-
2Remove the sink stopper. This step is crucial otherwise you will just be plunging the stopper up and down rather than forcing up the clog.
- Use your hands to pull the sink stopper up as far as it will go out of the drain. Then turn it to the left and continue unscrewing until it comes out.[4]
-
3Turn the sink on. You want to fill the sink with some water but just enough to cover the drain. An inch or so of water should be just fine.
-
4Create a suction seal. Place the plunger directly over the drain and press down once until you feel rubber bottom tighten into a seal. You may have to stand on a chair to make sure you are positioned directly over the sink.[5]
-
5Plunge. Using the handle of the plunger, plunge vigorously up and down about 10-20 times. Make sure that the plunger is tightly sealed around the drain, creating suction, so that the plunger is actually forcing the blockage through.
-
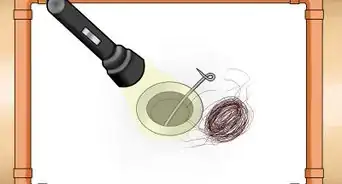
6Remove the plunger and check for the blockage. Shine a flashlight into the drain to check for the blockage. If you can see it and can reach with your fingers and pull it out, do so. If not, repeat the steps until the clog comes out.


Snaking the Pipes
-
1Get your materials ready. This method is for those stubborn clogs and therefore requires more materials. You will need:
- A bucket
- Screwdriver or wrench
- Plumber’s snake (also called a drain snake). If you do not have a plumber’s snake, you can improvise using a straightened wire hanger. Simply take a regular wire coat hanger and straighten it as much as possible, then bend one end over to create a hook.[6]
-
2Place the bucket underneath your sink. You want to position the bucket underneath the P-trap, that is, the curved part of pipe that leads directly from the drain.
-
3Check to see what is holding your P-trap together. Some are held together with screws, in which case you need a screwdriver, while others have slip nuts on both ends of the pipe, in which case you will need a pair of channel locks (a type of wrench).
-
4Remove the P-trap. Do this step slowly and make sure the bucket is still positioned directly beneath you. Standing water as well as the small pipes inside of the P-trap may spill out and you want the bucket to catch them.
- Whether the P-trap is made with screws or slip nuts, in both cases you will turn in a counterclockwise fashion to loosen the parts. When they are well loosened, you can use your fingers to pull them off completely. Be sure to keep the screws or nuts close by as you’ll need them when putting the P-trap back in place!
-
5Find the clog. First check the P-trap. If you can see the blockage, use your fingers, coat hanger, or the plumber’s snake to force it out.
- Build up typically occurs in the P-trap since the curve of the pipe is designed to stop fluids from coming back up into the sink.[7]
- If there is no visible clog, it is possible that the clog is in the pipe that goes into your wall. In this case, you need a plumber’s snake and it is not recommended that you substitute the wire hanger. Insert the plumber’s snake into the opening of the pipe that leads into the wall until it meets resistance (which is likely the blockage). Then tighten the nut at the base of the snake and begin twisting the snake. You can also use an in and out motion, similar to plunging, with the snake in order to dislodge the clog. Once you no longer feel any resistance at the other end, pull out the snake.
-
6Reattach the P-trap. Use either the screwdriver or wrench and turn the screws or nuts clockwise to tighten them. However, do not tighten them too much or you could crack the plastic pipe.
- Make sure you have replaced the screws or bolts tightly so that water doesn’t leak.
-
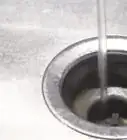
7Turn on the sink. The water should drain at its normal speed if the clog has been effectively removed.


Using a Wet and Dry Shop Vacuum
-
1Get your materials ready. Before you begin, get all of your materials together. You will need:
- Rags
- A bucket
- Screwdriver or wrench for undoing the P-trap
- A wet and dry shop vacuum (also known as a shop vac)
-
2Place the bucket under the sink. Position the bucket directly underneath the P-trap below the sink.
-
3Remove the P-trap. This is the curved pipe that is often held together with screws or slip nuts. Make sure that the bucket is directly below to catch any of the standing water left in the pipes.
- Depending on what the P-trap is held together with, you will use a screwdriver or wrench to turn the screws or slip nuts in a counterclockwise fashion to loosen them and then use your fingers to pull the loosened parts out completely.
-
4Locate the pipe you will connect to the shop vac. Every sink has two pipes, a vertical and horizontal one that intersect at an angle. You will be connecting the shop vac to the vertical pipe, also known as a stopper, that runs up into the sink.
-
5Place the nozzle of the shop vac onto the stopper.[8] Place the nozzle directly from below in order to create as much of a seal as possible.
-
6Set the shop vac to vacuum fluids.[9] Shop vacs have an option to vacuum wet or dry and in this case you want it to vacuum fluids to catch the clog.
-
7Plug up any other openings. Doing so will ensure you have the tightest seal possible which will in turn help with the suction.
- While maintaining your grip on the shop vac nozzle, seal the sink with a drain stopper and also plug up any open pipes where the P-trap was located by stuffing them with rags.
-
8Turn on the shop vac. If you cannot feel anything moving, you may want to allow a little air through by releasing the sink stopper for a few seconds at a time.
-
9Pulse the shop vac. Turn it on and off for a few seconds at time. Doing this will create more suction and help loosen the buildup, particularly if it is a very compact clog.
-
10
-
11Put the sink back together. Remove the nozzle of the shop vac and, using either a screwdriver or wrench, put the P-trap back into the piping. Again, make sure to tighten the screws or bolts well to avoid water leaking. However, make sure that you do not tighten them too much or the plastic pipe may crack.


Expert Q&A
Did you know you can get expert answers for this article?
Unlock expert answers by supporting wikiHow
-
QuestionCan a wet/dry vac unclog a drain?
 James SchuelkeJames Schuelke, along with his twin brother David, is the co-owner of the Twin Home Experts, a licensed plumbing, leak detection, and mold inspection company based in Los Angeles, California. James has over 32 years of home service and business plumbing experience and has expanded the Twin Home Experts to Phoenix, Arizona and the Pacific Northwest.
Professional PlumberYes! Attaching the hose of a wet/dry vacuum to your drain may be strong enough to suck out the debris causing the clog. Just make sure to set the vac to fluids.
Support wikiHow by unlocking this expert answer.
Warnings
- If these methods do not work, call in a plumber as you may have a more serious issue that requires an expert.⧼thumbs_response⧽


References
- ↑ http://www.ewg.org/guides/cleaners/1380-DranoClogRemover
- ↑ http://www.make-it-do.com/clean-it/baking-soda-and-vinegar-to-the-rescue-again/
- ↑ http://www.apartmenttherapy.com/how-to-naturally-unclog-the-ba-44368
- ↑ http://home.tips.net/T003748_Unclogging_a_Bathroom_Sink_Using_a_Plunger.html
- ↑ http://www.howtocleanstuff.net/how-to-unclog-the-drain/
- ↑ http://www.wisebread.com/10-really-easy-ways-to-unclog-drains
- ↑ http://home.tips.net/T003750_Unclogging_a_Bathroom_Sink_Using_a_Snake.html
- ↑ James Schuelke. Professional Plumber. Expert Interview. 1 October 2019.
- ↑ James Schuelke. Professional Plumber. Expert Interview. 1 October 2019.
- ↑ James Schuelke. Professional Plumber. Expert Interview. 1 October 2019.
- ↑ http://www.wisebread.com/10-really-easy-ways-to-unclog-drains
- ↑ https://www.washingtonpost.com/realestate/how-to-clear-a-clogged-bath-sink-drain/2014/03/06/671a7078-9b10-11e3-975d-107dfef7b668_story.html
About This Article

If you need to unclog a slow running bathroom sink drain, pour baking soda down the drain, followed by vinegar, then plug the drain with a rag or a sink stopper. The chemical reaction from the baking soda and vinegar may be able to dislodge the blockage in your pipe. Allow the mixture to sit for about 15 minutes, and boil a pot of water while you wait. Pour the pot of boiling water down the drain, and repeat if the water is still draining slowly. To learn more from our Contractor co-author, like how to use a drain snake to break the clog, keep reading the article!