This article was co-authored by wikiHow staff writer, Jessica Gibson, and Matt Khoury, a trusted member of wikiHow's volunteer community. Matt Khoury is a seasoned drummer with over 25 years of experience. He started playing in high-school band and at church, which expanded into opportunities to play with bands in front of thousands of people across the United States.
There are 7 references cited in this article, which can be found at the bottom of the page.
wikiHow marks an article as reader-approved once it receives enough positive feedback. This article received 11 testimonials and 91% of readers who voted found it helpful, earning it our reader-approved status.
This article has been viewed 482,153 times.
Learn more...
Knowing how to properly tune your drums is vital to having a great sounding drum kit. Even if you are a novice drummer, having a well-tuned drum kit will make you stand above the rest. Since tuning a drum set isn't an exact science, you'll need to experiment with tuning. Play around with different tunings and figure out what works best with your drums and musical style.
Steps
Changing a Drum Head
-
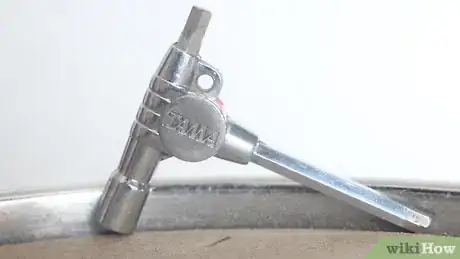
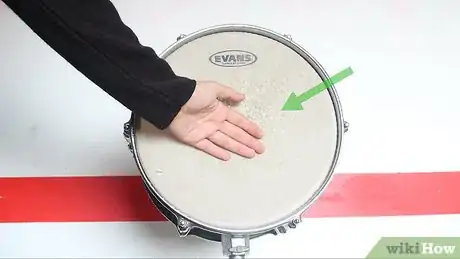
1Get a drum key. Drum keys are used to tune drums and cost about two dollars at a music store. If you're going to play drums, it's a good idea to get one and make sure your kit is in tune with itself. To start tuning your drums or changing the heads, all you need is a stick and your drum key. Turn the snares off and you're ready to start.[1]
- If you have any drummer friends, you can ask if they have spare keys to lend or give you.
- Consider using two drum keys at rods opposite each other on the drum. You'll be able to tune faster and will get a more even tension (so long as you continue keeping them across from each other as you move diagonally around the drum).
-
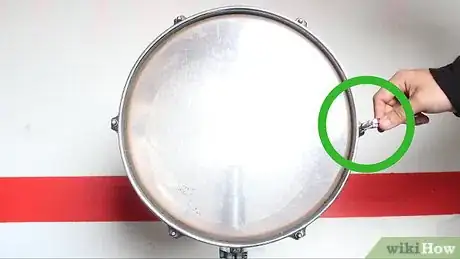
2Start loosening the tension rods in a diagonal pattern. Using your key, begin loosening tension rods. Give a rod about half a turn and then loosen the rod diagonally across from it (not the rod next to it). Then go back and loosen the rods again. Continue doing this until you can loosen them by hand. You don't want to loosen them one at a time, but instead evenly loosen them half a turn each, just keep going around the drum until you can start loosening them by hand.
- Avoid completely loosening the rods at once. Remember to use a diagonal pattern when loosening and tightening the rods. This will prevent the rim from bending.
Advertisement -
3Remove the rim, tension rods and old drum head. Once you've removed these parts, wipe the inside and edge of the drum with a dry piece of fabric. Tap the inside of the drum to check that your drum's lugs are tight and check your mounting hardware.[2]
- A loose drum lug can cause a buzz in the head.
- Also, wipe the new drum head to make sure everything's clean and not dented.
-
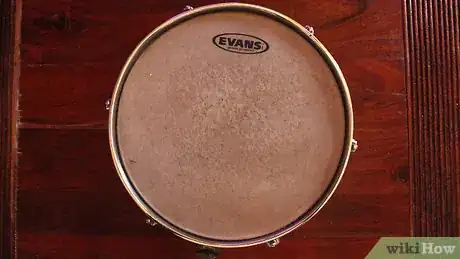
4Seat the drum head. Center the new head on the drum and put the rim and tension rods back onto the drum. You might want to place the rim back on the drum in the spot it was originally since the rim's shape has probably moved to fit in that position. Tighten all of the tension rods evenly using your hands (no drum key yet) and keep going until all of the tension rods are finger tight.
- Keep your tension rods and drum lugs clean and lubricated. To lubricate the rods, rub a little oil, petroleum jelly, or paraffin wax over them.[3]
-
5Break in the drum head. Prevent your drum from repeatedly going out of tune by pushing down in the center of the drum with your fist. Do this 5-10 times. Don't worry, you won't break it. You should be able to put a good portion of your body weight onto the drum. Don't be alarmed if you hear popping or glue-cracking sounds.[4]
- Make sure the tension rods are all still tight and adjust them as needed. Once you've got the new head seated and the tension rods relatively tight, you're ready to start tuning the drum.
Tuning the Snare
-
1Tighten the tension rods in a diagonal pattern. Start with the tension rod closest to you and turn the drum key half a turn tighter. Do not move onto the tension rod beside it. Instead, turn the tension rod that's directly across from the one you've already turned half a turn. The next tension rod you are going to tighten is the one to the left of the tension rod you started on. Then go directly across the drum from there and continue this pattern.
- Keep going around the drum until all of the tension rods are totally even and the drum has the sound that you want it to. You may have to go over all of the tension rods several times or until you reach the desired tone.[5]
-
2Give it the tone you want. Many drummers and techs will hit the drumstick or finger against the body of the drum (the side, not the part with the head) to listen for the overtone, then try to match the pitch when tuning the head. You can also listen to recordings in order to try to match the tone you want.
- If it is a new drum head, tension the head higher than your desired pitch and press hard in the center. You will hear the pitch drop. This seats the head, as well as pitches it correctly to get the great crack sound out of the snare. The top head should be tightened slightly tighter than the bottom when you're finished.
-
3Make sure the tension is even across the drum. Go around the drum and tap an inch away from each tension rod with a drumstick. Fine tune the rods to make sure the point you're hitting makes the same tone all the way around the drum. Tighten or loosen the rods depending on the tone you're getting.
- If you don't like some of the overtones that your drum is giving off, you can use some form of dampening (moon gel, drum gum, o-rings). You don't want to use dampening as a solution to poor tuning. Instead, dampening can be used to enhance good tuning.[6]
-
4Do the same thing to the bottom head of your drum. Depending on your taste, it will either be the same pitch as your batter, or vary a little. Follow the same process, periodically taking the time to smooth out the wrinkles in the plastic covering with a cloth or a napkin as you bang on it. This will help make the tone uniform across the drum, so the wrinkles won't settle out later and change the sound.
- To make sure your bottom and top heads have the same pitch, try muting the top head while you check the tune of the bottom. To do this, try setting the top head face-down on a drum stool while you check the bottom head.[7]
-
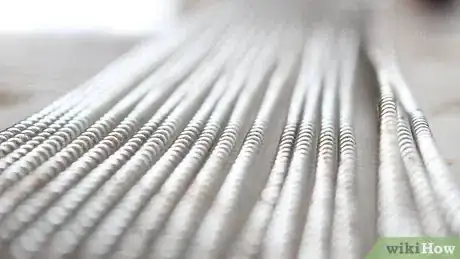
5Maintain your snares. The snares themselves are also very important, so it's a good idea to keep them in pristine condition. Try to tighten them so that they are flat across the skin of the drum. Too tight and it will bow off of the middle, too loose and it won't touch at all.
- A good rule of thumb is to tighten the snares until just after they stop rattling.[8]
Tuning the Toms and Kick Drum
-
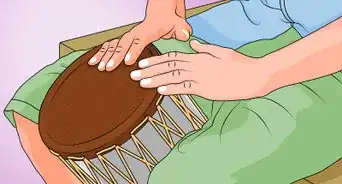
1Tune to the body of the drum. It's important that you take the time to bang on the body a few times to get a sense of the pitch of the individual drum, and keep tuning until you've matched it.
- Tune the smallest tom first so that the top head is close to the pitch you want. Move on to the other drums, continuing to match the top head pitch.
-
2Listen for a smooth single tone. Follow the same procedure as you would for the snare drum, smoothing out the head with a cloth and tapping around the perimeter of the drum surface to check for evenness. Use your ears and really focus on the sound. The ideal tone should smoothly and evenly fade into a single note.
- You may find that a particular tension or particular pitch is really good for your drums. Keep going until you find it. Experiment with what sounds you get out of your kit by comparing the tunes between the bottom and top heads.
- Tuning both heads to the exact same pitch will bring out a very resonant sound. Tuning the bottom head to a lower pitch than the top head will make a dropping sound. If the bottom head is tighter and has a higher pitch than the top head, you will get a very constant tone with little resonance.[9]
-
3Tune the bottom first. The bottom head is the part of the drum that creates the projection and sustains more than any other part. It's the most important part of tuning the drum kit, because the batter heads won't sound right if you don't take the time to accurately pitch the bottom heads.
- Tuning the bottom will make it easier to tune the top heads since the bottom will be reverberating at the correct pitch.
-
4Consider using a rotisserie or a lazy Susan. Get something that rotates to set the drum on and turn the drum as you work. Setting your drum on a spinning surface will make it easier to turn the drum and can make the process go faster. This way, you can turn all the keys and shift things around easier. With a spinning surface, you won't need to shift around on the floor on your knees.
- A rotating table setting, called a "lazy Susan," would be perfect for the job, or use a rotating desk chair or bar stool. Get comfortable, because tuning can take a while.
Expert Q&A
-
QuestionHow do I get the best sound out of my drums?
 Matt KhouryMatt Khoury is a seasoned drummer with over 25 years of experience. He started playing in high-school band and at church, which expanded into opportunities to play with bands in front of thousands of people across the United States.
Veteran Drummer Drums have a sweet spot when tightening the head and the resonant head. This takes practice and is also a matter of taste. Personally, I like my drums to ring long. I want them to resonate and hold as much sustain (how long the note lasts) as possible.
 -
QuestionWhy must I tune both the top and bottom part?
 Community AnswerBoth the top and bottom will vibrate when you hit the drum, so both should be tuned for the best sound possible.
 -
QuestionShouldn't the small tom have a higher pitch than the floor tom? How should each drum's pitch compare?
 Community AnswerYes, whichever is your smallest mounted tom will ideally have the highest pitch. Wherever your highest drum is tuned to, the others should follow suit in a pattern that complements the sounds of the previous. Start with your snare, work your way down.
Warnings
- Do not over tighten your drum which could damage your drum and drum head. If you're worried you've over-tightened your drum, take off the drum head to look for a noticeable depression in the middle. This means the head has been stretched beyond its elastic limit.⧼thumbs_response⧽
References
- ↑ http://www.rockdrummingsystem.com/underground/drum-articles/understanding-drum-heads.php
- ↑ http://www.drummagazine.com/features/post/drumcare-make-those-hoops-sing/
- ↑ http://www.drummagazine.com/features/post/drumcare-make-those-hoops-sing/
- ↑ http://www.drummagazine.com/features/post/drumcare-make-those-hoops-sing/
- ↑ http://www.rockdrummingsystem.com/underground/drum-articles/tuning-your-drums.php
- ↑ http://www.musicradar.com/tuition/drums/10-essential-damping-tips-for-drummers-232145
- ↑ http://www.soundonsound.com/sos/aug10/articles/drum-tuning.htm
- ↑ http://mikedrums.com/tuning/snare.html
- ↑ http://www.musicradar.com/us/tuition/drums/8-simple-steps-to-tuning-your-toms-200367
About This Article
To tune a drum, use a drum key to tighten the tension rods half a turn, starting with the one closest to you. Tighten the one across from you next, rather than moving to the one directly to your left or right, so the drum will be tightened evenly. Tap an inch away from each tension rod with a drumstick to make sure they all sound about the same, and adjust as needed. Repeat with the bottom drum head. If you’re tuning toms, tune the bottom part first, then adjust the other drums to that one. To learn more, such as how to change a drum head, keep reading the article!
