This article was co-authored by wikiHow staff writer, Hunter Rising. Hunter Rising is a wikiHow Staff Writer based in Los Angeles. He has more than three years of experience writing for and working with wikiHow. Hunter holds a BFA in Entertainment Design from the University of Wisconsin - Stout and a Minor in English Writing.
There are 12 references cited in this article, which can be found at the bottom of the page.
This article has been viewed 11,465 times.
Learn more...
Well water comes straight from the ground, so it may carry contaminants that can affect the taste of your water or make you sick. When you need to kill bacteria in your water, pour bleach into your well and let it disinfect the water. To clean out minerals and chemicals that are harmful, install a filter system on your water lines to remove them. If your water tastes hard, then you may need to put a water softener in your home. After you’ve treated your water, it will be safe to drink!
Steps
Killing Bacteria with Bleach
-
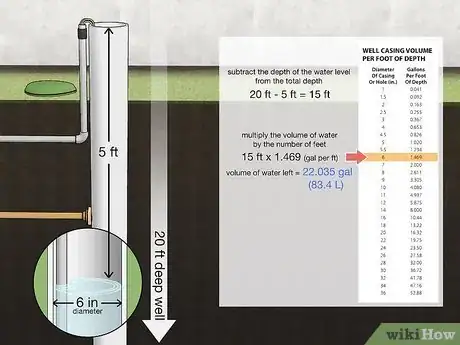
1Measure the depth of your well to know how much water you have to treat. Feed the weighted end of a steel measuring tape into your well and extend it down to the bottom for your measurement. Then, pull the steel tape up so the bottom is even with the top of the water. Subtract the depth of the water level from the total depth so you know how much water your well’s holding. Find the diameter of the well and check a table to determine how much water is in your well in gallons per foot of depth.[1]
- You can find a table for measuring water volume in a well here: http://www.geotechenv.com/Reference_Pages/water_measure_tables.pdf.
- For example, if the depth of the water in your well is 20 feet (6.1 m) and the diameter is 6 inches (15 cm), then your well holds 1.469 gallons (5.56 L) of water for each foot. Multiply the volume of water you found by the number of feet in your well to get 29.38 gallons (111.2 L) total.
- If you can’t find the volume of the well yourself, then you need to call a well specialist to determine it for you.
-
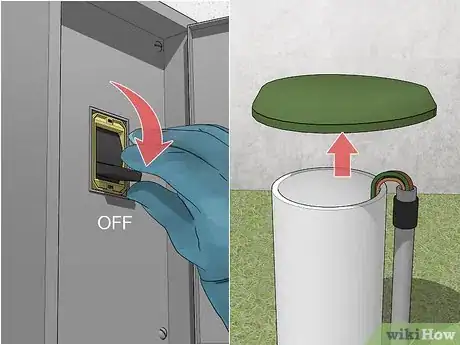
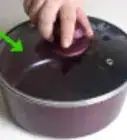
2Turn off the pump and remove the well cap. Find the breaker on your home’s circuit panel that controls the well pump and turn it off so it doesn’t turn on. Then find the cap or cover that’s on top of your well and loosen it from place with a wrench. Set the lid upside-down while you’re working so it doesn’t get covered in contaminants.[2]
- Don’t work on your well while the pump is still on since the bleach treatment won’t be as effective.
- You cannot use the water in your home while the well pump is off.
Advertisement -
3Wipe the areas you can reach inside the well with bleach solution. Mix a solution with 1⁄2 gallon (1.9 L) of standard household bleach with 5 gallons (19 L) of clean water. Wet a cleaning rag in the solution and reach into your well as far as you can to wipe away any residue or contaminants left on the well walls. Try to clean as much off as you can and replace your cleaning cloth if it gets too dirty while you’re working.[3]
- The bleach may irritate your skin so wear protective cleaning gloves to protect you.
- It’s okay if you can’t get your well perfectly clean since you will be flushing it out later on.
-
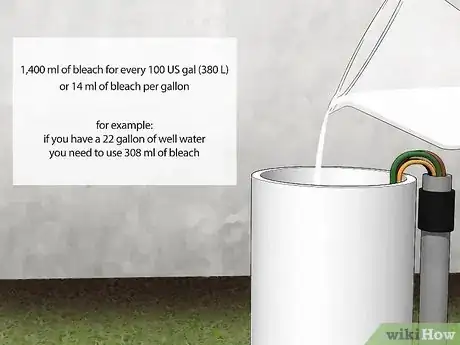
4Pour 3 US pt (1,400 ml) of bleach into the well for every 100 US gal (380 L) of water. Look at the total volume of water you found earlier so you can calculate how much bleach you need. Measure out the amount of bleach you need based on the volume, and pour the bleach directly into the well so it mixes with the water. Continue adding bleach to the well water until you’ve added the appropriate amount for disinfecting it.[4]
- For example, if you found that your well has 50 gallons (190 L) of water, then you would need to add 1 1⁄2 US pints (0.71 L) of bleach to the well.
-
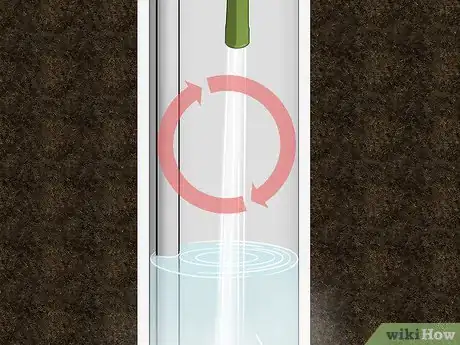
5Circulate the water in the well by running a hose inside of it. Attach a hose to an outdoor faucet and feed the end into the top of your well. Connect the well pump back to power and turn on the hose so it starts running. Once the water coming from your hose smells like chlorine, wash the inside of the well with the water for about 15 minutes before turning it off.[5]
- You can use your standard garden hose for rinsing off your well. Just be sure to run clean water through the hose before you water any plants so you don’t kill them.
-
6Turn the water faucets on in your home until you can smell chlorine. Start by running water through any outside faucets you have on your home. Then go into your home and turn on each of the faucets one by one. Let the water run through the faucets until you can smell the chlorine bleach in your water. Turn the faucet off and proceed to the next one in your home. After going through all the faucets, flush each of your toilets so they also smell like chlorine.[6]
- Don’t drink or use any of the water coming through your faucets since they contain bleach and could be harmful to drink.
Tip: If you don’t smell the bleach after running the faucets or flushing the toilet, then add an additional 3 US pints (1.4 L) of bleach to the well and repeat the process.
-
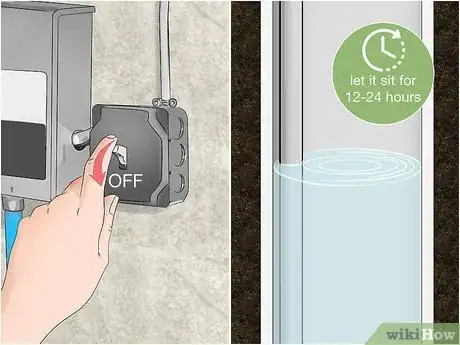
7Turn off the pump circuit and allow the bleach to sit in your well for 12-24 hours. Find the circuit controlling the well pump and flip it to the off position so the water doesn’t circulate through your home. Leave the faucets off in your home and let the bleach sit in the system for at least 12 hours and up to 24 hours. The bleach will kill any bacteria in your well and pipes to make the water safe to drink.[7]
- Have bottles or pitchers of water prepared ahead of time so you can still drink while your well and pipes are disinfecting.
-
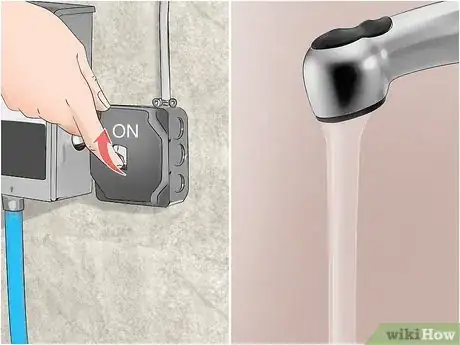
8Turn the circuit back on to flush the bleach out of the system by running your water faucets. Turn the circuit back on at the switch so your well pump can run again. Start by turning on any outdoor faucets one at a time until the water is clear and doesn’t smell like chlorine. Then start running water through your indoor faucets until they’re clean. Finally, flush each of your toilets so it has clean, disinfected water.[8]
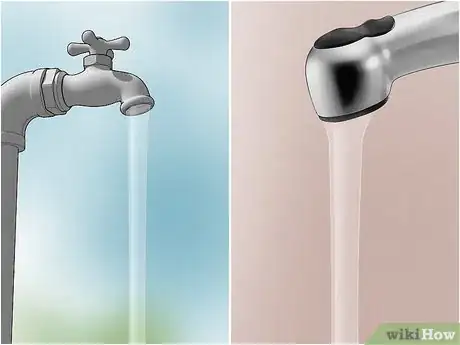
- It’s normal for the water to be discolored when you first turn on your water after treating it since the bleach can break apart slime or gunk trapped inside the pipes.
- Don’t let more than 100 gallons (380 L) of chlorinated water run into a septic system or drain into a natural body of water.[9]
Choosing a Water Filter
-
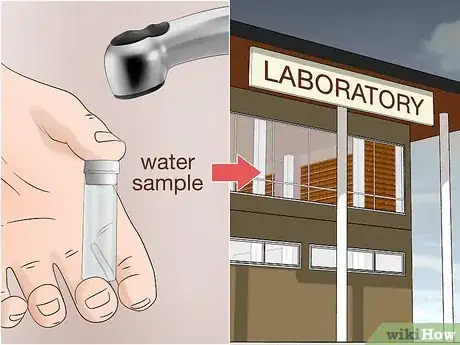
1Test your well water for bacteria and other contaminants. Contact your local health department or water treatment facility to get a test kit for your water. Fill the vials provided in the testing kit with water from your faucets and seal them tightly so they don’t leak or spill. Send or take the water samples to the testing facility so you can find out what contaminants are in your water.[10]
- Check your well water annually to see if any new contaminants have gotten into it.
- If you’ve recently had any repairs or maintenance done on your well, test the water to make sure you didn’t introduce any contamination.
- You may also be able to get home water tests from online water treatment specialists.
-
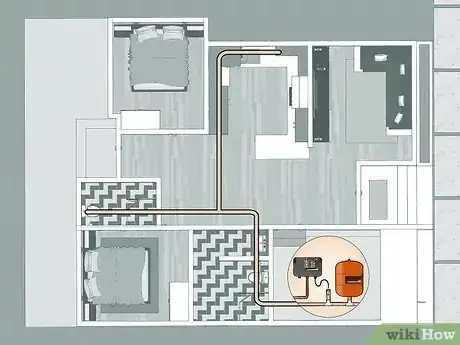
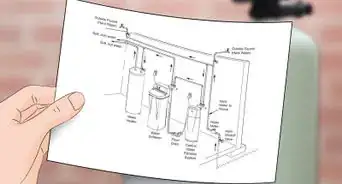
2Put a whole-home system on your main water line to treat all the water in your home. Whole water systems attach to your water line as soon as it enters your home so every faucet is filtered. Turn off your main water supply and cut out a section of the water line pipe that’s about 6–12 inches (15–30 cm) long. Connect a flexible metal hose to the pipe leading into your home to the input valve on the filter system. Then attach the filter’s output valve to the pipe leading to the rest of your home on the water line so the water runs into your filter first.[11]
- If you don’t feel comfortable installing a whole-home water filter yourself, contact a plumber or a filter specialist to install it for you.
- Some whole-home filters mount on the wall while others are a standalone unit. Pick the type of filter system that fits best in the space.
-
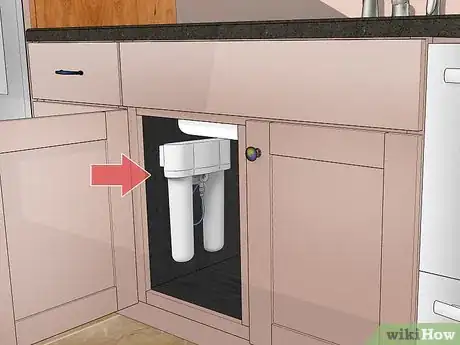
3Install an under-sink filter if you only want to treat the water on a single faucet. Under-sink filters connect to the plumbing in the space underneath your sink and get rid of contaminants at the faucet. Use an open hole in your sink’s fixture for the new filtered water dispenser and slide it in place. Connect the hose from the new faucet to the filter tank and make sure it’s secured in place. Run an input hose from your sink’s water line to the filter tank so you can use your new faucet.[12]
- You may need to cut pipes or alter the plumbing under your sink to attach the new filtered faucet.
- When you want filtered water, use the new faucet attached to the filter rather than the main one.
- If you don’t have any holes left in your sink’s fixture, then you cannot install the under-sink filter.
-
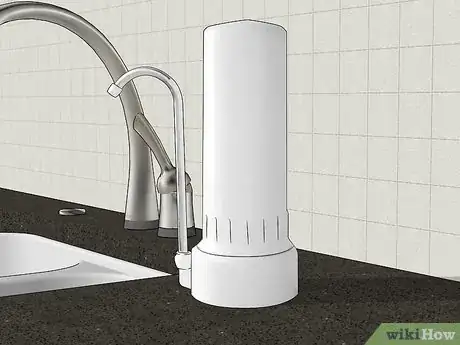
4Choose a countertop filter for easy installation on a faucet. Countertop filters connect to the end of your sink’s faucet and run the water through the filtration system before dispensing it. Screw the end of the filter hose onto the end of your faucet and set the filter next to your sink so the nozzle is over a drain. When you want to use your filter, turn the valve on the hose near the faucet so it’s horizontal. Turn on your faucet as normal so the water diverts into the filter and dispenses from it instead.[13]
- Countertop filters only filter the water on the fixture they’re attached to.
Tip: Turn the valve on the filter hose so it’s vertical if you want unfiltered water to come out from your main faucet.
-
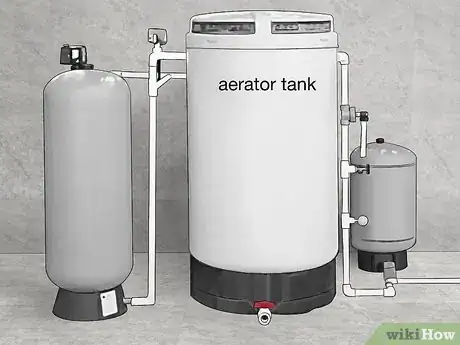
5Have an aerator installed on your water line to remove harmful gases and metals. Aerator tanks introduce oxygen into your water that help remove gas and metal particles that could make the water smell or taste funny. Talk to a filter specialist or a plumber about installing an aerator on your water line to get a quote for how much it costs. Get a tank that has a capacity of about 16 gallons (61 L) so you can use the aerated water throughout your home without running out.[14]
- Standard aerators require a tank and an air compressor that needs power, but it doesn’t limit the flow of your water.
- Some aerators feed water through a narrow valve into the tank and don’t require power to operate, but it may restrict the water flow in your home.
Fixing Hardness with Water Softeners
-
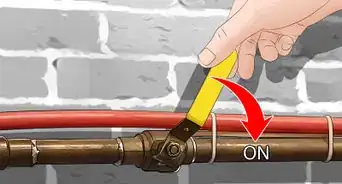
1Turn off the main water supply for your home. Locate the valve for your main water line, which is usually in a basement or outside. Turn the handle on the valve so it’s perpendicular to the pipes so the water can’t come in while you’re working. Make sure the water is completely off so it doesn’t leak or have high pressure when you install your water softener.[15]
- While your water is turned off, you won’t be able to use any of the faucets in your home.
-
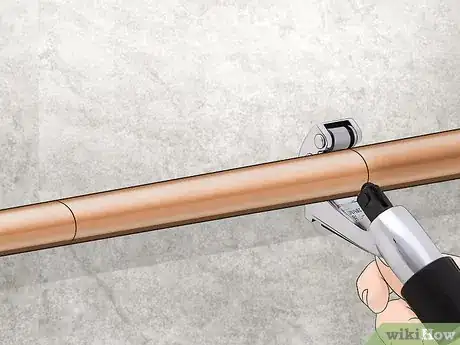
2Cut out a section of pipe on the water line where you want the water softener. Find an area in your home that’s near your main water line and close to a drain or utility sink. Use a pipe cutter to remove a 10–12 in (25–30 cm) section of pipe from the water line so you have space to install your water softener. Once you cut the pipe, carefully pull it out of place and throw it away.[16]
Tip: There may be a small amount of water left in the pipes after you close the valve, so set a towel or bucket underneath your work area to catch any spills.
-
3Attach the water softener to the main water line with flexible metal hoses. Look for the ports on your water softener that say “IN” and “OUT” so you know where to attach your lines. Push the end of the flexible metal hose onto the end of the water line coming into your home and screw it into the “IN” port of the softener. Then connect a second flexible hose to the water pipe running to the rest of your home to the “OUT” line on your softener so your treated water goes into your home.[17]
- You can buy a water softener from hardware stores or water treatment specialists.
- Tighten any connections you made with a wrench to help prevent any leaks in your system.
-
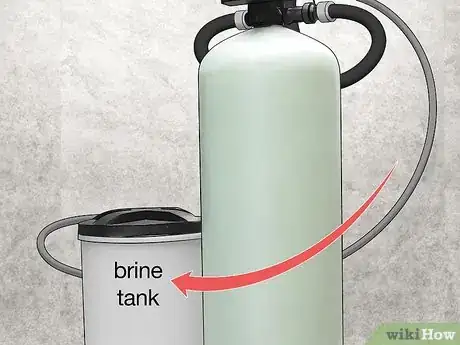
4Connect hose lines between the softener and the brine tank. The brine tank is the section of your water softener that contains salt that removes the hardness from your water. Keep the brine tank in an area near the main softener machine and use the hoses provided with the system to attach them together with hose clamps. Follow the instructions for installing the water softener carefully since the ports may depend on the type of system you have.[18]
- If you have a salt-free water softener, then you don’t have to connect it to a brine tank.
- Water runs between the brine tank and the main softener to help circulate and store soft water.
-
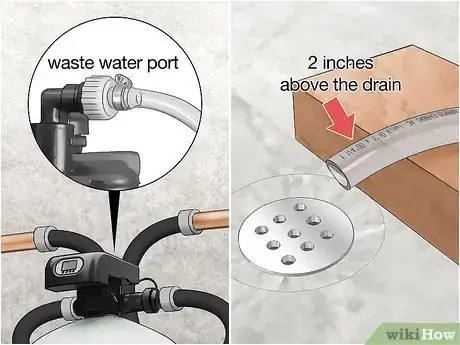
5Run a waste water hose from the water softener to a drain. Water softeners need to drain waste water that contains contaminants so they don’t cycle back into your pipes. Find the waste water port on top of the softener and run a hose from it to a floor drain or utility sink so the water can escape. Make sure the end of the hose is 2 inches (5.1 cm) above the drain so the water can’t accidentally enter the hose again.[19]
Warnings
- Don’t drink well water if it appears discolored or has a strong scent since it could be contaminated with harmful bacteria or minerals.⧼thumbs_response⧽
- Contact a well specialist to come inspect your water if you aren’t sure how to treat it on your own.⧼thumbs_response⧽
Things You’ll Need
Killing Bacteria with Bleach
- Steel measuring tape
- Bleach
- Bucket
- Cleaning cloth
- Hose
Choosing a Water Filter
- Water filter system
Fixing Hardness with Water Softeners
- Water softener
- Pipe cutter
- Pipes made for water
- Flexible metal hoses
- Plastic hoses
- Hose clamps
References
- ↑ https://youtu.be/lh0x4MO3waE?t=124
- ↑ https://web.uri.edu/safewater/files/TipSheetT19_Bleaching.pdf
- ↑ https://extension.uga.edu/publications/detail.html?number=C858-4&title=Disinfecting%20Your%20Well%20Water:%20Shock%20Chlorination
- ↑ https://extension.uga.edu/publications/detail.html?number=C858-4&title=Disinfecting%20Your%20Well%20Water:%20Shock%20Chlorination
- ↑ https://extension.uga.edu/publications/detail.html?number=C858-4&title=Disinfecting%20Your%20Well%20Water:%20Shock%20Chlorination
- ↑ https://web.uri.edu/safewater/files/TipSheetT19_Bleaching.pdf
- ↑ https://extension.uga.edu/publications/detail.html?number=C858-4&title=Disinfecting%20Your%20Well%20Water:%20Shock%20Chlorination
- ↑ https://web.uri.edu/safewater/files/TipSheetT19_Bleaching.pdf
- ↑ https://extension.uga.edu/publications/detail.html?number=C858-4&title=Disinfecting%20Your%20Well%20Water:%20Shock%20Chlorination
- ↑ https://www2.illinois.gov/epa/topics/drinking-water/private-well-users/Pages/well-water-testing.aspx
- ↑ https://youtu.be/gKhDbubxbVM?t=102
- ↑ https://youtu.be/3ZM7Tjpem4w?t=31
- ↑ https://www.cdc.gov/healthywater/drinking/home-water-treatment/water-filters/step3.html
- ↑ http://www.purewateroccasional.net/hwaerationtank.html
- ↑ https://www.watersoftenercritic.com/water-softener-installation/
- ↑ https://youtu.be/p0t6yyKf-4s?t=187
- ↑ https://youtu.be/qy391HwCxbI?t=248
- ↑ https://youtu.be/p0t6yyKf-4s?t=211
- ↑ https://www.watersoftenercritic.com/water-softener-installation/
