wikiHow is a “wiki,” similar to Wikipedia, which means that many of our articles are co-written by multiple authors. To create this article, 15 people, some anonymous, worked to edit and improve it over time.
There are 9 references cited in this article, which can be found at the bottom of the page.
wikiHow marks an article as reader-approved once it receives enough positive feedback. In this case, 95% of readers who voted found the article helpful, earning it our reader-approved status.
This article has been viewed 535,711 times.
Learn more...
Near the end of a pregnancy and throughout the labor period, women experience contractions, a periodic tightening and relaxing of the uterine muscle leading up to birth.[1] Timing contractions is a useful way to determine whether labor is occurring and how soon the birth will take place. Read on for information on how to time contractions.
Steps
Knowing When to Start Timing
-
1Recognize what a contraction feels like. Many women describe contractions as a pain that begins in the lower back and moves in a wavelike fashion toward the abdomen. The feeling is described as being akin to menstrual cramps or constipation. With each contraction, the pain is mild at first, it builds to a peak, and then it subsides.[2]
- During contractions, the abdomen becomes rigid.[3]
- For some women, the pain stays in the lower back area. Contractions feel a little different for everyone.[4]
- At the beginning of labor, most contractions last from 60 - 90 seconds and occur every 15 to 20 minutes. They decrease in duration and increase in frequency as labor draws closer.[5]
-
2Start timing when you feel a few in a row. It's common to feel a contraction now and then in the months leading up to labor. Your body is "practicing" for the main event, and it's usually no cause for alarm. When your due date approaches and you feel several contractions that seem to be following a regular pattern, time them so you can determine whether you're going into labor.
Timing Contractions
-
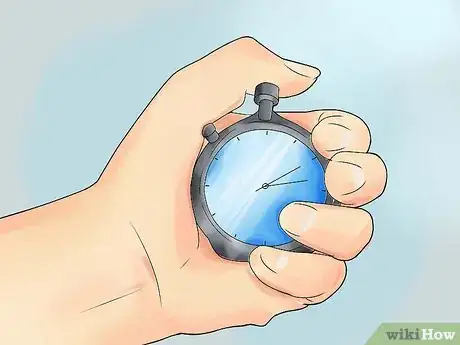
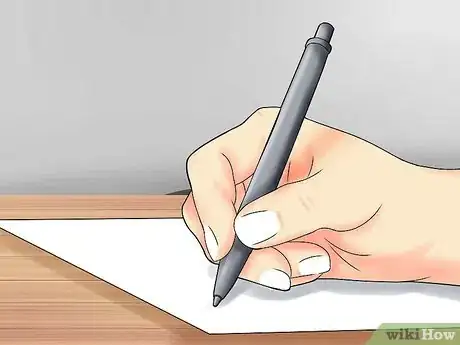
1Decide what timing tools to use. You may use a stopwatch, a clock with a second hand, or an online timing tool to keep track of the frequency and duration of your contractions. Have a pencil and paper handy as well so that you can record the numbers and recognize patterns.[6]
- Use a precise timer, rather than a digital clock without seconds. Since contractions often last under a minute, it's important to be able to time them to the second.
- Make a chart to help you easily record the data. Create a column titled "Contractions," one titled "Time Started" and a third titled "Time Ended." Include a fourth column called "Duration" to calculate how long each contraction lasts, and a fifth column called "Time Between Contractions" to calculate the length of time elapsed between the beginning of one contraction and the beginning of the next one.
-
2Start timing at the beginning of a contraction. Do not start in the middle or at the end of an already-occurring contraction. If you-or whoever is experiencing the contractions-are in the middle of a contraction when you decide to start timing them, wait for the next contraction to begin.
-
3Write down the time the contraction starts. When you feel your abdomen tighten, start the timer or begin watching the clock and jot down the time in the "Time Started" column. The more accuracy you can provide, the better. For example, instead of writing "10 PM," write "10:03:30 PM." If the contraction did start exactly at 10 PM, then write "10:00:00 PM."
-
4Write down the time the contraction ends. When the pain subsides, and the contraction ends, record the exact moment it stopped. Again, include as much information and accuracy as you can.
- Now that the first contraction is over, you can fill in the "Duration" column. For example, if the contraction began at 10:03:30 and ended at 10:04:20, the duration of the contraction was 50 seconds.
- Record other information about the contraction, such as where the pain began, what it felt like, and so on. This could be useful as the contractions continue and you begin to notice patterns.
-
5Write down the time when the next contraction begins. Subtract the start time of the previous contraction from the start time of this contraction and you'll know how far apart your contractions are. For example, if the previous contraction started at 10:03:30 and this contraction started at 10:13:30, then your contractions are exactly 10 minutes apart.
Knowing When You're going into Labor
-
1Recognize the signs of labor contractions. In some cases, women have series of contractions before they go into labor. These are called "false contractions," or Braxton Hicks contractions. Knowing the difference between real labor contractions and false contractions can help you determine what steps to take next.[7] [8]
- Labor contractions get closer together and shorter in duration as the hours pass, while false contractions don't follow a predictable pattern.
- Labor contractions continue even if you switch positions or move around, while false contractions may go away after you move.
- Labor contractions get stronger and more painful over time, while false contractions tend to be weak.
-
2Know the other signs that labor is occurring. Aside from having regular contractions, there are other physical signs that a woman is experiencing labor, rather than false labor.Look for the following changes:[9]
- Water breaking.
- The baby "lightening," or dropping lower toward the cervix.
- Passing of the mucus plug.
- Dilation of the cervix.
-
3Know when to prepare for the birth. It's time to go to the hospital or have the midwife get ready to deliver the baby when "actual labor" occurs. This happens when strong contractions with a duration of 45 to 60 seconds occur 3 to 4 minutes apart.[10]
References
- ↑ https://www.marchofdimes.org/pregnancy/contractions-and-signs-of-labor.aspx
- ↑ https://my.clevelandclinic.org/health/articles/9686-true-vs-false-labor
- ↑ https://www.sutterhealth.org/health/labor-delivery/labor-contractions
- ↑ https://kidshealth.org/en/parents/childbirth-pain.html
- ↑ https://www.kernodle.com/obgyn_blog/stages-of-labor-explained/
- ↑ https://www.allinahealth.org/health-conditions-and-treatments/health-library/patient-education/beginnings/giving-birth/-/media/allina-health/files/health-conditions-and-treatments/health-library/patient-education/beginnings/birth-and-after-birth/laborlog.pdf
- ↑ https://my.clevelandclinic.org/health/articles/9686-true-vs-false-labor
- ↑ https://www.msdmanuals.com/professional/gynecology-and-obstetrics/normal-labor-and-delivery/management-of-normal-labor
- ↑ https://my.clevelandclinic.org/health/articles/9676-labor-delivery
About This Article
To time contractions, you'll need to time how long the contractions last and how far apart they are. When a contraction starts, simultaneously start a timer and note the hour and minute mark. Next, write down when the contraction ends and the duration. You can also note the intensity and location of the pain. As the next contraction begins, write down the start time and subtract it from the previous start time to find the time between contractions. When strong contractions occur 3-4 minutes apart, it’s time to go to the hospital or call the midwife! To learn how to recognize the other signs that labor is happening, keep reading!


Medical Disclaimer
The content of this article is not intended to be a substitute for professional medical advice, examination, diagnosis, or treatment. You should always contact your doctor or other qualified healthcare professional before starting, changing, or stopping any kind of health treatment.
Read More...