This article was co-authored by wikiHow Staff. Our trained team of editors and researchers validate articles for accuracy and comprehensiveness. wikiHow's Content Management Team carefully monitors the work from our editorial staff to ensure that each article is backed by trusted research and meets our high quality standards.
This article has been viewed 66,299 times.
Learn more...
An arbor knot is one of the most basic knots that you can tie and is commonly used to attach fishing reel to fishing spools. Arbor knots consist of two simple overhand knots and can provide more security than a simple overhand knot would provide. While it may look confusing at first, arbor knots are actually very easy to tie as long as you take your time.
Steps
Tying the End Knot
-
1Wrap the string around whatever you’re tying the knot to. Take the free end of the string and wrap it around whatever you’re tying the knot to.[1] Pull both sides of the string so that it’s tight against the object. Both ends of the string should point in the same direction and run parallel with each other.[2]
- If you’re tying the knot to a fishing rod, you’d wrap the string around your spool.
-
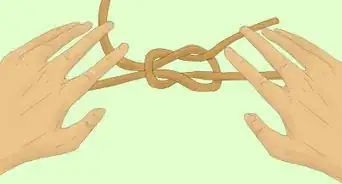
2Form a 1 in (2.5 cm) loop at the end of the line. Hold the free end of the string or rope and cross it over the string or rope to form a loop at the very end of it.[3] [4]Advertisement
-
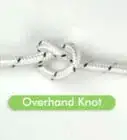
3Pull the free end of the string through the loop. Pull the free end of the string up and through the loop and continue pulling it till it forms a knot. You should now have a small knot at the end of your string or rope.[5]
- This is what is known as an overhand knot, and is one of the most common knots out there.


Finishing the Arbor Knot
-
1Loop the free end of the string over the mainline. The mainline is the portion of rope or string that’s on the other side of your spool or object. Cross the free end of the string (the end with the knot) over the mainline, then bring it under the mainline so that it forms a loop around it. Hold the loop with your fingers.[6]
- This loop should be around 1–2 inches (2.5–5.1 cm) large.
- The main line should be able to move through the loop you created.
-
2Pull the string over the free line. Take the end of the string and cross it over your free line again with the loop still intact.
-
3Pull the end of the string behind and through the loop. Thread the tag end of the line through the loop to make a slip knot. Pull on the free end of the string to tighten the knot. This will create a slipknot that can slide down your string or rope.[7]
-
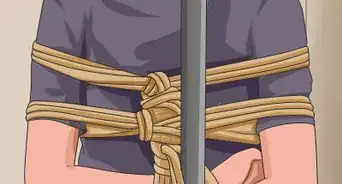
4Pull on both strings to tighten the knot. Pulling on the strings will tighten the slipknot around whatever you’re tying the knot to and position both knots right next to each other.[8]
-
5Trim the excess free line. Use a pair of scissors or a razor blade to cut the excess string on the free line. Cut the line or rope so there is a 1⁄4 inch (0.64 cm) of slack at the end of the knot.[9]


References
- ↑ https://www.netknots.com/fishing_knots/arbor-knot
- ↑ https://www.netknots.com/fishing_knots/arbor-knot
- ↑ https://www.netknots.com/fishing_knots/arbor-knot
- ↑ https://youtu.be/IcoAF_jspGo?t=26s
- ↑ https://youtu.be/IcoAF_jspGo?t=30s
- ↑ https://youtu.be/IcoAF_jspGo?t=43s
- ↑ https://youtu.be/w3TUP9XL72k?t=6s
- ↑ https://www.saltwatersportsman.com/arbor-knot-how-to-video
- ↑ https://www.saltwatersportsman.com/arbor-knot-how-to-video


About This Article

An arbor knot is a basic knot that’s great for attaching fishing reel to spools. To tie one, start by wrapping the string around the object you want to tie it around so you have both ends of string pointing in the same direction. Then, make a 1 inch loop near one end of the string and pull the other end through it to tie a knot. You’ll next need to loop the free end of the string over the main line, which should still be on the other side of your object. Hold the loop in place as you bring the free end of your string over the main line a second time, then thread the end through the loop. Finally, pull on both strings to tighten the knot. For tips on how to trim your string after tying the knot, keep reading!