This article was co-authored by wikiHow staff writer, Christopher M. Osborne, PhD. Christopher Osborne has been a wikiHow Content Creator since 2015. He is also a historian who holds a PhD from The University of Notre Dame and has taught at universities in and around Pittsburgh, PA. His scholarly publications and presentations focus on his research interests in early American history, but Chris also enjoys the challenges and rewards of writing wikiHow articles on a wide range of subjects.
There are 9 references cited in this article, which can be found at the bottom of the page.
This article has been viewed 50,262 times.
Learn more...
In addition to being an annoyance, having backpack straps that keep slipping off your shoulders can lead to shoulder, neck, or back pain. In many cases, the culprit is an improperly fitted school or outdoors backpack, which can be solved by choosing the right size of pack and cinching up the straps properly. Alternatively, you may be able to troubleshoot the problem by making quick fixes to the straps, buckles, or shoulder pads.
Steps
Trying Quick Fixes
-
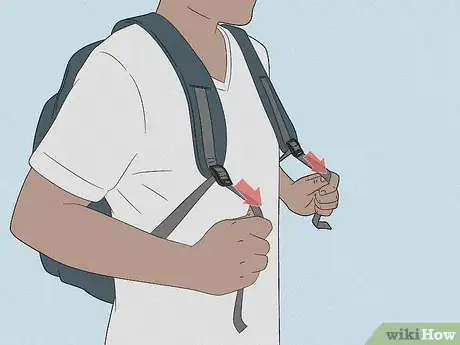
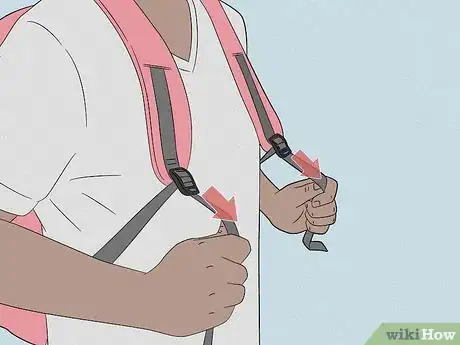
1Tighten the shoulder straps by pulling on the loose ends. With the backpack on, grab the loose ends of the shoulder straps that come out of the adjustment buckles located a little below your armpits. Pull firmly and evenly on each strap so that the backpack pulls up against your back snugly but not uncomfortably tightly—the pack should end up somewhere between your shoulder blades and hips.[1]
- Don’t over-tighten the straps—you should be able to slip your hand between each strap and your underarm.
- If you’ve tightened the straps as far as they’ll go and the pack is still sagging down so far that it touches your backside, the backpack is almost certainly too large for you.
-
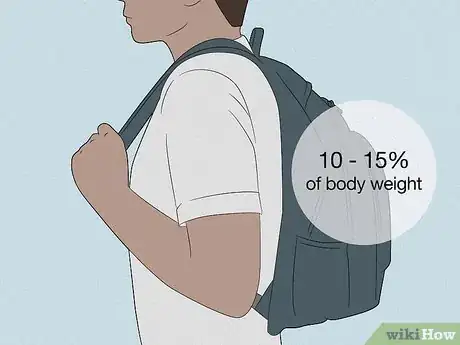
2Cut how much you carry to less than 10-15% of your body weight. If your backpack is too heavy, the straps may slip off of your shoulders more easily. Even worse, the heavy pack may cause back pain, neck pain, or bruising where the straps press against your shoulders.[2]
- Kids should not carry a backpack that weighs more than 10% of their body weight. For instance, a 75 lb (34 kg) child should not carry a pack that weighs more than 7.5 lb (3.4 kg).
- Adults should also stick to the 10% threshold whenever possible, with 15% as the safe maximum.
Advertisement -
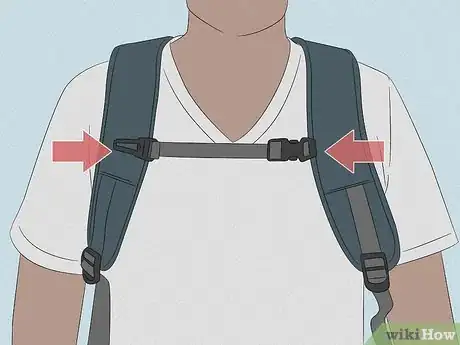
3Connect the shoulder straps across your chest with a sternum strap. Most outdoors backpacks already have sternum straps, but they’re less common on school backpacks. Connecting the shoulder straps with a sternum strap across your upper chest makes slippage nearly impossible, so consider adding them to your pack.[3]
- Look online for “backpack sternum straps.” They usually are made of the same kind of material as shoulder straps, and often have the same type of snap-together buckle to hold them together.
- Whether you have a built-in or added-on sternum strap, proper placement is important. The buckled strap should rest high on your chest, about 1 in (2.5 cm) below your collarbone.
-
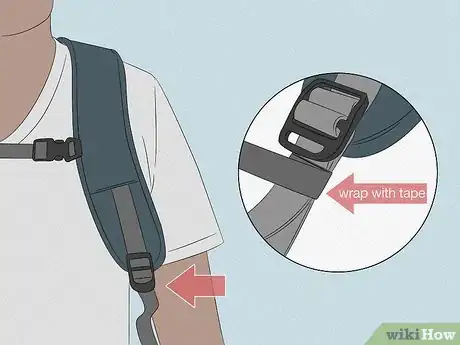
4Tie or tape the shoulder straps if the buckles keep slipping. Backpack shoulder straps typically loop through plastic buckles that make the straps adjustable in length. If these buckles fail to hold properly, the straps will loosen up and slide off your shoulder while you wear the pack. Replacing the buckles is one possibility, but there are quicker alternatives as well:[4]
- One option is to use the free end of the strap below each buckle to tie a simple knot (like the first part of tying your shoe) up against the bottom of each buckle.
- Or, wrap a sturdy tape—like duct tape or electrical tape—several times around both the free and attached sections of strap right below each buckle.
-
5Replace or add to the backpack’s current shoulder pads. While the main job of the shoulder straps’ pads is to prevent the straps from digging into your shoulders, they also help to prevent slippage. Straps with a “grippier” texture on the underside do a better job of keeping the straps in place.
- Search online for “backpack shoulder pads.” If your backpack has built-in shoulder pads that aren’t removable, you can still probably slip another set of pads over top of them. They often attach with snaps or hook-and-loop (Velcro) closures.
-
6Replace low-quality buckles that simply won’t hold the straps. Some backpack buckles are poorly made and are too smooth to effectively grip the straps in place. Even higher-quality buckles may smooth out due to wear-and-tear and lose their grip over time. If this happens, replacing the buckles may be the best solution to your problem.[5]
- Strap buckles come in different shapes, sizes, and styles. Your best bet is to bring the backpack with you to a retailer that specializes in camping and hiking gear. A store associate can help you find the right buckles for your needs.
Fitting an Outdoors Backpack
-
1Choose an outdoors backpack based on your torso length. Grab a flexible cloth tape measure and have a friend hold it to your spine, making sure it follows the contours of your back. Have them record the measurement between the base of your neck (the C7 vertebra) and the vertebra that’s even with the tops of your hip bones.[6]
- Bring this measurement with you to an outdoors store, or use it to shop online. If your measurement is shorter than 16 in (41 cm), for instance, you may need an extra small pack, while you may need a large pack if it’s longer than 20 in (51 cm).
-
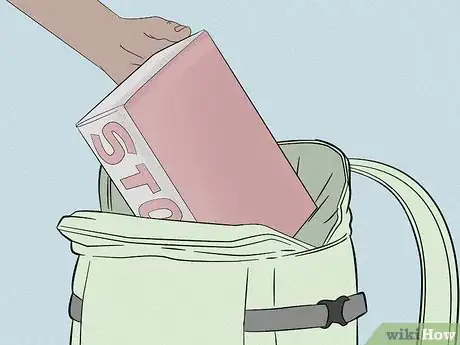
2Put on the loaded pack without tightening any of the straps. Load up the backpack with the gear you plan to put in it when using it, placing heavier items in first so they rest closest to your back. If the waist belt or sternum strap are buckled, undo them so you can slip the pack over your shoulders.[7]
- Outdoors backpacks are made to carry a lot of gear, but the loaded pack shouldn’t weigh more than 10% (for kids) or 10-15% (for adults) of your body weight. For example, a 150 lb (68 kg) adult shouldn’t carry a backpack that weighs more than 15–22.5 lb (6.8–10.2 kg).
-
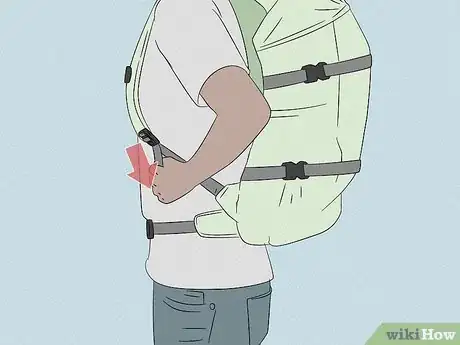
3Clip and tighten the waist belt so it’s at the top of your hips. Snap together the buckle on the waist belt that runs between the bottoms of the shoulder straps. Pull on the loose end of the strap until the belt is snug (but not uncomfortably tight) against your hips and abdomen.[8]
- The waist belt should go right over the tops of your hip bones (called the iliac crest). If it’s above or below this point, adjust the positioning of the belt and/or backpack.
- Once secured, the waist belt should carry the majority of the backpack’s weight. This way, the larger muscles and bones in your legs do most of the work.
-
4Tighten the shoulder straps and load lifters to secure the pack. Pull on the loose strap ends coming from the shoulder strap buckles positioned to the sides of your chest. Snug them up until the backpack generally conforms to the shape of your spine—but don’t make them so tight that they’re uncomfortable. Then, pull the loose straps for the “load lifters,” which are located above your collarbone.[9]
- Cinching up the load lifters brings the top of the pack closer to your upper back. As with the shoulder straps, tighten them until you have a snug, but not uncomfortable, fit.
-
5Secure the sternum strap and test the pack’s fit. Clip together the buckle on the sternum strap, then adjust the positioning of the strap (if needed) so that it runs between the shoulder straps about 1 in (2.5 cm) below your collarbone. Pull on the loose end of the strap until you have a snug but not uncomfortable fit.[10]
- At this point, the backpack should feel comfortable and secure, with most of its weight distributed to your legs.
- Take a short walk around with the pack on your back. If the pack feels uncomfortable, or if the straps feel like they’re slipping, fine-tune the buckle tightness until you get the right fit.
Sizing a School Backpack
-
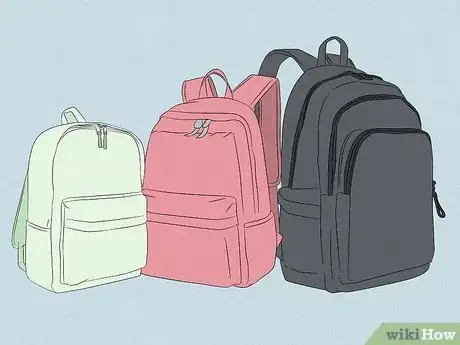
1Buy a backpack that’s suited to your age and size. While hiking and camping backpacks are sized based on your torso length, school backpacks usually come in more general size categories like “small,” “medium,” and “large,” or “youth,” “teen,” and “adult.” Use these categories for guidance, but base your purchase on the age and especially size of the wearer.[11]
- If the backpack is for you or the intended wearer is with you, hold the pack up to your (or their) chest. It should fit between the bottom of your collarbone and the top of your hips.
- The straps on a pack that is too large may not cinch up enough to keep them in place, resulting in strap slippage.
-
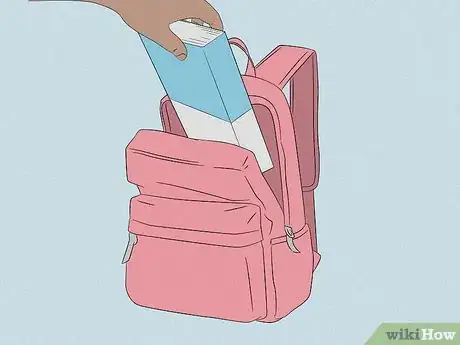
2Load heavy items in the pack first, but don’t overload it. Fill the pack with the typical materials you’ll be carrying, like books and a lunch bag. For comfort and safety, place heavier materials in the pack first, so that they’re closest to your back when the pack is on.[12]
- A loaded backpack should weigh no more than 10% of the body weight of a child, or 10-15% of the body weight of an adult. In other words, a 50 lb (23 kg) kid shouldn’t carry a pack that weighs more than 5 lb (2.3 kg).
-
3Slip the loaded pack over your shoulders with the straps loosened. The straps on a newly-bought backpack are usually pretty loose, so just leave them that way for the moment. If the straps are already uncomfortably tight, loosen them by lifting up on the side of each shoulder strap buckle where the loose end of the strap exits it.[13]
- Feed some of the excess strap back into each buckle if they don’t loosen up on their own.
-
4Pull the shoulder straps tight so the pack snugs to your back. Grab the loose ends of the shoulder straps, one in each hand, and pull firmly. Cinch up the straps until the pack slides up against your back between your shoulder blades and the tops of your hips. There should be very little slack in the straps, but you should still be able to fit your hand between the strap and your underarm.[14]
- The backpack shouldn’t be touching your butt! If it is, the backpack is either too big or too heavy for you, or you need to cinch up the straps some more.
Warnings
- Always wear a backpack with both straps over your shoulders. Carrying the pack on just one shoulder can cause neck and back pain—and the strap will definitely slide off more easily!⧼thumbs_response⧽
References
- ↑ https://kidshealth.org/en/teens/backpack.html
- ↑ https://uihc.org/health-topics/your-backpack-too-heavy
- ↑ https://youtu.be/HwuqwuJ5Dz0?t=15
- ↑ https://youtu.be/l9Hj9YtUQPU?t=150
- ↑ https://youtu.be/p5AcVEUE1n0?t=1
- ↑ https://www.theactivetimes.com/how-choose-hiking-backpack
- ↑ https://kidshealth.org/en/teens/backpack.html
- ↑ https://pangolinswithpacks.com/the-definitive-guide-that-you-never-wanted-fitting-and-adjusting-your-backpack-157f510d46cd
- ↑ https://www.theadventurejunkies.com/how-to-fit-a-backpack/
- ↑ https://pangolinswithpacks.com/the-definitive-guide-that-you-never-wanted-fitting-and-adjusting-your-backpack-157f510d46cd
- ↑ https://pangolinswithpacks.com/the-definitive-guide-that-you-never-wanted-fitting-and-adjusting-your-backpack-157f510d46cd
- ↑ https://www.aota.org/~/media/Corporate/Files/Backpack/Backpack%20Strategies%20for%20Parents%20%20Students.pdf
- ↑ https://kidshealth.org/en/teens/backpack.html
- ↑ https://kidshealth.org/en/teens/backpack.html
