X
wikiHow is a “wiki,” similar to Wikipedia, which means that many of our articles are co-written by multiple authors. To create this article, 13 people, some anonymous, worked to edit and improve it over time.
This article has been viewed 21,714 times.
Learn more...
Everyone wants to have a bake sale for their school, but how do you set up the table? Read below and learn how to leave no treat unsold, and create a dashing display of decadent cookies and sweet cakes.
Steps
Part 1
Part 1 of 2:
Packaging the Baked Goods
-
1Wrap up loaves of handmade bread. Put each into a clear bag. Tie it up carefully with a ribbon, and slip a label onto the end of the ribbon before you tie it. Trim the excess ribbon to desired length.
-
2Put cakes into special containers. Put cakes into boxes for now. When you reach the bake sale table, line a cake tray with a lace doily. Place the cake on top, and put a cake cutter next to it. Somewhere on the cake tray's lid, tape the label so everyone knows what kind of cake it is.Advertisement
-
3Package cookies. In a wax paper bag, gently place a few cookies in each one. Punch holes in the top, and thread the ribbons through it. Again, put the label on the ribbon, tie the ribbon, and trim the excess ribbon.
-
4Package cupcakes and muffins. Put each cupcake or muffin into a clear plastic cup. On the side, tape the label. Hole punch a sheet of colored plastic wrap, and thread ribbon through the holes. Then tie the ribbon around the cup, and trim anything unneeded off.
-
5Wrap brownies individually in plastic wrap. Once wrapped, label each one with its desired label. If desired, thread the label on a ribbon and tie the brownies like you did for the cupcakes, cookies and loaves of bread. It gives it a special appearance. You could also line the bottom of the brownie with paper of the same size before wrapping it for a more appealing touch.
-
6Store drinks. If you made lemonade or anything like that, put each into one of the pitchers that have lids and a little spout. You can carry these around, and won't have to worry about spills! Just remember to bring ice to put into the drinks, and cups to pour the drinks into. Put little stands in front of each drink so customers know what they are.
-
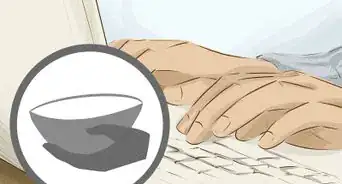
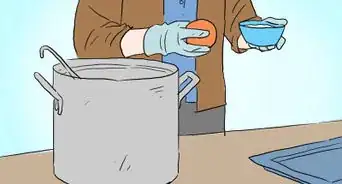
7If you are selling popcorn, line paper cups with tissue paper. When someone wants popcorn, scoop it out of a bowl and into a cup. Leave the cups on a tray labeled "(flavor) popcorn" and tell customers you put it into the cups when someone wants it.
-
8Bring any mint candies you might have bought. The chocolate ones with the mint filling are best. Keep them in their package until you reach your table, and then pour them into it until the bowl is full. Keep any extras in case you run out, and don't charge for these.


Advertisement
Part 2
Part 2 of 2:
Setting Up the Table
-
1Assemble the table. If you have more than one, make sure they line up perfectly with one another, and make sure they are level so they don't wobble. Line the table with a table liner, then a table cover.
-
2Set up a beach tent over your table. In case it rains, customers, and you, will have a dry place to stand. Tape posters to the tables as well. If you made a menu, or list of all your products with ingredients and prices, tape that somewhere too.
-
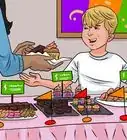
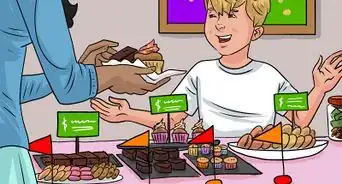
3Place cakes on their stands in the middle of the table. Set out three trays and put cupcakes in one, muffins in another, and cookies in the last one. If you are selling popcorn, you will have to use one more tray and place the cups in them for when you are ready to use them. Arrange brownies and the loaves of bread on plates, and arrange them in whichever way looks best to you.
-
4Look around after you place all your treats. In a wide enough space, lay down the drinks. Place napkins and cups next to each other closest to you, and place your bowl of chocolate mints behind the cash register, closer to the other end of the table. If you are collecting donations, put your jar near the middle, and make it flashy to attract the eyes of your customers.
-
5Set up chairs, and place coolers, extra labels, and extra treats under the table. Place your popcorn in a large cooler near your popcorn cups as well, so you can fill those quickly. If you are making receipts, have little sticky notes and a pen ready to write down everything a customer bought, and how much they paid. Have a calculator near your register, and make sure you have change in the register, too.


Advertisement
Warnings
- If you frost anything, keep it as cool as you can. Frosting melts easily, and letting it sit out for too long might cause it to melt.⧼thumbs_response⧽
- Don't be the only one at the booth. The rush of customers might get to you, and if you are a child or teenager, you need adult supervision. Always have your friends and family selling with you.⧼thumbs_response⧽
Advertisement
Things You'll Need
- Baked goods
- Table cover
- Table liner
- Chairs
- Cash register
- Donations jar
- Chocolate mints
- Bowl
- Cups
- Boxes
- Bags
- Plastic wrap/wax paper
- Labels and pen
- Trays for cake
- Trays to display goods
- Plates to display goods
- Cups and napkins
- Receipt paper


About This Article
Advertisement