This article was co-authored by wikiHow Staff. Our trained team of editors and researchers validate articles for accuracy and comprehensiveness. wikiHow's Content Management Team carefully monitors the work from our editorial staff to ensure that each article is backed by trusted research and meets our high quality standards.
There are 14 references cited in this article, which can be found at the bottom of the page.
This article has been viewed 19,945 times.
Learn more...
If you’re passionate about cooking or baking, selling food online is a great way to turn your hobbies into a business. Selling food online nowadays is a popular income generating activity. This also allows you to be creative with how you market your product and reach more customers. To be able to attract customers, a seller must build a reputation among his customers and to the public. Thus, this will increase your credibility as a seller. From there, marketing your product is going to be key to getting your business off the ground. Whether you want to stay small or go big, selling food online is a fun way to share your favorite eats!
Steps
Getting Licensed
-
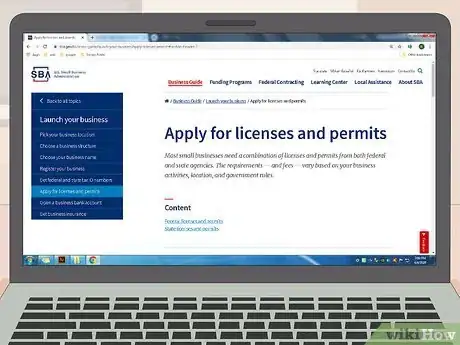
1Apply for a business license on your state’s government website. The process of applying for a business license from your state may vary depending on your location and particular activities (that is, the type of food you’re selling). Do an online search for your state’s business permit office. For example, you might search: “Texas business permit office” or “California business license application.”[1]
- Pay attention to the date that your license expires—different states and cities have different rules about when to renew business licenses.
- Since you’re selling food, you won’t need a federal license.
-
2Get professional liability insurance to protect you from claims and lawsuits. Professional liability insurance means that you won’t have to pay for legal defense if customers or any business partners file claims against you. Some states require businesses to have this type of insurance, so refer to your state’s business licensing regulations.[2]
- Even if it’s not required in your state, it’s wise to have liability insurance in case of misunderstandings or unhappy customers.
- The deductible amounts range from $1,000 to $25,000. If you’re running a small business with relatively low risk, you can stick to a lower deductible.
Advertisement -
3Apply for your DBA certificate. DBA stands for “doing business as” and it’s also referred to as an “assumed name certificate.” Whether you’re selling food as a sole proprietor, partnership, or corporation, it’s required in most counties in the United States. It only costs $15 to $50 depending on your location.[3]
- If you register for a DBA without first forming an LLC, your business will be recognized as a sole proprietorship.
- An LLC isn’t required in most states, but it is beneficial for ensuring limited personal liability (i.e., your business debts won’t be seen as your personal debts). There’s also less paperwork and, depending on your state, some tax benefits.
- Come up with a memorable DBA name that relates to your product in some way. For instance, if you’re selling vegan baked goods, you might call it “Mindful Muffins.”
-
4Obtain a tax permit. Tax permits mean that you collect city or state taxes when you sell food online. Some states only require a sales tax for out-of-state purchases while some require them for both in-state and out-of-state. Often times, there is a special type of tax for internet vendors, so check your state’s website to read the rules before applying for your permit.
- Some areas won’t charge you for obtaining a tax permit while others only charge a small fee (anywhere from $10 to $50).
- Apply at https://www.sba.gov/business-guide/launch-your-business/apply-licenses-permits
-
5Follow cottage food laws in your state. Cottage food laws allow small producers to cook, bake, can, pickle, dry, or candy foods in their homes and sell the goods for a profit. Some states have extra guidelines according to the type of food that you’re selling (e.g. baked goods versus canned or pickled goods). To see the specific state laws you need to follow, visit https://foodpreneurinstitute.com/cottage-food-law/.
- For instance, the state of Texas requires specific steps to be taken in order to legally sell pickled and fermented foods.
- Cottage Food Laws in most states have the following principles in common:
- You have to have proper stores for all food (cold or dry).
- No pets allowed in the kitchen.
- You need a state business license.
- You must get zoning clearance and all necessary permits from your local government.
- You have to have a kitchen inspection at least once a year (performed by the health department).
-
6Acquire a food handlers card by taking a course online or in person. You’ll learn about food safety, preparing and storing food, safe cooking temperatures, proper hygiene, and foodborne illnesses. You can take it online (which typically costs around $10 and takes 2 hours) or in a classroom setting.
- You must score a 70 or above on the exam to obtain your food handler’s card. It expires 2 years from the date that you completed the course.
-
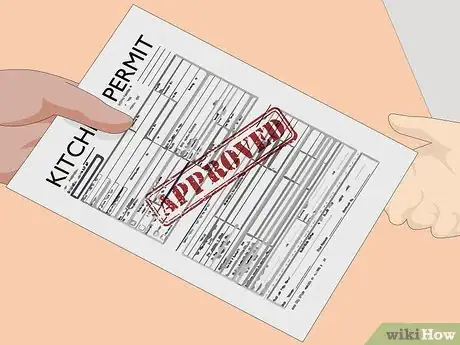
7Get a local permit for your kitchen. Contact your county or local government to have your kitchen approved. If you’re operating from home, you may need to have someone from the local health department inspect your kitchen to see that it meets zoning and food safety laws.[4]
- If you rent space in a shared commercial kitchen, they’ll already have their permits in order.
Finding a Reliable Supplier
1 Look for reputable suppliers in online directories or ask from the established people you know in the industry. You must assure that the supplier is certified and has a good record. Do research by reading reviews about their service in terms of communication, transparency, workplace practices, and prices. Be guided that you must seek different suppliers for you to be able to have many options and to acquire the cheapest raw products.
2 Ask all the details you need to verify to the supplier in order to make sure they are credible. Consider them as your business partners. Without them, your business will not go through as well. You may inquire about their policies and management. It is also important for you to know their mode of payment and terms they can offer. In this way, you may know the minimum order they offer or if they can give discount and freebies if you order in bulk.
3 Do a background check. If you know someone who is buying the same product that you will be using from them, do not be reluctant to ask them. The easiest way for you to make a phone call to them or simply visit them. Also, do not forget to ask for recommendations and learn from them. 4 Choose suppliers that hold the same values as your business. For example, you want your food to be halal, make sure that these suppliers abide by those practices. If in doubt, you may give them a call or send them and email inquiring about their business practices. 5 Shop from wholesale stores if you’re making small batches. Wholesale stores are great option if you’re just starting out, only making small batches. For example, the food you are selling needs to be placed in a box. In the Philippines, ordering from Divisoria will surely help you to reduce cost of the materials you need since they give discount.
Labelling Your Products Properly
-
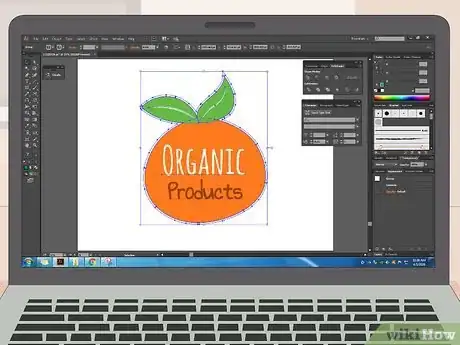
1Create an interesting logo and label so your products stand out. Search online for a business that makes custom labels that you can buy in bulk. If you have a knack for design, make your own logo. If not, some custom labelling companies have in-house artists that can work with you to create the perfect label.[5]
- If you don’t want to design your own logo or label, some custom labelling vendors have templates for different types of products.
- You can also hire a designer to create a unique logo.
-
2Choose a packaging and shipping company to distribute your goods. Packaging and shipping can be pricey, especially if your products require refrigeration or extra padding. USPS, UPS, and FedEx all offer special rates for small businesses depending on the size and weight of the package, the delivery location, and the volume of shipments. Typically, the more items you ship annually, the lower your rate will be.[6]
- Shop around online for discounted packaging supplies.
- Get quotes from multiple packaging and shipping suppliers before making a decision.
- If you’d like to have exterior printed packaging with your company logo, this will cost extra.
- Think about whether you’ll need extra space in the package for promotional items and any freebies you may want to offer.
-
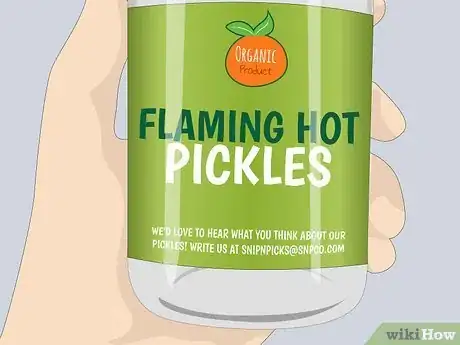
3Put your company name, logo, and contact info on the package. The name of your business and the logo are the things customers will remember the most—make them stand out they can spread the word! Your contact information is necessary in case the customer has a problem or inquiry.[7]
- Use colors that reflect your business aesthetic and attract people to your product. For instance, bright reds, yellows, and greens are great choices for hot sauces while muted colors might work better for milder-tasting goods.
- For your contact information, list a professional email, not your personal one.
- Let your customers know you’re open to feedback. For instance, before your contact info, you might write: “We’d love to hear what you think about our pickles! Write us at Snipnpicks @snpco.com.”
- Make sure your logo is interesting but still readable. For instance, avoid cursive scripts for small font and make sure the text on the package is large enough to read. Don’t use font colors that are similar to the background color (e.g., bright red text on a maroon background).
-
4Make your product’s packaging stand out from the competition. Create interesting packaging that complements the product and reflects the values of your business. For example, if you’re selling all-natural products, you might want to use compostable or biodegradable packaging with earthy colors (like green and brown).[8]
- Take the cost of packaging into consideration when calculating your total expenses.
- Make sure the packaging is appropriate to the product. For instance, if you’re selling muffins, make sure they’re in a sturdy container so they don’t get smashed during shipping.
- Consider the weight of the packaging—heavier items will cost more to ship than lighter ones.
-
5Disclose all of the ingredients on your packaging. Customers turn to the ingredients lists to know exactly what they’re eating, which is crucial if they have particular allergies or other dietary restrictions. List the largest quantity ingredients first and go down from there (i.e., if your product is mainly made up of wheat flour, list that first). Highlight food allergens in bold font or in a separate statement (or both).[9]
- For example, you might write “Allergens: Wheat, eggs, peanuts” in bold font under the ingredients list.
- If you have a website, you’ll need to put the ingredients on there as well. That way, customers won’t have to ask you questions about particular ingredients.
-
6State the net quantity and the combined weight of the product. Tell your customers how much of the product they’re getting. Use ounces and milliliters for liquid products and grams and ounces for solids. If applicable, state how many items are in a single package (e.g., “3 4-oz. cookies”).[10]
- If you’re renting space in a commercial kitchen, they probably have kitchen scales for this purpose.
- If you’re working from home, get a small kitchen scale to measure the weight in grams and ounces. If your product is liquid, take note of how many cups and ounces go into each bottle or jar and be consistent with your serving sizes.
-
7Mention the name and location of your company and the supplier. You need to state your name and location (city and state) in order to adhere to the FDA’s Fair Packaging and Labeling Act. Telling customers where you are and, if applicable, the name(s) of your supplier(s) can also add to your marketing scheme.[11]
- For instance, saying that your macaroons are made from organic free-range eggs on your own family farm might draw people who like to eat local goods, avoid animal cruelty, and support independent farms.
- If you’re using a supplier, stating their name on the package will draw in more customers who already like their particular products.
-
8Give instructions on how to store and handle the product. If you’re selling something that needs to be refrigerated right away or after opening, state that on the package. You can put it near the quantity and weight or close to the ingredients list. If necessary, state whether the product will go bad after a certain period of time (e.g., “perishable”) or if it should be handled with care (e.g., “fragile”).[12]
- You might give an expiration date (“Use by 10/6/20) or state how long the product is good after opening (e.g., “Use within 7 days of opening”).
- If your product requires reheating, give specific instructions on how to do that. You can send a small leaflet with the product or put it on the package. For instance: “Preheat oven to 300°F (148°C). Wrap each muffin in foil. Place muffins on baking sheet. Wait 10 to 12 minutes. Enjoy!”
Selling Your Products
-
1Sell your products online via your own website. Luckily, there are tons of web builder sites made for small business owners to sell their goods—no fancy internet lingo required. Set up your store via one of these sites. Or, if you want to increase your visibility on search engines, buy your own domain name from a legitimate registrar.[13]
- A few popular web builder sites include Shopify, Weebly, and Wix.
- Start a blog where you offer an inside look at your business practices (like recipes and what inspired you to create your business) to draw in a following.
- Allow customers to sign up for newsletters via email so you can send them special offers, news about your business, and any other market materials. Just don’t flood their inboxes!
-
2Post professional-looking photographs of your products. Hire a photographer to take photos of your products or use a quality camera (some smartphones have great resolution) to do it yourself. Use a spotlight lamp or natural light to make your photos clear and colorful.[14]
- Take photos close up to show texture and true-to-life coloring.
- Lifestyle photography is a great way to show off your product. Show it being served in a way that reflects your company’s core values.
-
3Pitch your product to established online retailers. Look for independent online grocers or specialty shops if your items are considered “niche.” You can also approach restaurants and other vendors about selling your items in their stores or via their online ordering system (if they have one).[15]
- Keep in mind that they’ll take a cut of the profits.
- Target retailers with your intended customers. For example, your vegan gluten-free cookies are more likely to sell from an online specialty foods vendor than they are a general grocer that sells mass-produced products.
-
4Take your total expenses into account when you price your items. Finding the proper price for your products can be tricky. Calculate the cost to make a single item (including ingredients, labeling, packing, shipping, and labor) and set a price that gives you a profit for each item sold. You can also price your items according to your competitor’s prices, which is good to consider if your products will be on a shelf with similar items.[16]
- For instance, if it takes $4.00 to make a single jar of pickles, selling them for $5.50 is going to give you a profit of $1.50 per jar sold. If you sell (on average) 20 jars a week, that’s a total profit of $30.00 per week.
- Think about how much you, as a customer, would be willing to pay for your products—keep the prices realistic and attractive.
-
5Use social media platforms to reach customers. Start a page for your business on Facebook, Instagram, and/or Twitter to market your products. Friends and family members can help spread the word by reposting your posts. You can also follow other online vendors that have a following similar to your own target audience.[17]
- Keep all of your social media accounts consistent in terms of the color scheme, photos, and tone.
- Offer discounts and giveaways to followers for tagging their friends—this will help reach more potential customers.
-
6Use sturdy boxes and cold packs to keep perishable items fresh while shipping. Shipping naturally takes time, but when it comes to perishable items it’s best to ship them overnight. Meat and poultry items should be sent cold or frozen (below 40°F or 4°C) with a cold source inside the packaging. Foam or heavy corrugated cardboard are the best types of packaging for cold items.[18]
- Make sure the shipping box says “Keep Refrigerated” on the outside so the customer knows they need to open it and refrigerate it as soon as possible.
- Pack your products in sturdy boxes that won’t bend, break, or squish the food.
- Avoid sending packages at the end of the week so they don’t end up sitting at a mailing facility over the weekend. Let your customers know that you only ship cold items at the beginning of the week.
Warnings
- Selling food online without the necessary licenses and permits will result in fines and your business getting shut down.⧼thumbs_response⧽
- Make sure your food meets health and safety standards.⧼thumbs_response⧽
References
- ↑ https://gov.texas.gov/business/page/start-a-business
- ↑ https://www.iii.org/article/professional-liability-insurance
- ↑ https://www.mda.state.mn.us/food-feed/cottage-food-law-guidance
- ↑ https://www.fda.gov/food/food-industry/how-start-food-business
- ↑ https://www.entrepreneur.com/article/71902
- ↑ https://www.fundera.com/blog/best-shipping-services
- ↑ https://ecommerce-platforms.com/articles/how-to-sell-food-online
- ↑ https://ecommerce-platforms.com/articles/how-to-sell-food-online
- ↑ https://ecommerce-platforms.com/articles/how-to-sell-food-online
- ↑ https://www.fda.gov/food/food-industry/how-start-food-business
- ↑ https://www.ftc.gov/enforcement/rules/rulemaking-regulatory-reform-proceedings/fair-packaging-labeling-act
- ↑ https://www.fda.gov/food/food-industry/how-start-food-business
- ↑ https://www.entrepreneur.com/article/219410
- ↑ https://www.practicalecommerce.com/How-to-Take-Gorgeous-Product-Photos
- ↑ https://www.inc.com/ilan-mochari/cracking-boutique-retailers.html
- ↑ https://extension.psu.edu/food-for-profit-price-and-pricing
- ↑ https://www.entrepreneur.com/article/252733
- ↑ https://www.fsis.usda.gov/wps/portal/fsis/topics/food-safety-education/get-answers/food-safety-fact-sheets/safe-food-handling/mail-order-food-safety/CT_Index


