This article was co-authored by wikiHow staff writer, Travis Boylls. Travis Boylls is a Technology Writer and Editor for wikiHow. Travis has experience writing technology-related articles, providing software customer service, and in graphic design. He specializes in Windows, macOS, Android, iOS, and Linux platforms. He studied graphic design at Pikes Peak Community College.
This article has been viewed 2,653 times.
Learn more...
Do you have an awesome pattern you made in Illustrator? Do you want to know how to save it so you can use it over and over again? Luckily, Adobe Illustrator allows you to save a pattern as a swatch. Then you can save the swatch library so you can use it in future projects. This wikiHow article teaches you how to save a pattern in Adobe Illustrator as a swatch and then save the swatch library.
Steps
Creating a Pattern
-
1Create a new project in Illustrator. You can create a new project at any time in Illustrator by clicking File in the menu bar at the top, followed by New Alternatively, you can use the following steps to create a new project when opening Illustrator:
- Click the Illustrator icon to open Illustrator.
- Click New on the title page.
- Select Web, Mobile, or Print.
- Enter the height and width of your project artboard. You can adjust the size of the artboard at any time using the artboard tool.
- Click Create.
-
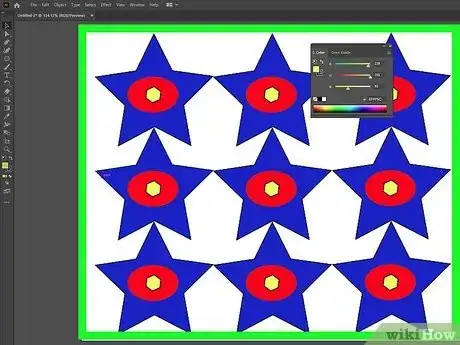
2Create a pattern in Illustrator. Use the drawing tools in Illustrator to create a pattern tile. A pattern tile is a single instance of your pattern that can be saved as a swatch and used to create a repeating pattern.
- Adobe Illustrator is part of the Adobe Creative Cloud Suite. You can download, and install Adobe Illustrator using the Creative Cloud desktop application, or using the Adobe website.
Advertisement -
3Select your pattern. To do so, click the icon that resembles a black mouse cursor or press V on the keyboard to select the selection tool. Then click and drag a selection box over your pattern.
- If you want to create space in between the repeating pattern elements, add a square, rectangle, or hexagon with no fill color around the pattern.[1]
-
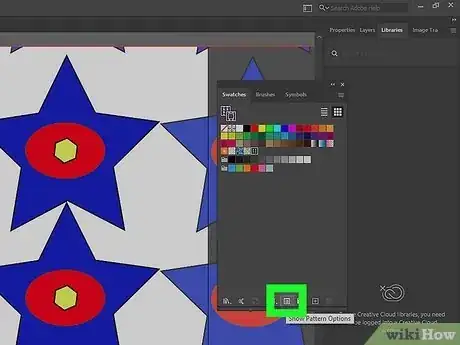
4Open the Pattern Options window. There is a variety of ways you can open the Pattern Options window. Use one of the following steps to open the Pattern Options window:
- Drag and drop your pattern selection into the swatch library window.
- Click Edit followed by Define Pattern.
- Click Object followed by Pattern. Then click Make.
-
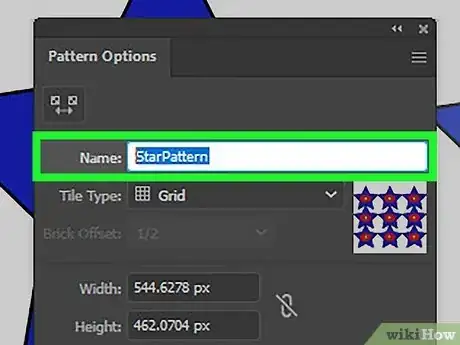
5Type a name for your pattern swatch. Enter the name for your pattern next to "Name."
-
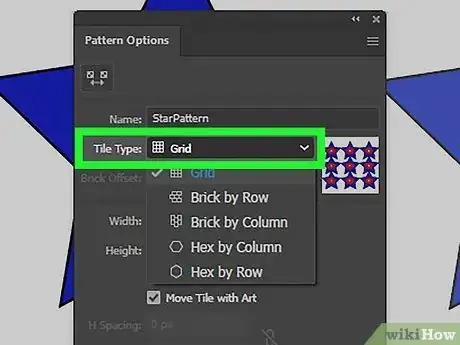
6Select a tile type. Use the drop-down menu next to "Tile Type" to select what type of tile your pattern is designed for. Your options are as follows:
- Grid: This option creates square-shaped types that are aligned in the center.
- Brick by row: This option creates a repeating pattern where each vertical row is offset in a brick-like pattern.
- Brick by column: This option creates a repeating pattern where each horizontal column is offset in a brick-like pattern.
- Hex by row: This option creates hexagon-shaped tiles where each horizontal row is offset and staggered.
- Hex by column: This option creates hexagon-shaped tiles where each vertical column is offset and staggered.
-
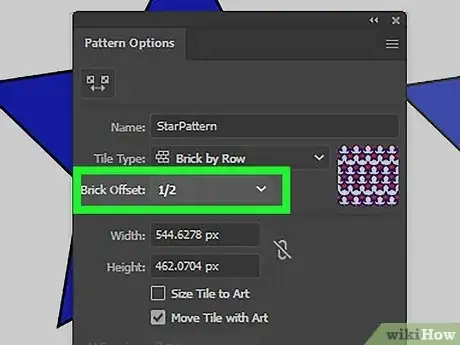
7Adjust the Brick Offset. Use the drop-down menu next to "Brick Offset" to determine how much the tiles are offset in the columns or rows.
-
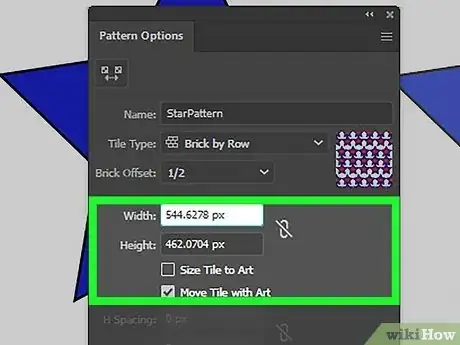
8Enter the height and width of the tile. If you want, you can specify the exact dimensions of the tile by entering the height and width of the tile next to "height" and "width" in whatever unit of measurement your Illustrator file is set to use.
- Click the checkbox next to "Size Tile to Art" to automatically set the height and width of your tile to match the size of your artwork.
- Click the checkbox next to "Move tile with Art" to be able to move the tile if you move your artwork tile on your artboard.
-
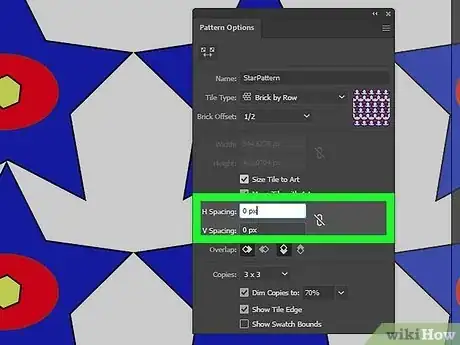
9Enter any horizontal and vertical spacing (optional). If you want there to be spacing in between the tiles, you can enter how much space you want in the spaces next to "H Spacing" and "V Spacing". Use the box next to "H Spacing" to enter how much space you want in between columns. Use the box next to "V Spacing" to enter how much space you want in between rows.
- Additionally you can enter negative numbers (i.e, "-20") to bring the tiles closer together.
-
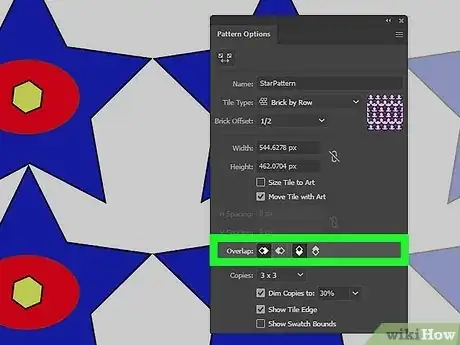
10Select if you want your tiles to overlap (optional). If you want your tiles to overlap, click one of the icons next to "Overlap" to determine how you want them overlap. They can overlap from left to right, right to left, top to bottom, or bottom to top.
-
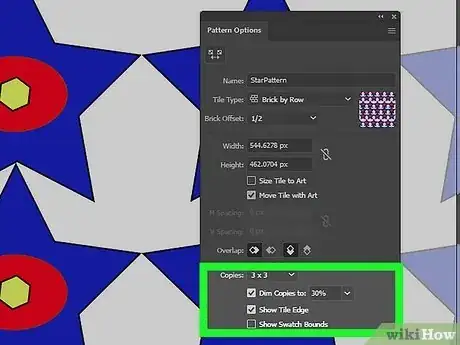
11Adjust the preview of the pattern. The Pattern Options menu has several options that allow you to adjust how you preview the pattern. Use the following steps to adjust how you preview the pattern.[2]
- Copies: Use the drop-box next to copies to select how many copies of your tile are previewed and how they are arranged.
- Dim copies to: Click the checkbox next to "Dim copies to" to dim all copies except for the original tile. Then you can use the box next to this option to enter how much you want to dim them by. Uncheck this option to view all copies in full color.
- Show tile edge: Click the checkbox next to his option to show a blue bounding box around the edge of your original tile.
- Show swatch bounds: Click the checkbox next to his option to show a unit portion of the repeating pattern.[3]
-
12Click Done. This saves your pattern to the swatch library as a new pattern swatch.[4]
- You can apply a pattern swatch in your swatch library by clicking and dragging it onto your artboard to create a single tile, or you can create a shape on your artboard and click and drag a pattern swatch into the shape to apply the pattern to the entire shape.
- To adjust the pattern options of a saved pattern swatch, double-click the pattern swatch in the swatch library window.
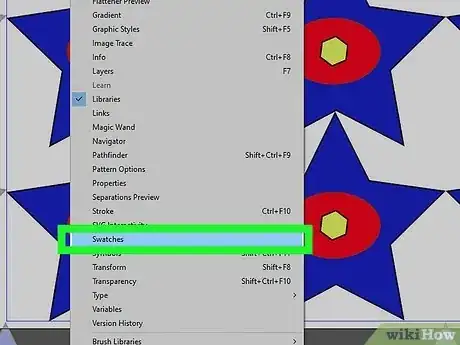
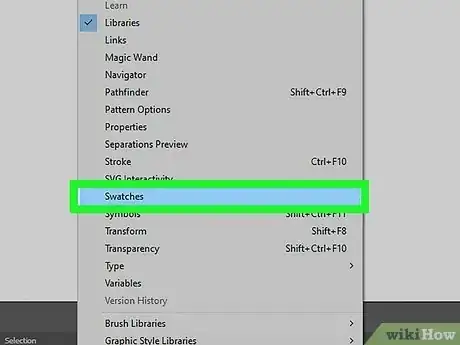
- To display the swatch library window, click the icon that resembles 6 swatches with different shades of grey in the panel to the right. If you don't see this option, click Window in the menu bar at the top and then click Swatches.
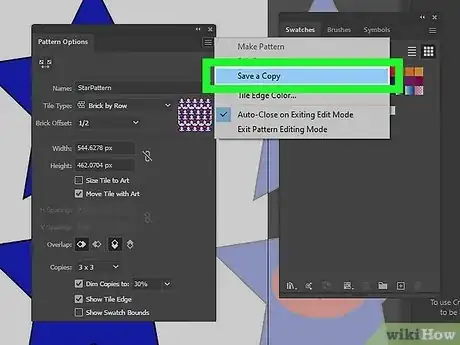
- You can also click + Save a Copy to save the pattern as a new swatch in the swatch library. This is a great way to create multiple versions of the same pattern.
Saving a Swatch Library
-
1Open the swatch library window. To do so, click the icon that resembles a panel of 6 swatches of different shades of grey in the panel to the right. You should see the swatch for the pattern you saved in the panel.
- If you do see the icon for the swatches library, click Window in the menu bar at the top and then click Swatches to open the swatch library window.
-
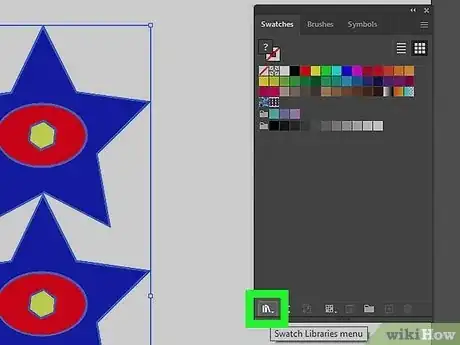
2Open the Swatches Libraries menu. To do so, click the icon that resembles 3 books next to each other. It's in the lower-left corner of the Swatch Library window.
-
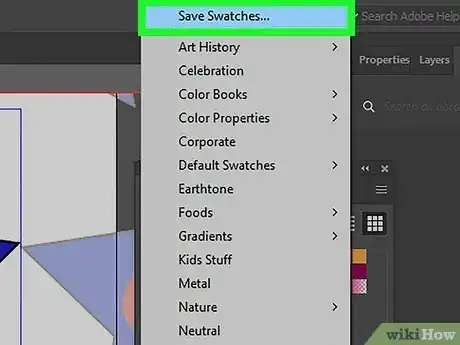
3Click Save Swatches. This opens a dialogue box that allows you to save all the swatches in your Swatch Library window.
-
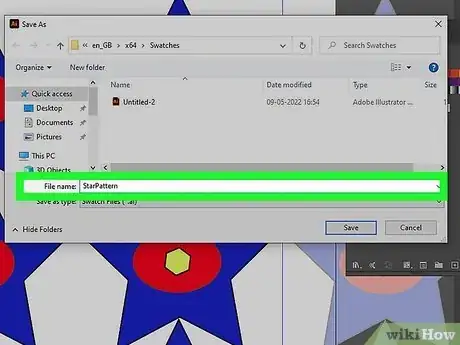
4Enter a name for your swatch library. You can enter whatever name you want. Enter it next to "Save as" in the dialogue box.
-
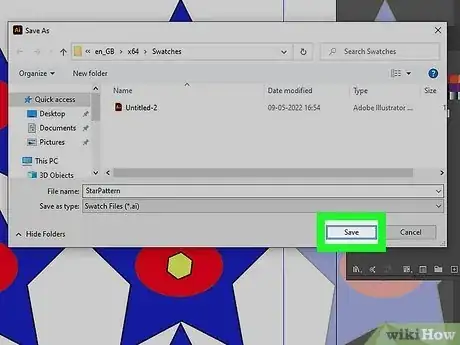
5Click Save. This saves the swatch library along with any swatches you added to it.
Opening a Saved Swatch LIbrary
-
1Open the swatch library window. To do so, click the icon that resembles a panel of 6 swatches of different shades of grey in the panel to the right. You should see the swatch for the pattern you saved in the panel.
- If you do see the icon for the swatches library, click Window in the menu bar at the top and then click Swatches to open the swatch library window.
-
2Open the Swatches Libraries menu. To do so, click the icon that resembles 3 books next to each other. It's in the lower-left corner of the Swatch Library window.
-
3Click User Defined. It's near the bottom of the Swatch Libraries menu. This displays all the swatch libraries you have saved.
-
4Click a swatch library you saved. This opens the swatch library in a new window.[5]
References
About This Article
1. Use the Illustrator tools to create a pattern tile.
2. Select your entire pattern with the Selection tool.
3. Open the Swatch Library.
4. Click and drag your pattern into the Swatch Library window.

