This article was co-authored by wikiHow staff writer, Hunter Rising. Hunter Rising is a wikiHow Staff Writer based in Los Angeles. He has more than three years of experience writing for and working with wikiHow. Hunter holds a BFA in Entertainment Design from the University of Wisconsin - Stout and a Minor in English Writing.
There are 11 references cited in this article, which can be found at the bottom of the page.
This article has been viewed 62,065 times.
Learn more...
Sandblasting is a great way to remove rust or paint from a material. By using an abrasive medium and pressurized air, a sandblaster quickly cleans a surface and leaves it like new. Before beginning, you need to make sure you pick up the right abrasive material and know how to safely use a blaster.
Steps
Abrasive Options
-
1Opt for mineral sand to remove rust and paint. Mineral sands are composed of materials like olivine and staurolite and should be used on thick metal pieces with rust. This abrasive works quickly and can also be used to remove weathered coatings and scale.[1]
- Silica sand is not commonly used due to the possibility of developing silicosis, a lung disease caused by inhalation of the silica dust.
- Sand creates friction as it is released from the blaster and generates heat. If you have a delicate or heat-sensitive material, it may deform.
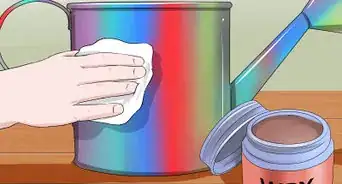
- Sand can be reused if it’s collected, but some of the sand will blow away if working outdoors.
-
2Use plastic or a soda abrasive around sensitive areas. For areas that are made of plastic or have electrical components, use a light abrasive. While these media work slower, they are more gentle to the material and will not damage the surface.[2]
- Plastic beads are reusable if you use them in a blast cabinet.
Advertisement -
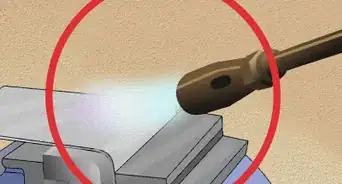
3Pick glass beads for a smooth finish. Glass beads are a harder material used to remove rust from metal without roughening the surface underneath. Use glass for cosmetic materials, like a car or tiling.[3]
- Glass beads are a great choice for polishing metal, like cast iron, stainless steel, and aluminum.
- Glass beads can be reused if they’re collected or used in a cabinet blaster.
-
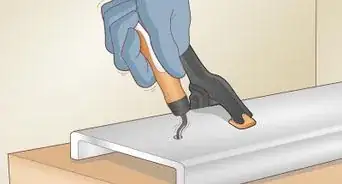
4Blast with walnut for an environmentally friendly alternative. Walnut is a gentle blast material that works for removing paint from any surface, but it will not be strong enough to remove rust. Use walnut to polish and clean surfaces without leaving any patterning on the surface.[4]
- Walnut can only be used once since the shells break apart upon impact.


Equipment Selection
-
1Use a cabinet blaster for smaller jobs. Cabinet blasters are small, enclosed sandblasters that have gloves and a nozzle built in. The top of a cabinet blaster has a window so you can see what you’re working on.[5]
- A cabinet blaster is perfect for smaller components or materials that you have removed from a larger piece.
-
2Pick a portable blaster for large jobs. If you’re working outdoors or on a piece of material that is too large to fit into a cabinet blaster, use a portable pressure blaster. This can be moved or maintained in any location for an easier, on-the-go sandblasting treatment.
-
3Use a compressor with a minimum of 80 PSI at 5 cubic feet per minute (CFM). A consistent pressure is needed for you to use a sandblaster properly. If it is too strong, it could damage your material, but if it’s too weak, it won’t work efficiently. Check the specifications of the compressor before you choose which one to rent or buy.[6]
- The PSI you need will depend on what material you’re blasting. Start on a low setting and increase the pressure slowly until it fits your needs. Look up the material you’re blasting to determine what PSI you should be using.
- The size of your air compressor will depend on the size of the job you have. For larger projects, use a large industrial-sized compressor. For smaller jobs, a consumer grade air compressor will do.
-
4Pick the right nozzle for the job. Depending on the job, you may select a different shaped nozzle. As a rule of thumb, select a nozzle that has a narrow opening that is about 3⁄8 inch (9.5 mm) to have the most concentrated stream of abrasive. As abrasive passes through the nozzle, the interior walls of the nozzle will start to wear away.[7]
- Select a straight bore nozzle for a concentrated stream of abrasive.
- A Venturi nozzle will spread out the abrasive more, but it will give a more uniform particle distribution.
-
5Select a shorter hose to maximize the amount of pressure. Keep your compressor and your sandblaster near one another so the air doesn’t have to travel far. As air travels further away from the compressor, it will start to lose pressure.[8]
- A wider interior diameter of the hose will reduce the friction of the abrasive inside.
-
6Put on eye and ear protection, gloves, and a respirator. Since you’re working with small abrasives, it’s very easy for stray particles to blow back at you. Wear protection that covers your eyes, mouth, and nose to prevent inhalation or eye damage.[9]
- The abrasive comes out of the hose at high speed. Avoid pointing the nozzle at anyone or any part of your body. Wear long sleeves and pants to lower the amount of exposed skin.
- Wear coveralls to keep dust off of your clothes.
- Compressors are very loud and blasting abrasive only increases the volume. Wear earplugs or earmuffs to prevent hearing loss.
- Cabinet blasters have built-in gloves, but you should still wear eye and ear protection as well as a respirator.


Using a Pressure Blaster
-
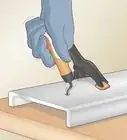
1Lay down a tarp in an open space to collect your blasting media. Work in an open space clear from other people and materials. Make sure the tarp covers the full area you intend to blast. This catches your abrasive so it doesn’t spread too far and so you can reuse the material.[10]
- Confined spaces will grow thick with dust if the area is not properly ventilated.
- If you’re using a cabinet blaster, you do not need to lay out a tarp. The blasting material will stay inside the cabinet and be recycled.
-
2Add the blasting medium into the hopper. Tear off a corner from the bag of your abrasive. Either use a hand scoop or pour the medium directly from the bag into the hopper. Fill the hopper to the top with the abrasive. [11]
- Use a funnel to avoid spilling any medium.
-
3Attach a hose from the compressor to the hopper. There will be a port on the back or side of the hopper to attach a hose. Make sure the hose is securely attached to the hopper and the compressor.[12]
- The compressor provides pressurized air to the hopper and will propel the abrasive material at high speeds.
-
4Turn on the compressor and test the blaster on a scrap piece of material. Lay the scrap piece of material on the ground. Make sure it’s the same material you plan on blasting. Use short bursts of spray on the material to see if it causes any damage. If your PSI is too high, it may cause warping to the surface.[13]
- This can also be done on an inconspicuous section of the larger material.
- Place the material inside of a cabinet blaster before securing it closed. Place your hands in the gloves and grab the built-in nozzle to spray the material.
-
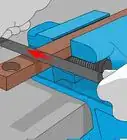
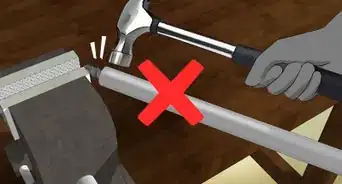
5Hold the nozzle at a 45-degree angle 6 in (15 cm) from the material. If the nozzle is too close, the material will be damaged or warped. If the nozzle is too far away, the abrasive will spread out and be ineffective in removal.[14]
-
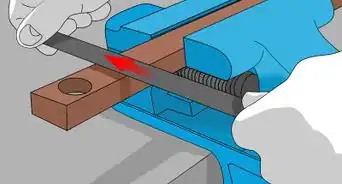
6Blast the material in smooth, back and forth strokes until it is clean. Overlap your strokes in the area you’re blasting so you remove all of the residue. Don’t focus on a specific area. Instead, move around the material evenly and revisit spots that may be more difficult.[15]


Warnings
- Wear safety glasses, earplugs, gloves, and a respirator to protect yourself while you sandblast. Wear long pants and long sleeves to prevent skin exposure.⧼thumbs_response⧽
- The abrasive stream can cause physical damage and tear open skin.[16]⧼thumbs_response⧽
Things You’ll Need
- Gloves
- Respirator
- Earplugs
- Eye protection
- Tarp
- Air compressor
- Blasting medium
- Hopper


References
- ↑ http://www.graco.com/us/en/products/surface-preparation/how-to/how-to-choose-the-right-abrasive-for-the-job.html
- ↑ http://www.graco.com/us/en/products/surface-preparation/how-to/how-to-choose-the-right-abrasive-for-the-job.html
- ↑ http://welderboy.com/2016/04/26/tips-to-help-you-select-the-right-air-compressor-blasting-media-and-protective-gear-for-sandblasting-metal/
- ↑ http://www.graco.com/us/en/products/surface-preparation/how-to/how-to-choose-the-right-abrasive-for-the-job.html
- ↑ https://youtu.be/FQAwRynp27Y?t=8s
- ↑ http://welderboy.com/2016/04/26/tips-to-help-you-select-the-right-air-compressor-blasting-media-and-protective-gear-for-sandblasting-metal/
- ↑ http://www.graco.com/us/en/products/surface-preparation/how-to/choosing-the-right-nozzle.html
- ↑ https://www.blastone.com/us/resources-training/tips-of-the-trade/the-correct-hose-size-improve-efficiency
- ↑ https://youtu.be/k-3A4jdHp-M?t=3m48s
- ↑ https://trustedpros.com/articles/power-washing/common-sandblasting-mistakes-and-why-they-happen
- ↑ https://youtu.be/eyl5jXgHwdQ?t=1m32s
- ↑ http://welderboy.com/2016/04/26/tips-to-help-you-select-the-right-air-compressor-blasting-media-and-protective-gear-for-sandblasting-metal/
- ↑ http://welderboy.com/2016/04/26/tips-to-help-you-select-the-right-air-compressor-blasting-media-and-protective-gear-for-sandblasting-metal/
- ↑ https://youtu.be/eyl5jXgHwdQ?t=6m27s
- ↑ https://youtu.be/4Ggbuk1SfmI?t=3m30s
- ↑ https://www.cdc.gov/niosh/topics/blasting/
About This Article