X
wikiHow is a “wiki,” similar to Wikipedia, which means that many of our articles are co-written by multiple authors. To create this article, 13 people, some anonymous, worked to edit and improve it over time.
This article has been viewed 39,129 times.
Learn more...
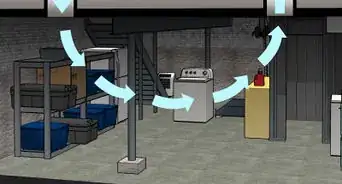
Adding a bathroom to your basement can be a fairly long and complicated process. This article will get you through the initial stage of this project, the rough plumbing. The steps are based on personal experience and offer a straightforward guide to the various aspects of the project. Be sure to check with local building codes when deciding the placement of the new sink and toilet!
Steps
Part 1
Part 1 of 4:
Preliminary Thinking
-
1Gather your materials:
- Metal detector
- Scratch paper
- Tape measure
-
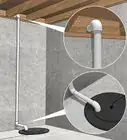
2Identify the main waste stack that goes from the upstairs bathroom to the sewer.
- This will be a vertical cast iron pipe, more than likely 4" in diameter.
Advertisement -
3Detect the cast iron pipe leading from the main waste stack to the sewer using a metal detector.
- This is the pipe in the ground that the new toilet and sink will flow in to.
-
4Identify where you want the sink and the toilet to be placed in the basement.
- A crude drawing may be helpful to visualize where the you want the new sink and toilet in relation to the existing pipe.
- This will also help you when you measure out the length of PVC you'll need.
-
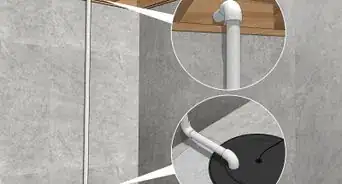
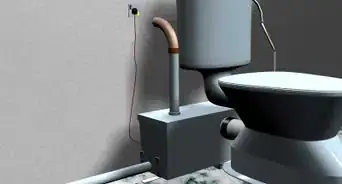
5Plan the location of the new PVC pipe that will connect the new toilet and sink to the cast iron pipe in the ground.[1]
- It is recommended that it be a 45 degree PVC pipe that attaches to the existing cast iron to help with the flow of waste.
- Be sure to note that the PVC setup will vary depending on where the sink and toilet will be placed.


Advertisement
Part 2
Part 2 of 4:
Breaking the Floor
-
1Prepare your materials:
- Box cutter knife/chisel
- Safety Glasses
- Chalk/tape
- Jackhammer
- Bucket/spade
- Plastic curtain
-
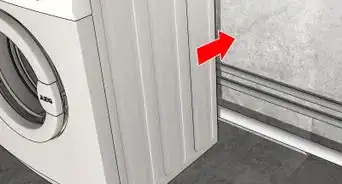
2Remove any tile/carpeting/etc to expose the concrete above the spot you chose to place the new pipe.
-
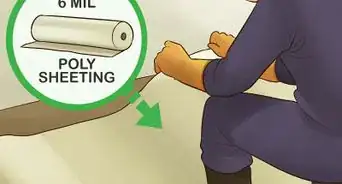
3Draw an outline in chalk or tape on the concrete floor where you will need break it, based on where you decided the new toilet and sink will go.
- Hanging a plastic curtain around the work area can help contain dust!
-
4Break the floor to expose the necessary section of the cast iron pipe as well as the path that the new pipe will lay for the toilet and sink.
- This can be done with a jackhammer which can be rented at a home improvement store.
- Safety glasses should be worn when using tools![2]
-
5Clear out the concrete debris and dig out the sand so the new pipe has a place to lay.


Advertisement
Part 3
Part 3 of 4:
Assembling the New Pipe
-
1Collect the needed materials:
- Necessary sections of PVC as determined in Part 1
- PVC primer and cement
- Saw (hand or electric) for cutting PVC into shape
- Angle grinder
- Band-seal couplings and screwdriver
-
2Purchase the necessary length of PVC pipe that the new toilet and sink will flow into.
-
3Connect the pipe together in the shape that fits your design.
- Use PVC primer and cement to fasten the sections together
- Due to chemical fumes, make sure the area is well ventilated! [3]
-
4
-
5Attach the new PVC to the cast iron with band-seal couplings.
- Make sure that there is enough PVC on either side of the wye so that the band-coupling has enough of both PVC and cast iron pipe to attach to!
- Cleaning the cast iron pipe makes for a tighter seal!


Advertisement
Part 4
Part 4 of 4:
Rebuilding the Floor
-
1Prepare the materials you'll need:
- Bags of sand
- Bags of Ready Mix concrete
- Mason trowels
-
2Cover over the pipe over with sand.
- Make sure the new pipe has a slope of at least 1/4" every foot flowing into the cast iron pipe. [6]
-
3Cover over the sand with approx. 4" of concrete so that just the pipes that the toilet will sit on and the sink will connect to are exposed.
-
4Smooth out the concrete with the mason trowel so that new flooring can be added later.


Advertisement
Community Q&A
-
QuestionWhat is the difference between a 10" and a 12" rough out?
 Community Answer2 inches, which can result in your toilet not fitting (because now the wall would be in the way).
Advertisement
Warnings
- Make sure that no water is run in the house while the pipe is being cut and while the new connection is drying, all water will flow through that pipe⧼thumbs_response⧽
Advertisement


References
- ↑ https://www.youtube.com/watch?v=gqwAETNyTnE
- ↑ http://elcosh.org/document/2157/d000148/using-the-jack-hammer-safely.html
- ↑ https://time.com/94361/paint-and-glue-fumes-mess-with-your-brain-for-decades/
- ↑ https://www.youtube.com/watch?v=gqwAETNyTnE
- ↑ https://safework.sa.gov.au/workplaces/plant-tools-and-vehicles/angle-grinders
- ↑ https://www.archtoolbox.com/materials-systems/plumbing/pipe-slope.html
About This Article
Advertisement