This article was co-authored by Allen Lee. Allen Lee is a Home Improvement Specialist and the Owner of Honest Lee Handyman Services, a licensed and insured handyman business servicing Sacramento, California, and surrounding areas. Working with homeowners and businesses to get their small repairs done in a timely and efficient manner, Honest Lee Handyman Services provides gutter and dryer vent cleaning along with fixture, fence, drywall, and toilet repairs.
There are 16 references cited in this article, which can be found at the bottom of the page.
This article has been viewed 166,366 times.
So your old fan is looking a little worn out, or maybe it just stopped working altogether. You need that cool breeze on those balmy summer days, so it's up to you to switch out your fan for a better option. Changing the fan can be a little intimidating, but you're up to the challenge if you just go step by step and be sure to read the directions that come with your new fan.
Steps
Removing the Old Fan
-
1Check if you need a permit. Some cities require permits when you are changing out ceiling fans. Others just require them if you're moving from a light to a ceiling fan. It's best to check ahead of time to see if you need to get a permit.
- Contact your city permit office for more information. You may also be able to look the information up online.
-
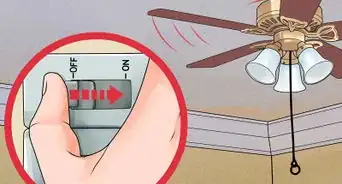
2Flip the power off at the breaker box.[1] You don't want to work on live wires, and just turning it off at the switch isn't enough to keep you safe. Find the room on the breaker box. Flip the switch so there is no power going to that room.[2]
- Always flip the power switch to the fan to make sure the power has actually been turned off.[3]
Advertisement -
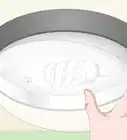
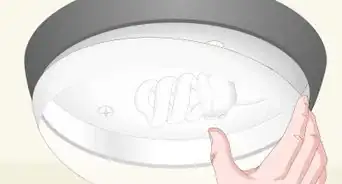
3Take down the canopy covering the wiring. The canopy is the part up near the ceiling that is over the wires. Usually, you'll need to unscrew a few screws to take off the canopy. Some may twist off, though. It just depends on your fan. If you can't figure it out, try looking up the fan on the internet for help.[4]
- The screws will likely be near the ceiling. You may need to slide the canopy over a notch on one screw to pull it down.[5]
-
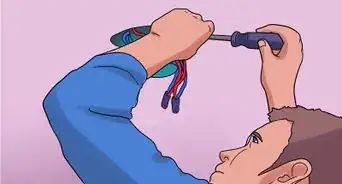
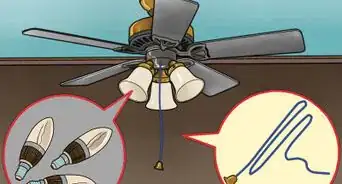
4Voltage check the wires. Just to be on the safe side, you should check the wires one more time to see if they have power. To check them, you'll need a non-contact voltage tester.[6] All you do is place the voltage tester up near the wires, and it will indicate whether the wires are hot or not. Check each wire separately.[7]
- Read the directions for your particular tester to see what indicators it uses. Some use a green light if there's no power and a red light if there is power. Others will chirp as they get near hot wires.
- It's a good idea to test your voltage tester on an outlet first. You can stick in the hot side (small side) of an outlet to test if it's working.[8]
- Keep in mind, these readers only work on plastic-insulated wires, not metal-insulated wires.
-
5
-
6Pull the wires apart. As you take off each cap, you should notice two wires that have been twisted together. Often, they'll spring apart as you untwist the cap, but you may need to pull them apart yourself. One wire is from the fan, and one is from the ceiling, which is why they need to come apart for you to pull the fan down.[11]
-
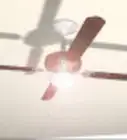
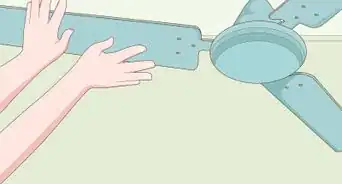
7Take the fan down. Now, you'll need to move the fan off the mounting bracket. Often, the fan will have a ball or something similar that just slides off the bracket, though you may need to jiggle it a bit.[12] Always support the fan while you remove it.[13] It can help to have someone support the fan as you pull it off its bracket and slide it free.[14]
-
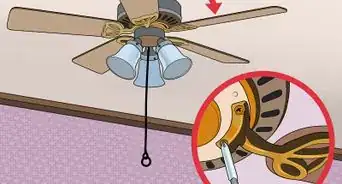
8Remove the bracket. Your new ceiling fan will have its own bracket that fits that fan perfectly, so you need to take down the old bracket. However, leave the mount that attaches to the ceiling in place. The bracket fits over the mount.[15]
-
9Check the wires and box. Now is a good time to check if the wires look frayed. You can also check the mount/brace above the bracket to make sure it is secure. It shouldn't wiggle around, and it should be screwed into the ceiling. Also, look at where the wires come out. It should have a plastic connector around the hole, so that the wires are up against the edge of the mount (because the mount is metal).[16]
- If you have a problem with any of the above, you may need to replace the mount or the wiring. If that's the case, you'll likely want to call in a professional.


Assembling the Bracket and Threading the Wires
-
1Glue on the decorative medallion. You won't have to do this step with all fans, so make sure yours comes with this part. Apply (urethane) glue to the back of the medallion. Pull the wires on the ceiling through the center. Once the medallion is centered, push it onto the ceiling until it sticks.[17]
- To hold it in place, use four 6D finishing nails, and cover the ends with spackle or caulk.
-
2Install the bracket. The bracket holds the fan in place, and it's hidden by the fan's structure. Pull the wires from the brace through the middle of the bracket. Line up the bracket with the mounting bolts in the brace above. You'll either clip or slide the bracket into place over the bolts.[18]
- Make sure you read the instructions for your particular fan. In some cases, you may need to use screws to secure the bracket.
-
3Work on threading the wires through the fan. On the floor, find the wires coming off of the fan's motor. Feed them through the canopy that will cover the wires eventually. Then, feed them through the downrod.[19]
-
4Screw the downrod in place. The downrod will likely screw into the top of the fan. You may need to tighten a locking screw in place, usually on the side of the rod near the motor. Use a wrench for tightening.[20] Make sure the locking screws are tight, as your fan may wobble if they're not.[21]
- You may also need to attach the ball mount, though some may have this attached already. Place it on the downrod, and secure it with the pin.[22]
- Some people install the blades while the fan is still on the ground. However, that is up to you. If you want to minimize your time on the ladder, you may want to install them now. On the other hand, having the blades in place now can make it unwieldy.


Connecting the Fan and Wires
-
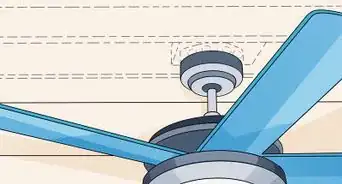
1Lift the fan into place. Have someone support the fan from below. Lift it up to the bracket. The ball at the top should slide right into the bracket you just installed. If you're unsure how yours slides in, check the instructions that came with your fan.[23]
- Hang one edge of the canopy up to work on the wires.
-
2Cut the wires, and use a wire stripper to scrape them. The wires will be long to thread through the fan, so now you need to cut them. Just make them about 6 to 8 inches (15 to 20 cm) longer than the downrod, matching the length of the wires extending from the ceiling. Strip off the plastic at the ends of the wire so they can be joined with their mates.[24]
-
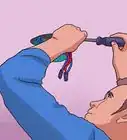
3Connect the wires. Use a wire nut to connect the two green wires with the bare copper wire. Hold the ends together, and twist it on to connect them. Also connect the two white wires, and then the two black wires with the same method.[25]
- When you're done, tuck the wires up into the brace above.


Attaching the Blades and Light
-
1Secure the canopy. Push the canopy up so that it's flat against the ceiling. You'll likely need to screw it into place, though a few may pop into the bracket without screws. The screws should fit up close to the ceiling.[26]
-
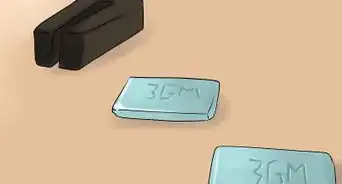
2Attach each blade to its bracket. Each fan blade will fit into a bracket that will then fit into the fan. Slide the blade into the bracket, then add a screw to secure it. You may need to use more than one screw, according to your directions.[27]
-
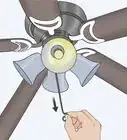
3Screw each bracket into the fan. Each fan bracket will have a place to screw the blade brackets into the fan's motor.[28] To make it easier on yourself, place the screw in the bracket, and use the screwdriver to keep it in place. Lift the blade and bracket up, and then screw it into the motor.[29]
- Screw these in tightly, as a loose bracket could make your fan wobble.
-
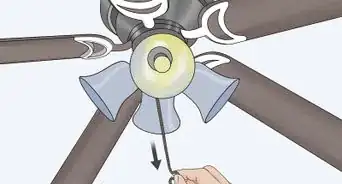
4Add the light. Plug the wired plug into the light's attachment, which connects the electricity, and screw in the light kit as described by your directions. Add the light bulb and any shade that goes on top, which you may also need to screw in.[30]
- You may also need to attach the pull chain.
-
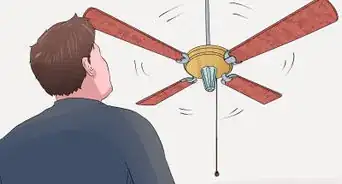
5Turn the power back on. Once you're sure everything is connected properly, you can flip the breaker back on. Test the fan with the light switch to see if it seems to be working correctly.


Expert Q&A
Did you know you can get expert answers for this article?
Unlock expert answers by supporting wikiHow
-
QuestionWhat's the difference between a light-rated and fan-rated junction box?
 Allen LeeAllen Lee is a Home Improvement Specialist and the Owner of Honest Lee Handyman Services, a licensed and insured handyman business servicing Sacramento, California, and surrounding areas. Working with homeowners and businesses to get their small repairs done in a timely and efficient manner, Honest Lee Handyman Services provides gutter and dryer vent cleaning along with fixture, fence, drywall, and toilet repairs.
Home Improvement SpecialistA light-rated junction box is only made to hold the weight of a light fixture, while a fan-rated junction box is made to hold the heavier weight of a ceiling fan.
Support wikiHow by unlocking this expert answer.
Things You'll Need
- New fan
- Non-contact voltage tester
- Screwdriver or drill
- Wire cutters
- Wire strippers
- Wrench
- Hammer (possibly)


References
- ↑ Allen Lee. Home Improvement Specialist. Expert Interview. 10 July 2020.
- ↑ https://www.destinationlighting.com/fliptheswitch/the-how-to-guide-to-installing-a-ceiling-fan/
- ↑ http://www.prettyhandygirl.com/installing-the-most-beautiful-ceiling-fan-i-ever-laid-eyes-upon/
- ↑ http://www.prettyhandygirl.com/installing-the-most-beautiful-ceiling-fan-i-ever-laid-eyes-upon/
- ↑ https://www.youtube.com/watch?v=C5BKkzOFKOQ&feature=youtu.be&t=60
- ↑ Allen Lee. Home Improvement Specialist. Expert Interview. 10 July 2020.
- ↑ https://www.familyhandyman.com/electrical/how-to-use-cheap-electrical-testers/view-all
- ↑ https://www.youtube.com/watch?v=C5BKkzOFKOQ&feature=youtu.be&t=136
- ↑ https://www.youtube.com/watch?v=C5BKkzOFKOQ&feature=youtu.be&t=188
- ↑ http://www.prettyhandygirl.com/installing-the-most-beautiful-ceiling-fan-i-ever-laid-eyes-upon/
- ↑ https://www.youtube.com/watch?v=C5BKkzOFKOQ&feature=youtu.be&t=188
- ↑ https://www.youtube.com/watch?v=C5BKkzOFKOQ&feature=youtu.be&t=217
- ↑ Allen Lee. Home Improvement Specialist. Expert Interview. 10 July 2020.
- ↑ http://www.prettyhandygirl.com/installing-the-most-beautiful-ceiling-fan-i-ever-laid-eyes-upon/
- ↑ https://www.youtube.com/watch?v=C5BKkzOFKOQ&feature=youtu.be&t=260
- ↑ https://www.youtube.com/watch?v=C5BKkzOFKOQ&feature=youtu.be&t=260
- ↑ https://www.thisoldhouse.com/how-to/how-to-install-ceiling-fan-0
- ↑ https://www.destinationlighting.com/fliptheswitch/the-how-to-guide-to-installing-a-ceiling-fan/
- ↑ https://www.thisoldhouse.com/how-to/how-to-install-ceiling-fan-0
- ↑ https://www.thisoldhouse.com/how-to/how-to-install-ceiling-fan-0
- ↑ https://www.familyhandyman.com/electrical/how-to-install-ceiling-fans/view-all
- ↑ https://www.familyhandyman.com/electrical/how-to-install-ceiling-fans/view-all
- ↑ https://www.destinationlighting.com/fliptheswitch/the-how-to-guide-to-installing-a-ceiling-fan/
- ↑ https://www.youtube.com/watch?v=d9mVSVlsGTU&feature=youtu.be&t=111
- ↑ https://www.youtube.com/watch?v=d9mVSVlsGTU&feature=youtu.be&t=126
- ↑ https://www.destinationlighting.com/fliptheswitch/the-how-to-guide-to-installing-a-ceiling-fan/
- ↑ https://www.familyhandyman.com/electrical/how-to-install-ceiling-fans/view-all
- ↑ https://www.thisoldhouse.com/how-to/how-to-install-ceiling-fan-0
- ↑ https://www.familyhandyman.com/electrical/how-to-install-ceiling-fans/view-all
- ↑ https://www.youtube.com/watch?v=d9mVSVlsGTU&feature=youtu.be&t=155
- ↑ Allen Lee. Home Improvement Specialist. Expert Interview. 10 July 2020.
About This Article

If you've already removed your old ceiling fan and are ready to replace it, start by pulling the wires from the brace through the bracket and clipping the bracket into place on the bolts. Next, feed the wires from the fan through the canopy and downrod before screwing the downrod in position. Once the downrod is secure, lift your fan up to the bracket and slide the ball at the top into place. Finally, trim the green, white, and black wires so they're 6 inches longer than the downrod , then connect them to the copper wires using wire nuts. To find out how to attach the blades and light, keep reading!