This article was co-authored by wikiHow staff writer, Travis Boylls. Travis Boylls is a Technology Writer and Editor for wikiHow. Travis has experience writing technology-related articles, providing software customer service, and in graphic design. He specializes in Windows, macOS, Android, iOS, and Linux platforms. He studied graphic design at Pikes Peak Community College.
The wikiHow Tech Team also followed the article's instructions and verified that they work.
This article has been viewed 134,427 times.
Learn more...
This wikiHow teaches you how to remove an echo or reverb from an audio file. Most digital audio workstations have built-in effects that you can use to remove ー or at least reduce, echo or reverb from an audio file.
Steps
Adobe Audition
-
1Open Adobe Audition. It has a green square icon that says "Au" in the middle. Click the icon to open Adobe Audition. Adobe Audition has an effect you can use to easily remove or reduce echo and reverb from an audio file. You must purchase a subscription to download and use Adobe Audition.
- The DeReverb effect is not available on older versions of Adobe Audition. However, there are 3rd-party Dereverb effect plug-ins you can purchase that work with nearly all digital audio workstations. Some include a free trial.
-
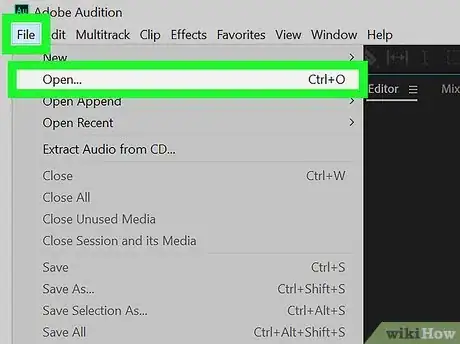
2Open the audio file you want to remove echo from. Adobe Audition supports most audio formats, including mp3, wav, aiff, flac, ogg, and ffmpeg and more. Use the following steps to open an audio file in Adobe Audition:
- Click File in the menu bar at the top.
- Click Open.
- Select the file you want to edit.
- Click Open.
Advertisement -
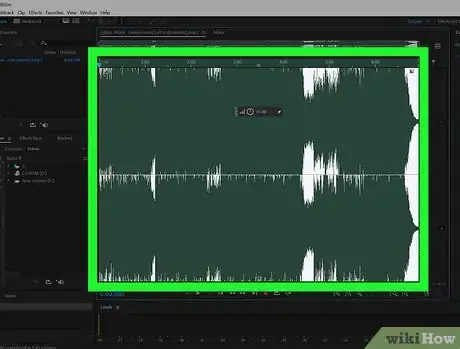
3Select the entire wave file. To select the entire audio file, simply double-click it. You can also click and drag to select a section of the audio file.
-
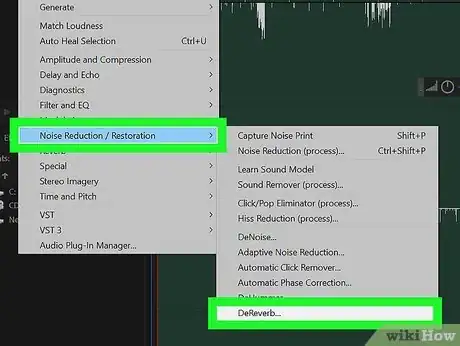
4Select the DeReverb effect. Use the following steps to select the DeReverb effect.
- Click Effects in the menu at the top.
- Click Noise Reduction/Restoration.
- Click DeReverb.
-
5Click the play icon to hear the audio. It's in the lower-left corner of the DeReverb effect window. This allows you to hear what the audio sounds like with DeReverb applied. [1]
- You can also click the power icon (the circle with a line through the top) in the lower-left corner to turn off the effect. This allows you to hear what the audio sounds like before and after DeReverb is applied.
-
6Drag the slider bar next to "Amount". To increase or decrease the amount of DeReverb you want to add, click and drag the slider bar next to "Amount" at the bottom fo the DeReverb effect window. Applying too much DeReverb will degrade the quality of audio. Applying too little will leave some residual echo or reverb left over. Be sure to click the Play icon in the lower-left corner to hear what the audio sounds like with the current amount of DeReverb.
-
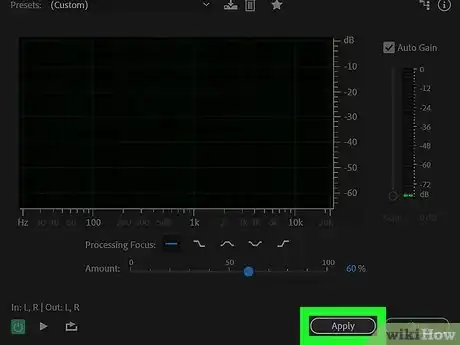
7Click Apply. When you are satisfied with how the audio sounds, click Apply in the lower-right corner of the effect window.
-
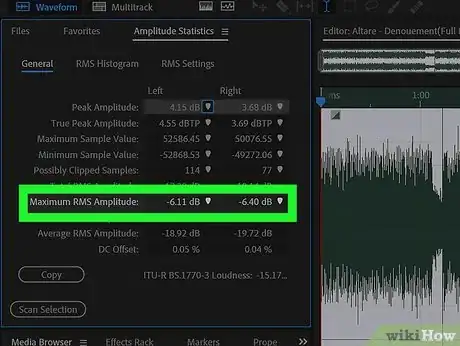
8Open the Amplitude Statistics window. Use the following steps to open the Applitude Statistics window:
- Click Window in the menu bar at the top.
- Click Amplitude Statistics.
- Click Scan Selection in the lower-left corner.
-
9Note the Average RMS Amplitude. It's under the "General" tab in the Amplitude Statistics window.
-
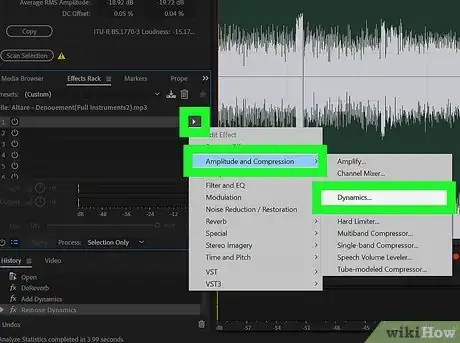
10Add the Dynamics effect. Dynamics has a noise gate you can use to limit the amount of sound in between spoken words. Use the following steps to add Dynamics.
- Dynamics is not available on older versions of Adobe Audition, but there are third-party noise gate effects you can download that work with nearly all digital audio workstations.
-
11
-
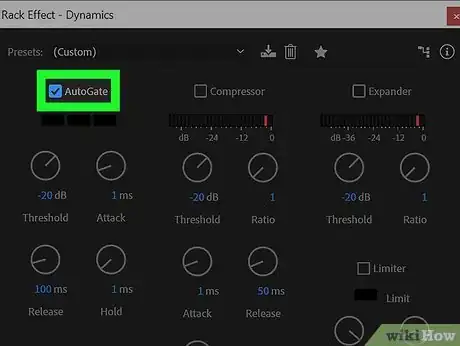
12Set the Threshold as the same number as your Average RMS Amplitude. You can click the number below the Threshold knob below AutoGate and type the number you noted as your Average RMS Amplitude in the Amplitude Statistics window. Round the number up if needed.
-
13
-
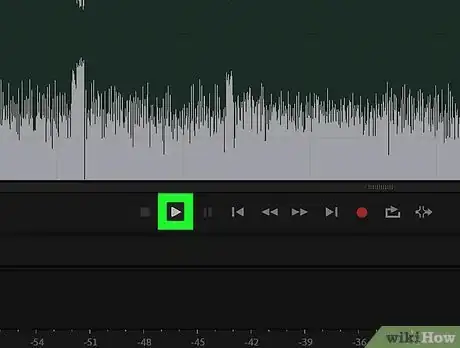
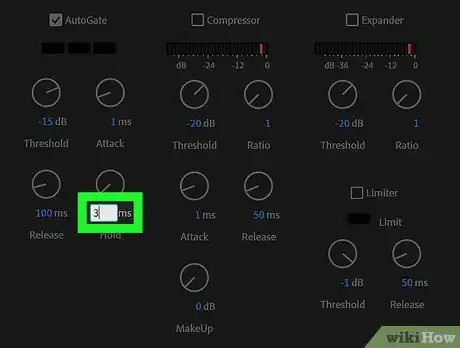
14Increase the Hold time as needed. If the AutoGate is cutting off parts of your spoken words, click and drag the know that says "Hold" to increase the hold time. Click the play icon to hear how the audio sounds. Repeat until the AutoGate cuts out excess noise in between words, but not any part of the spoken words themselves.
- You may also want to decrease the release time to 50 ms.
-
15Click Apply. When you are satisfied with how the audio sounds, click Apply in the lower-left corner of the effect window to apply Dynamics with the AutoGate.
-
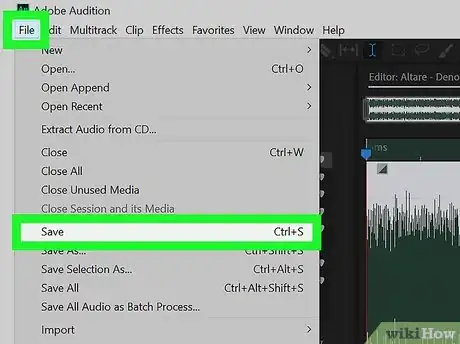
16Export the audio file. If you are satisfied with how the audio sounds, you can export the audio file in AIFF, MP3, Quicktime, or Wav formats. Use the following steps to export your audio file.
- Click File.
- Click Save As.
- Enter a name for the file next to "Filename." You may want to use a different file name from the original.
- Select the desired format using the drop-down menu next to "Format."
- Click Save.
Audacity
-
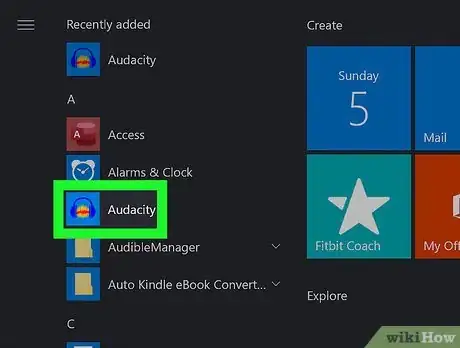
1Open Audacity. Audacity has an icon that resembles an audio wave in between two blue headphones. Click the icon to open Audacity.
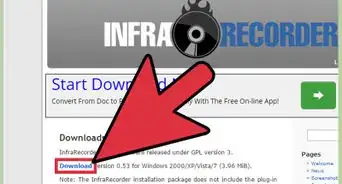
- To download Audacity, visit https://www.audacityteam.org/download/ and click the download link for your computer's operating system. Once downloaded, double-click the installer file and follow the prompts.
-
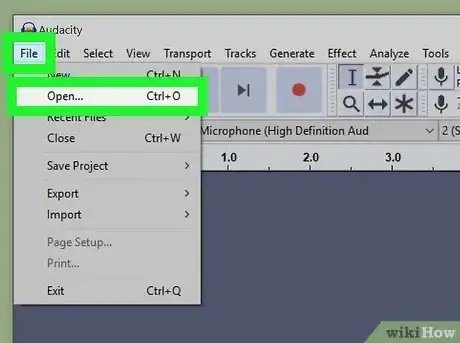
2Open the audio file. Audacity supports most audio formats, such as mp3, wav, aiff, flac, ogg, and ffmpeg. To open an audio file:
- Click File
- Click 'Open
- Browse to and select the audio file.
-
3Select the entire audio. Once you open an audio file in Audacity, simply double-click the wave to select the entire audio file. You can also click and drag to select a section of the audio.
-
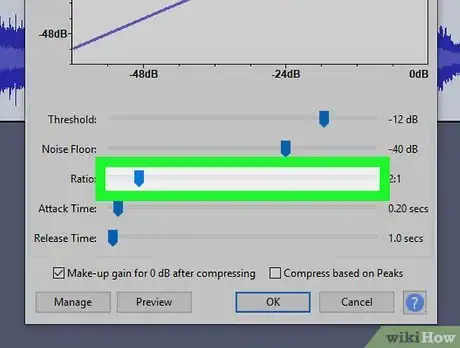
4Apply Compressor (if needed). If there is a huge difference in the loud parts and quiet parts of your audio file, you can apply some Compressor effect to reduce the disparity between the loud parts and quiet parts of your audio file. Use the following steps to apply a compressor and apply as needed throughout the entire audio editing process:
- Click Effects.
- Click Compressor.
- Drag the slider bar next to "Ratio" so that the line in the graph at the top drops slightly below it's the default position. You can also reduce the floor noise and threshold.
- Click Preview to hear what it sounds like. When you are satisfied with how it sounds, #*Click Ok to apply the effect when satisfied with the review.
-
5Get a noise profile. A noise profile is a sample of the audio that is used to reduce excess noise using the Noise Reduction effect. Use the following steps to get a noise profile:
- Click and drag to highlight a section of the audio that has an example of the noise you want to reduce. For example, you can highlight the excess sound that can be heard after a word is spoken.
- Click Effects in the menu bar at the top.
- Click Noise Reduction.
- Click Get Noise Profile.
- Close out of the window.
-
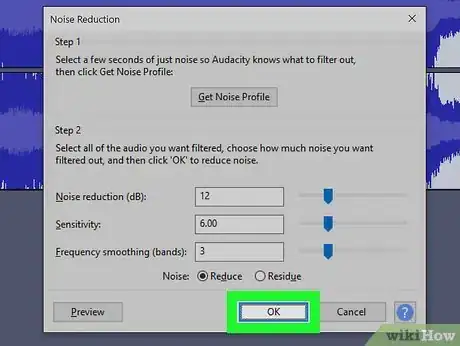
6Apply Noise Reduction. Noise Reduction uses the noise profile you just captured to reduce excess noise in the audio file. If there are still sections of your audio where an echo can be heard after applying Noise Reduction, you can take another Noise Profile and apply more Noise Reduction. Use the following steps to apply Noise Reduction:
- Double-click to highlight the entire audio wave.
- Click Effects in the menu bar at the top.
- Click Noise Reduction.
- Click Preview to hear how highlighted audio sounds with Noise Reduction.
- Drag the slider next to "Noise reduction (dB)" to increase or decrease the effect.
- Drag the slider next to "Sensitivity" to increase or decrease the volume at which the effect is applied.
- Click Preview to hear the audio again.
- Click Ok when satisfied with how the audio sounds.
-
7Apply Amplify (if needed). Since Noise Reduction makes the audio quieter, you can apply the Amplify effect to bring the volume back up. Don't apply too much amplification or the audio will sound distorted. You may also need to apply some more Compressor effect after applying Amplify. Use the following steps to apply Amplify:
- Double-click to select the entire audio file.
- Click Effects in the menu bar at the top.
- Click Amplify.
- Drag the slider below "Amplification (dB)" to the right.
- Check Allow Clipping.
- Click Preview to hear the audio with the effect.
- Click Ok if you are satisfied with how the audio sounds.
-
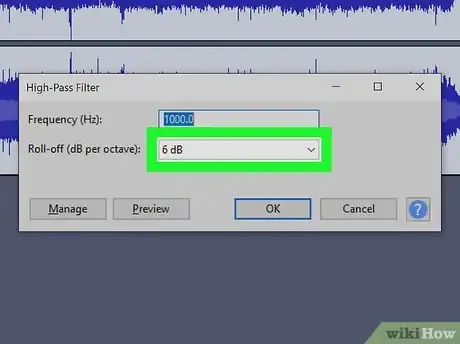
8Apply a Low Pass or High Pass Filter (if needed). Depending on how your audio sounds, you may need to apply a low or high pass filter. If the audio sounds high pitched with a lot of hisses, apply a low pass filter. If it sounds low and muffled, apply a high pass filter.
- Click Effects menu.
- Click Low-Pass Filter or High-Pass Filter, depending on which effect is needed.
- Use the pull-down menu to select the Rolloff (dB per octave) range. Your options are between 6 dB to 48 dB.
- Click Preview to hear the audio sounds
- Click "Ok" to apply the effect when you are satisfied with how it sounds.
-
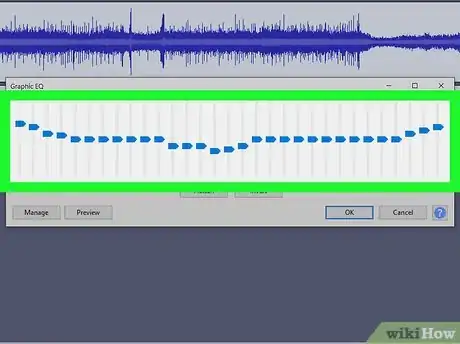
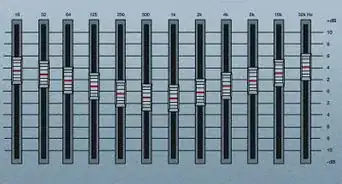
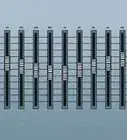
9Apply Graphic EQ (if needed). Graphic EQ (often referred to as Equalizer) is used to shape the overall tone of an audio file. Use the slider bars in the effect window to adjust the tone frequencies of the audio file. Drag them above the line in the center to increase the frequencies and drag them below the line to decrease the frequencies. The slider bars on the left effect the low, bass frequencies. The slider bars on the right effect the high-pitched, treble frequencies. The slider bars in the middle effect the mid-tones in between the bass and the treble. Use the following steps to apply Graphic EQ:
- Click Effects.
- Click Graphic EQ.
- Use the slider bars at the bottom to adjust the frequencies in the audio file.
- Click Preview to hear the audio with the EQ.
- Click Ok to apply the effect when you are satisfied with how the preview sounds.
-
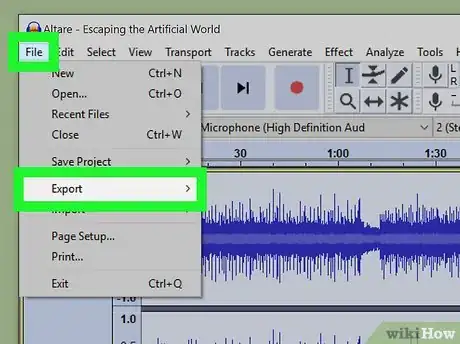
10Export the audio file. Once you are satisfied with how the audio file sounds, you can export it so that it can be played in your media player. To export the audio file:
- Click File in the menu bar at the top.
- Select Export
- Click Export as MP3.
- Click Save.
-
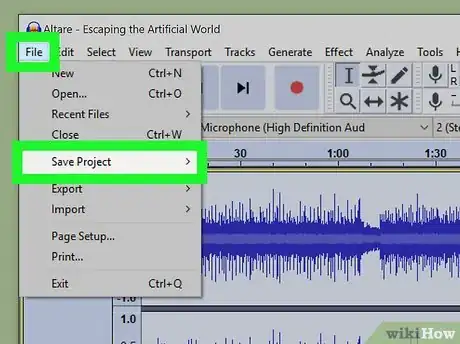
11Save the project. If you plan on editing the audio file more in the future, you should save the project. To save the project:
- Click File. in the menu bar at the top.
- Click Save Project
- Click Ok in the popup menu.
References
About This Article
1. Open an audio file in Audacity.
2. Highlight a sample of the audio you want to remove.
3. Open Noise Reduction in the Effects menu and click Get Noise Profile.
4. Highlight the entire audio file and apply Noise Reduction to reduce the audio you want to remove.
5. Apply Amplify in the Effects menu to bring the sound volume back up.
6. Apply Compressor in the Effects menu to reduce the distance between wave peaks and lows.
7. Apply Low-Pass Filter to reduce high-pitched noises and hisses.
8. Apply High-Pass Filter to reduce muffled noises and low rumbles.
9. Apply 'Graphic EQ in the Effects menu to shape the audio tone.
10. Export the audio as an MP3 or Wave file when you are satisfied with how it sounds.

