This article was co-authored by Ryaan Tuttle. Ryaan Tuttle is a Home Improvement Specialist and the CEO of Best Handyman, Inc. in Boston, Massachusetts. With over 17 years of experience, he specializes in building home service businesses, focusing on creating scalable and efficient brands. With the help of his global team, the companies have achieved over 10+ million in sales and received recognition through magazine features, and enjoy partnerships with wikiHow and Jobber field service software. Boston Magazine and LocalBest.com have named Best Handyman Boston the Best Handyman in Boston. Ryaan holds Construction Supervisor and Home Improvement Contractor Licenses.
There are 12 references cited in this article, which can be found at the bottom of the page.
This article has been viewed 557,370 times.
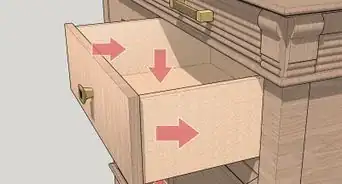
Every now and then, certain cleaning and moving tasks may require you to manually remove the drawers from a cabinet, dresser, or similar piece of furniture. Removing drawers is a cinch in most cases, but the process can vary a bit depending on the type of drawer you're working with. Most wood-glide and free-rolling drawers will come straight out with a little bit of force or a tilt at the right angle. For drawers with stopping mechanisms like stabilizer screws or anti-tip cables, you’ll need to remove the screws holding the drawer in place before you can finish pulling it out.
Steps
Coaxing out Wood-Glide and Free-Rolling Drawers
-
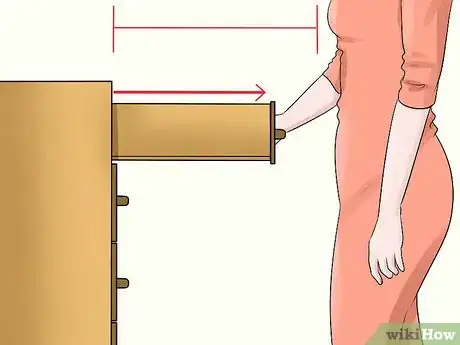
1Pull the drawer out as far as it will go. Stand in front of the piece of furniture, take hold of the handle or knob on the front panel, and begin sliding the drawer out until it stops moving. If the drawer doesn’t have a stopper, it should come right out. If you encounter resistance, you’ll need to move the drawer around a little in order to work it free.[1]
- Most drawers contain some type of stopping mechanism designed to keep them from falling out accidentally. In free-rolling drawers, the stopper is typically a small raised lip on the front side of the interior track.
- Be sure to keep enough space between you and the front of the drawer to allow it to extend all the way out.[2]
Tip: Wood-Glide draws can sometimes seem to stick a little, even if they’re not fitted with stoppers. Before you start searching for obstructions, try giving the drawer a good tug to see if that gets it past its sticking point.[3]
-
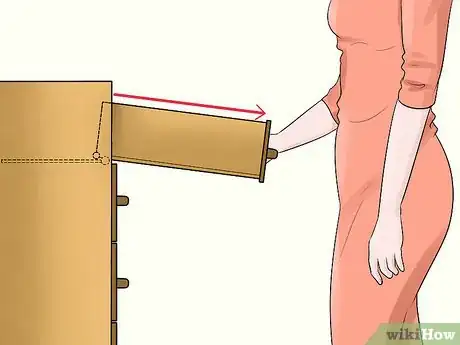
2Tilt the front of the drawer downward. Push down on the sides of the drawer so that the back end lifts slightly. This will cause the wheels or lip on the back edge to raise up higher than the stopper at the front of the track, making it possible to pull the drawer out the rest of the way.[4] [5]
- You may need to rock or jostle the drawer to help free the wheels from the track. Be careful not to get too rough with it, though, or you could damage it or its attached hardware.
Advertisement -
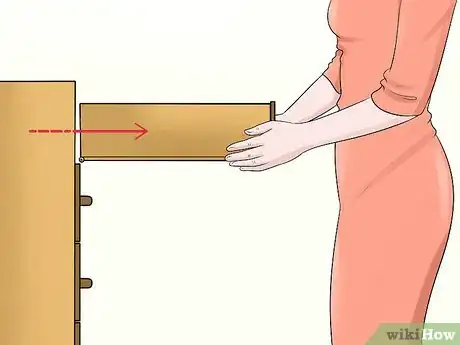
3Finish pulling the drawer straight out. Once the wheels or back edge are past the stopper, all you have to do is slide the drawer off of the track and out of the opening in the piece of furniture. Set the drawer aside on a flat, stable surface and repeat the process for any additional drawers you wish to remove.[6] [7]
- If you’re still having trouble getting the drawer out, there’s a chance that it may be equipped with another type of stopping mechanism, such as levers or stabilizer screws.
Freeing Metal-Glide Drawers with Levers
-
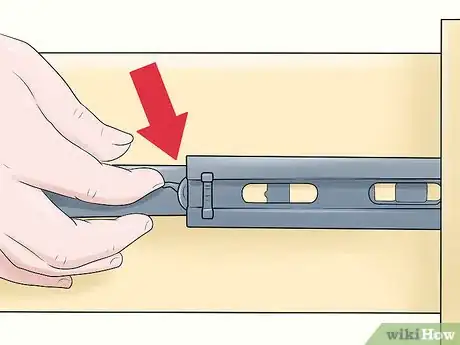
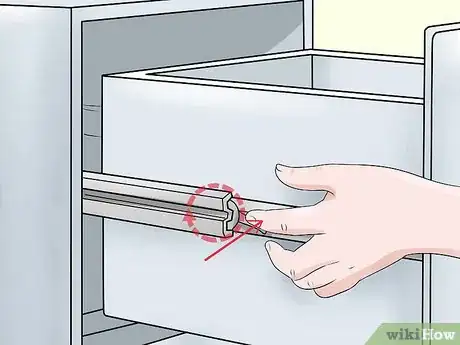
1Open the drawer and identify the track levers along the outer walls. You should see a lever on each side of the drawer, right around the center of the track. These levers may either be straight or slightly curved. Their job is to prevent the drawer from being removed until they’re disengaged.[8] [9]
- Be careful not to get your fingers caught in the overlapping tracks as you open the door.
- Full-extension slide tracks, which are often found on 12 in (30 cm) drawers, most often have straight tabs. Three-quarter-extension slide tracks, which are more common on 6 in (15 cm) box drawers, tend to have curved track levers.
-
2Press down on both levers simultaneously. The best way to do this is to use your thumbs or forefingers to disengage the levers while supporting the drawer from the bottom with your remaining fingers. That way, you won’t drop the drawer if it comes off of its track unexpectedly.[10]
- Use your left hand to press the lever on the lefthand side of the drawer and your right hand to press the lever on the righthand side of the drawer
- Some track levers may need to be pulled up rather than pushed down. However, this configuration is somewhat rare.
-
3Pull the drawer straight out while holding down the levers. Continue sliding the drawer towards you, making sure to keep both levers disengaged. When it reaches the end of its tracks, it should lift straight out. Remove any subsequent drawers from the piece in the same manner.[11]
- When you’re ready to put the drawer down, place it on a flat, sturdy surface.
Warning: On some pieces of furniture, the metal retainer tracks will remain extended after you've pulled the drawer free. For your own safety, be sure to push these tracks back in before handing the piece any further.
Disassembling Drawers with Stabilizer Screws
-
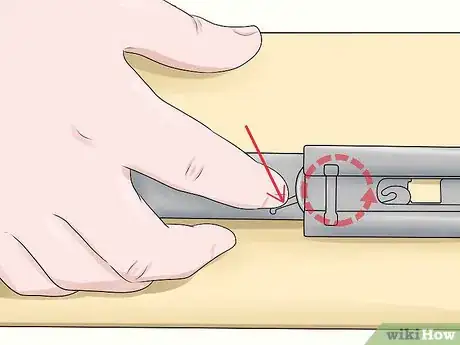
1Slide the drawer out and locate the stabilizer screws at the end of the tracks. You’ll find these screws on the bottom portion of each track. They’re used to secure the 2 halves of the track, the top of which doubles as a catch tab to hold the drawer in place.[12]
- If the drawer you’re attempting to remove has metal tracks but no screws at the end, they may be metal glide drawers with levers. See if you can find a pair of track levers to press that will then let you pull the drawer free.
-
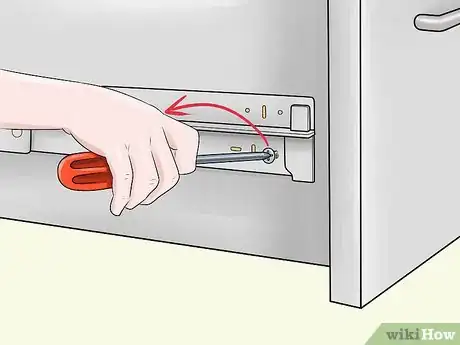
2Use an appropriate screwdriver to remove the stabilizer screws. Turn the screws to the left (counterclockwise) to loosen them, then pull them free from the holes in the track hardware. Set both screws aside somewhere you won’t lose them.[13]
- Most drawers with stabilizer screws use 2 in (5.1 cm) #8 cabinet screws, which need to be removed with a Phillips screwdriver.[14]
-
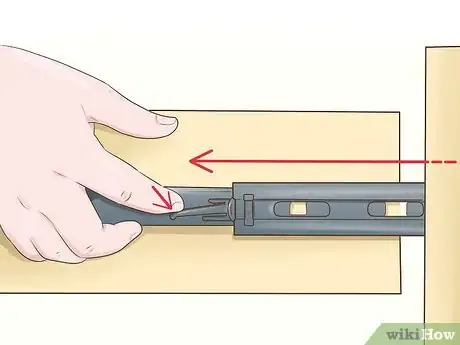
3Lift up on the catch tabs to separate the 2 halves of the track. Pull up on both tabs simultaneously. As you do, the top half of the track will come away from the bottom half, permitting the drawer to open past the stopping mechanism.[15]
- There should be enough of a lip on the catch tabs for you to easily grip them between your thumb and forefinger.
-
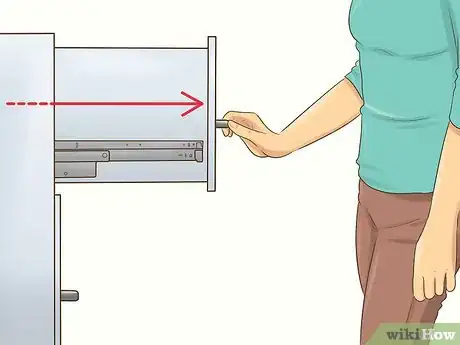
4Pull the drawer out the rest of the way. Without letting go of the catch tabs, guide the drawer off of its tracks. Hold it as straight as possible and move it in alignment with the tracks to prevent it from sticking. Once it’s clear, set it down carefully and move onto the next drawer.[16]
- If you’re going to be removing multiple drawers, check the lip on the righthand side interior of each drawer for a small number decal. These indicate which drawer goes where, which will make it much easier to return them all to their proper place.
- To reinstall a drawer with stabilizer screws, simply work in reverse: align the door with the track, lower the catch tab over the track’s bottom half, then thread and tighten the screws.[17]
Warning: Brace yourself when lifting the drawer out. Drawers with stabilizer screws are likely to be heavy, regardless of how full they are.
Removing Drawers with Anti-Tip Cables
-
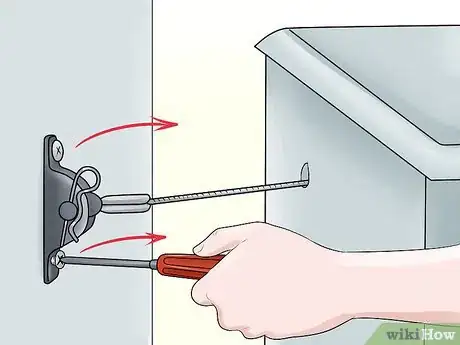
1Extend the drawer and look for the cable on the backside. Pull the drawer out until it stops moving and take a peek at the back panel. There, you should see a small metal cable tethering the drawer to the body of the piece of furniture. This cable is there to prevent more than one drawer from being opened at the same time.[18]
- Anti-tip cables are a common safety feature on top-heavy pieces that are prone to losing their stability when multiple drawers are open.
- On the top and bottom drawers, the cables will be connected to special inserts attached to the back panel. On the middle drawers, they’ll be threaded through eyelets drilled through the back panel.
-
2Undo the screws holding the cable in place. There may be 1 or 2 screws, depending on how the anti-tip hardware is designed, but a pair of screws is most common. Turn the screws to the left (counterclockwise) until they’re loose enough to pull out by hand.[19]
- Slip the screws in your pocket or set them on a nearby table or counter to avoid losing them.
- Different hardware may require different screwdrivers. In most cases, however, a Phillips head should do the trick.
-
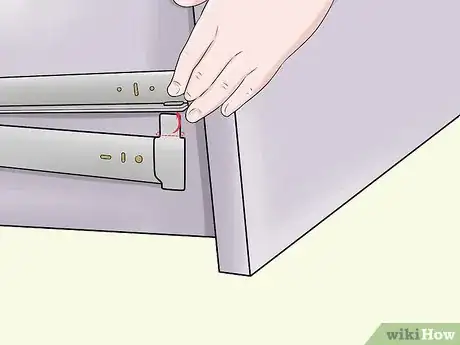
3Press and hold the disconnect tabs if your drawer has them. Examine the rear portion of the metal tracks on either side of the drawer. If you find a pair of adjustable tabs there, press both of them in at the same time to disengage them and allow the drawer to slide freely.[20]
- Keep a firm grip on the edges of the drawer while you take care of the disconnect tabs.
- Make sure both tabs are pushed in completely. They may not “lock” into place on their own, which means you'll need to continue pressing down on them until after you've removed the drawer.
Tip: In some cases, it may be necessary to push down or pull up on the disconnect tabs (or perform both actions simultaneously) in order to disengage them.[21]
-
4Slide the drawer straight off of its tracks. Pull the drawer towards you until it comes away from the piece of furniture. You may need to lift or angle the drawer upwards slightly in order to get it clear of the end of the tracks.[22]
- Don’t forget to push the extended metal tracks back into the piece before removing the next drawer or going about your business.
Community Q&A
-
QuestionCan I buy the plastic gliders that attach to the drawer?
 Community AnswerYes, you can buy them online or look for them in your local hardware or furniture stores.
 -
QuestionThe drawers on my dresser have no visible rails and very little movement up or down. Can you suggest an alternative method?
 Community AnswerI have an old Bombay Company dresser and I found that it had a peg in the back on both sides that needed to be pushed in. This may be the case for your dresser as well.
 -
QuestionHow can I remove drawers from Nolte furniture?
 Community AnswerPull out the drawer to its fullest extent. Hold the drawer front end with both hands and give a sharp lift up. The drawer will detach from the slides and can then be removed. To replace, fit the drawer onto the slides and push all the way in. Test correct operation by pulling out while supporting the drawer to make sure it halts on the stops.
Warnings
- Consider pulling on a pair of thick work gloves when working with metal drawers and tracks to protect yourself from cuts, pinches, and sharp edges.⧼thumbs_response⧽
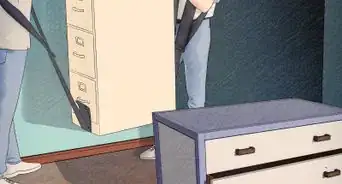
- Lightweight drawers can ordinarily be handled safely by one person. If you plan on taking the drawers out of a loaded filing cabinet or other heavy-duty piece, it’s a good idea to recruit an assistant.⧼thumbs_response⧽
Things You'll Need
- Screwdriver
- Thick work gloves (optional)
References
- ↑ https://www.ovisonline.com/blog/How-to-Remove-Drawers-With-the-Most-Common-Types-of-Drawer-Slides.aspx
- ↑ http://www.swisco.com/discussions/Removing-drawers-without-breaking-the-sockets-77-92
- ↑ https://www.youtube.com/watch?v=sKoL9Std5GA&feature=youtu.be&t=15
- ↑ https://www.psmoving.com/how-to-remove-dresser-drawers
- ↑ Ryaan Tuttle. Home Improvement Specialist. Expert Interview. 7 April 2021.
- ↑ https://www.livingspaces.com/inspiration/ideas-advice/how-tos/how-to-remove-drawers
- ↑ Ryaan Tuttle. Home Improvement Specialist. Expert Interview. 7 April 2021.
- ↑ https://www.livingspaces.com/inspiration/ideas-advice/how-tos/how-to-remove-drawers
- ↑ Ryaan Tuttle. Home Improvement Specialist. Expert Interview. 7 April 2021.
- ↑ https://www.ovisonline.com/blog/How-to-Remove-Drawers-With-the-Most-Common-Types-of-Drawer-Slides.aspx
- ↑ https://www.youtube.com/watch?v=5wK-IifprLg&feature=youtu.be&t=88
- ↑ https://www.ovisonline.com/blog/How-to-Remove-Drawers-With-the-Most-Common-Types-of-Drawer-Slides.aspx
- ↑ https://www.youtube.com/watch?v=qq6aG5GCaLI&feature=youtu.be&t=15
- ↑ http://hingedummy.info/screwinfopage2.htm
- ↑ https://www.livingspaces.com/inspiration/ideas-advice/how-tos/how-to-remove-drawers
- ↑ https://www.ovisonline.com/blog/How-to-Remove-Drawers-With-the-Most-Common-Types-of-Drawer-Slides.aspx
- ↑ https://youtu.be/qq6aG5GCaLI?t=29
- ↑ https://www.ovisonline.com/blog/How-to-Remove-Drawers-With-the-Most-Common-Types-of-Drawer-Slides.aspx
- ↑ https://bizfluent.com/how-5632287-remove-lateral-filing-cabinet-drawer.html
- ↑ http://www.whittierwood.com/pdf/2017_01_RTF_Manual.pdf
- ↑ http://www.whittierwood.com/pdf/2017_01_RTF_Manual.pdf
- ↑ https://www.ovisonline.com/blog/How-to-Remove-Drawers-With-the-Most-Common-Types-of-Drawer-Slides.aspx
About This Article
If you want to remove wood-glide or free-rolling drawers from a piece of furniture, start by pulling the first drawer out as far as it will go. Then, push down on the sides of the drawer so that the back end lifts up slightly. This causes the wheels or lip on the back edge to raise up higher than the stopper at the front of the track. Once the wheels or back edge are past the stopper, you can slide the drawer off of the track and out of the piece of furniture. Set the drawer aside on a flat, stable surface and repeat the process for any additional drawers you wish to remove! For tips on how to remove drawers with stabilizer screws or metal gliders, read on!
