This article was co-authored by Lindsey Swett and by wikiHow staff writer, Megaera Lorenz, PhD. Lindsey Swett is a Plant Specialist and the Owner of Niche Plant Shop in Boston, Massachusetts. She has over a decade of experience working in several plant settings, including golf courses, public parks, and commercial garden centers. Her focus now is on helping plant owners care for their indoor plants. Lindsey holds a Master of Landscape Architecture from The University of Michigan.
There are 15 references cited in this article, which can be found at the bottom of the page.
This article has been viewed 19,423 times.
If you’re growing pitcher plants in your home, garden, or greenhouse, you might be wondering about the best way to propagate these beautiful carnivorous plants. The ideal method for propagating pitcher plants depends on the type, but you can grow several common varieties easily from cuttings, divided roots or rhizomes, or seeds.[1] In this article, we’ll answer all your major propagation questions, like when to divide your pitcher plants, where to take cuttings, and how to get them to take root.
Steps
Stem Cuttings
-
1Take your cuttings in late winter. The stem cutting method is the best way to propagate Nepenthes, also called monkey cups. These beautiful tropical pitcher plants grow best from cuttings taken from an actively growing stem.[2] For the best results, take the cuttings in February, if you live in the Northern Hemisphere.[3]
- It’s okay to take stem cuttings from Nepenthes at any time of the year, but this method is most reliable during the plant’s growing season.[4]
-
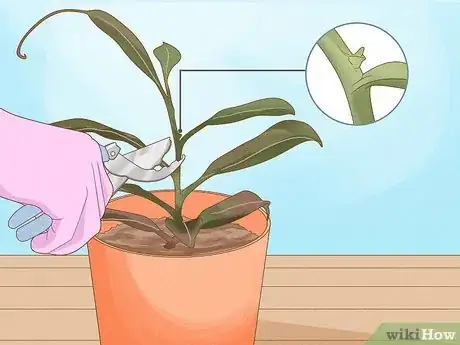
2Select a stem that has at least 2-3 leaves. Check for a tall stem that’s actively climbing and growing, with the leaves widely spaced apart. Aim to take your cutting close to the tip of the stem, which is where most of the new growth will be happening. You’ll want the part you cut to have at least 2 leaves, but try to leave a few green leaves behind on the remaining stem.[5]
- A stem that still has leaves on it will usually grow a new tip after you take a cutting.
- If you want to grow lots of little pitcher plants, cut an entire stem instead of just the tip. However, only do this if the plant has a healthy basal rosette (a circle of leaves at the base of the plant) so that it can keep growing new stems and pitchers.
Advertisement -
3Cut a section of stem with at least 1 node. Nodes are tiny leaf buds growing out of the stem, just above each mature leaf. If you cut a long stem, you can separate it into sections and plant each section. Whether you do that or just take the tip of the stem, make sure there’s at least 1 growing node on each section you plan to plant. Use a clean, sharp razor blade or scalpel to make your cuts.[6] Cut the stem underwater so that air bubbles don’t form in the cut stem and block water absorption.[7]
- You’re more likely to get good growth from a stem section that has at least 2-3 nodes on it.
- Cut off the bottom leaf of the stem segment, but leave any other leaves in place. Some gardeners recommend cutting the remaining leaves in half to help the plant retain water as new roots form.
- You can also lightly brush a little fungicide onto the stem and leaf cuts with a cotton swab to prevent infections.
-
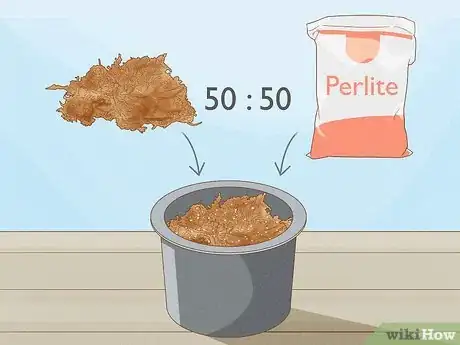
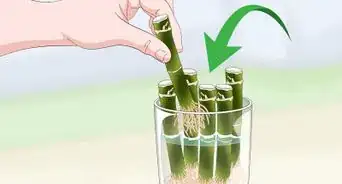
4Place the end of the stem in rooting medium. Choose a medium that’s neutral or slightly acidic, such as sphagnum moss, 50:50 sphagnum moss and perlite, or 50:50 coir and perlite. Pour the medium into a pot and dampen it. Don’t water it so much that it’s soggy, or your cuttings could get moldy. Push the end of the cut stem into the potting medium deep enough so that there’s at least one growing node under the soil surface.[8]
- If you use coir, make sure the label states that it has been well-rinsed with rainwater. Otherwise, it might be too salty for your cuttings.
- Some horticulture hobbyists like to root Nepenthes cuttings in water. However, for this to work, you’ll need to change the water frequently to prevent rot. Adding an aerator, such as a fish tank bubbler, may also help.
-
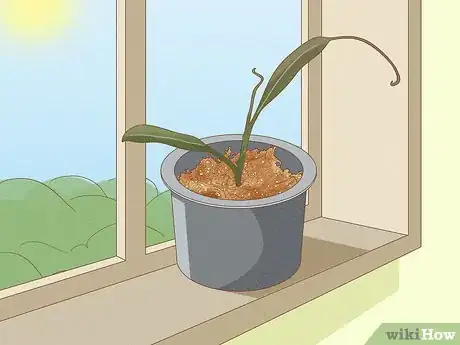
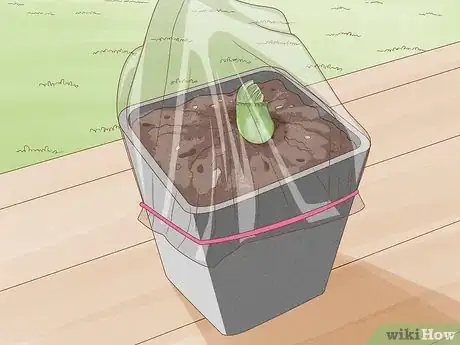
5Put the cutting in a bag and place it in a well-lit area. Place the potted cutting in a transparent plastic bag and poke 2-3 small holes in the bag. You can also set the pot inside a small terrarium. Check the rooting medium every few days to see if it is still damp. If it ever feels dry, moisten it with water from a spray bottle.
- Put the plant in a well-lit area, such as near a sunny window. However, keep it out of direct sunlight, which will be too harsh for the new plantlets.[9]
-
6Repot the cuttings once you see new growth. This part takes a bit of patience, since your cuttings will need at least a few weeks to start growing new roots. After about a month, try very gently tugging on the stem of the potted cutting. If it resists, then new roots are forming. If there’s no new root growth, don’t worry. Wait a few more weeks and check again. Once you see clear signs of growth at the top of the cuttings—such as new leaf buds—you can safely transplant them to a new pot or outdoor growing area.
- As long as the leaves on your cutting are still green, there’s still hope that it will grow roots. Don’t worry if it takes a long time—some Nepenthes cuttings can take several months to root.[10]
- If you’re growing several cuttings in the same container, pull out any dead cuttings as soon as you notice them so they don’t spread rot.
- If you plan to replant the cuttings outdoors, give them time to acclimate by putting them outside for just a few hours a day at first.
Rhizome Division
-
1Divide the rhizomes in early spring. You can grow Serracenia, also known as the American pitcher plant or trumpet pitcher, from seeds or from rhizomes—the fleshy, bulb-like structures at the base of the plant, under the soil.[11] Rhizome division is the quickest and easiest method.[12] [13] Plan to do this in early spring, as soon as you see signs of new growth.
- Established Serracenia plants need to be divided every 3 years so that they don’t get overcrowded, especially if they live in pots.[14]
-
2Remove the plant from its old container. Carefully pull the pitcher plant out of its pot, making sure to remove the roots and soil as well as the foliage. If the plant is in the ground, gently dig it out.[15]
- Once you’ve removed the plant from the pot, lay it out on a clean surface, such as a work bench or table. You might want to spread out a plastic drop cloth, since this process can be messy.
-
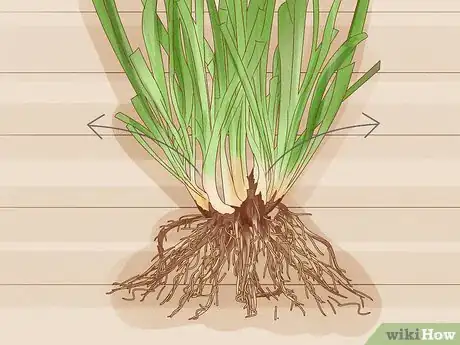
3Tease the rhizomes apart carefully. As trumpet pitchers grow, they naturally begin to divide into separate plants, with new rhizomes growing from the base of the parent plant.[16] After you pull the plant out of the pot, begin to gently pull or “worry” the base of the plant, looking for weak points between the rhizomes. When you find a weak spot, carefully snap it to disconnect the rhizomes.[17] [18]
- If the plant is old enough, the rhizomes will begin to separate naturally. In that case, you may only need to gently pull them apart.
- You can also use pruning shears to snip apart tougher rhizomes.
-
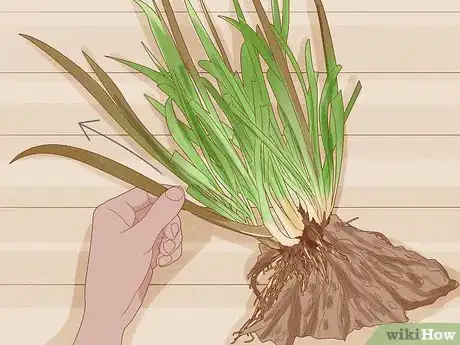
4Peel off all the old, brown leaves. At the same time, carefully inspect the divided plants for any signs of rot or insect infestations. Discard any dead or rotten plant matter or rhizomes. This will help ensure that you grow a healthy new crop of pitcher plants.[19]
-
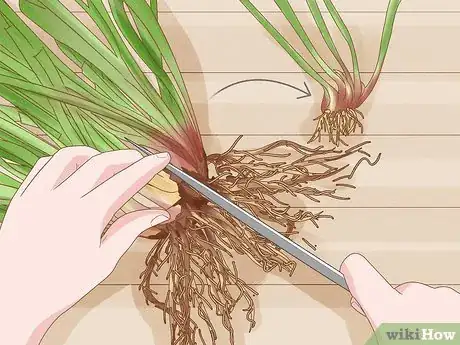
5Cut larger rhizomes into sections with a sharp knife. If the plant has just a few big rhizomes instead of several smaller, separate ones, you can also slice through the rhizomes to divide them. Use a clean, very sharp knife.[20] Carefully cut through the middle of the rhizome to make 2-3 smaller sections, making sure each section has its own roots.[21]
- If you noticed any dead or diseased areas on the rhizomes, slice them away with a sharp knife or razor.
-
6Trim the leaves down close to the rhizomes. Once you’ve separated the rhizomes, use some sharp shears to trim down the foliage. Cut the leaves back so there’s just 1–2 inches (2.5–5.1 cm) of greenery left above the top of the rhizome.[22]
-
7Replant the divided rhizomes in separate pots. Fill each pot with a mix of 50:50 peat moss and perlite.[23] You can also use coarse sand as an alternative to perlite. Plant the rhizomes just under the surface of the soil, so the bases of the leaves are just at the surface level.[24] Put the pot in a sunny area and water the plant regularly, so that the soil is always moist.[25]
- You can also keep the soil moist by setting the pot in a tray of rainwater.
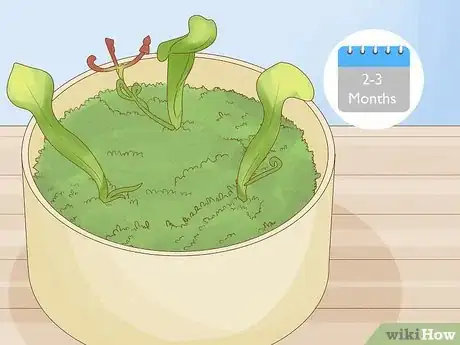
- It will take a few months for the divided plants to completely grow back. But, with a bit of patience, you’ll soon have a beautiful crop of new leaves and pitchers!
Seeds
-
1Collect Sarracenia seeds in early fall. Pitcher plants are notoriously difficult to grow from seed, but this method is relatively easy with Sarracenia (trumpet pitchers). If your pitcher plant is pollinated, it will grow small, round seed pods in the late summer or fall.[26] As soon as you see the pods turning brown, collect them and put them in a paper envelope. Let them dry out for 1-2 days, then split the pods open and remove the tiny seeds.[27]
- Just keep in mind that growing trumpet pitchers from seed is more time-consuming than other methods, like rhizome division.
- Store the seeds in an envelope in your fridge until you’re ready to use them. When you take them out, let the container warm up to room temperature before removing the seeds from the envelope to protect them from condensation.
-
2Place the seeds in a plastic bag with damp sphagnum moss. The sphagnum moss should be just damp, but not dripping wet. If you don’t have sphagnum, peat moss will also work. Sprinkle the seeds into the bag with the moss and close the bag. Make sure there’s some air in the bag when you close it.[28]
- You might find it helpful to label the bag with its contents and the date.
-
3Leave the bag in your fridge for 4-5 weeks. Sarracenia seeds need to be stratified in order to germinate. This process involves recreating the natural conditions of winter, where the seeds rest in the cold, damp earth for several weeks. Refrigerate the seeds to keep them cool and moist.[29]
- You can also leave them outside over winter—it’s okay for them to freeze as long as they haven’t actually sprouted yet.
-
4Sow the seeds in a pot with peat mix. A mixture of peat and sand works well. Space the seeds about .2 inches (5.1 mm) apart in the pot, then sprinkle just enough sand on top to cover them.[30]
-
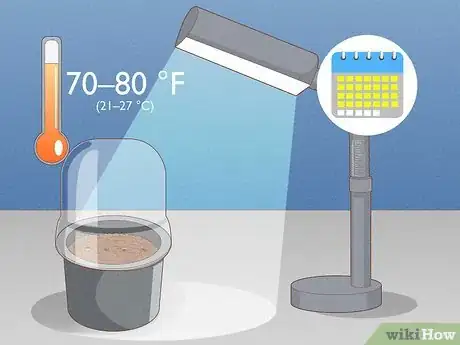
5Bag the pots and place them under a grow light. Put the posts inside clear plastic bags or place them in a terrarium or under a humidity dome. Place them under an LED grow light, rather than in direct sunlight. Try to maintain a temperature of about 70–80 °F (21–27 °C) in their growing area.[31]
- You should see tiny shoots starting to grow in about 2-4 weeks.
- Once the plants have some true leaves, you can remove them from the bag or humidity dome. Put them outside in direct sun, or keep them in a greenhouse if you’re worried about bad weather.
- Check the soil often and water it any time it starts to dry out.
Stolon Cuttings
-
1Take stolon cuttings in spring. Darlingtonia californica, or the California pitcher plant, is one of several kinds of plants sometimes called a “cobra lily.”[32] It’s easiest to propagate them from stolons, which are runners that grow out horizontally from the parent plant. New plants—with their own root systems—tend to appear on the ends of the stolons in mid to late spring.[33]
- The stolons of cobra lilies look like little vines growing out from the base of the plant, under the soil. If you’re growing cobra lilies in a pot, you might need to unpot them to find the stolons, which will be mixed in with the roots.
-
2Cut the stolon into short sections. Once a new baby plant appears on the end of the stolon, cut the stolon off of the parent plant with sharp shears. Then, cut the stolon into short sections, about 2–3 inches (5.1–7.6 cm) each.[34]
- Each section of stolon should have a few roots on it.
- While you can grow individual plants from each section of the stolon, you can also simply leave the stolon intact and replant the baby plant already growing at the end of the runner.[35]
-
3Lay the sections of stolon on moist sphagnum moss. Spread a layer of shredded, long-fibered sphagnum moss on a tray.[36] Choose a tray made of light-colored material, since darker materials, such as black plastic, can overheat and damage the roots of your pitcher plants.[37] Get the moss moist, but not sopping wet. Place the cut sections of stolon on top of the moss.
- Place the tray with the stolons in a humid, cool, well-lit spot. To maintain humidity, it may help to put them in a terrarium or under a humidity hood.
- In a few weeks, new plants should begin to grow from the stolon sections.
-
4Transplant the young plants once they grow leaves. It may take about 4-6 months for the baby pitcher plants to grow. Once you have a small plant with true leaves, you can transplant it into a proper pot or a spot in your garden or greenhouse.[38]
- Darlingtonia is sensitive and difficult to grow. Plant the young plants in live sphagnum moss or a mix of sphagnum moss, peat moss, fine orchid bark, and pumice.[39]
- Set the pot in a tray of water to help the soil stay moist. If possible, use rainwater, since the pH of tap water is often too high for these delicate plants.[40]
Leaf or Pitcher Pullings
-
1Take leaf or pitcher pullings in spring. This technique works best for Cephalotus, otherwise known as the Australian pitcher plant.[41] If you live in the Northern Hemisphere, the best time to take leaf or pitcher cuttings is April or May.[42]
- You can also grow these plants by division of the crown (the base of the plant, where the stalks meet the roots) or the roots.
- While you can grow Cephalotus from seed, this method is extremely slow. It can also be difficult to get viable seeds.
- This method also works for Darlingtonia, especially if your plant isn’t putting out runners.[43]
-
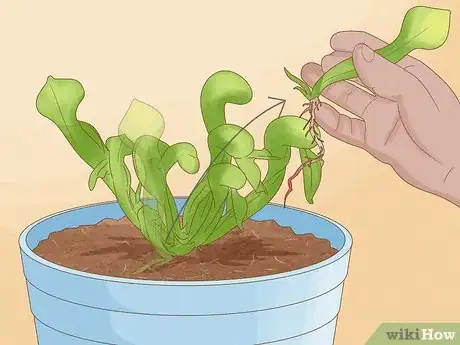
2Pull off a new leaf or pitcher. While this method is usually called “cutting,” you’ll actually be gently pulling the leaf or pitcher from the plant rather than cutting it. Grab the leaf or pitcher at the base of the stem, where it attaches to the crown of the plant, and carefully pull down to separate it from the plant.[44] If you’re using this method to propagate Darlingtonia, use leaves instead of pitchers.[45]
- It’s easiest to get young leaves and pitchers to root, so try to take newer ones rather than older or more mature ones.
- If you’re having trouble getting a good grip on the leaf or pitcher, try using tweezers. Just be careful not to crush the stem!
- The new growth will form at the base of the petiole, or the part of the stalk where the leaf or pitcher attaches to the crown of the parent plant. Keep as much of the petiole intact as possible when your remove the leaves or pitchers.[46]
-
3Place the cuttings on a 50:50 peat/sand mixture. Fill a tray with the peat and sand mixture and set the cuttings on it, with the top surfaces of the leaves or pitchers facing up. Carefully bury the whitish petiole (the base of the stem) of each cutting, but don’t cover the actual leaf or pitcher. Water the soil so that it is nice and moist, but not soggy.[47]
- Alternatively, you can use a mixture of sphagnum peat moss, perlite, and horticultural sand.[48]
-
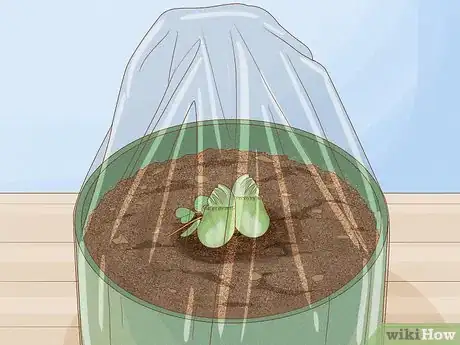
4Put the cuttings in a bag and place them in a well-lit area. Put the tray with the cuttings inside a clear plastic bag or under a humidity dome to help seal in moisture.[49] Place them in a spot with bright but indirect light, such as near a sunny window or next to a grow light.[50]
- Be patient—it can take up to 9 months for the cuttings to root and start to grow new plantlets!
- As long as the leaf or pitcher cuttings are green, they could still be viable.
-
5Try root or crown division as an alternative method. If you have a mature plant that is getting crowded in its pot, this is a good approach. Carefully remove the plant from its pot and pull or cut some of the smaller crowns (the bulb-like structures at the base of the plant) away from the base of the parent plant. Place the crowns on a tray of 50:50 peat and sand growing medium, put the tray in a bag, and place it in a well-lit area, just the way you would a leaf or pitcher cutting.[51]
- Always leave the largest 1-2 crowns in place at the base of the parent plant. Repot the parent plant after dividing the crowns.
- Try to take sections of crown with their own roots. If not all the crowns have their own roots, don’t worry. You may still be able to get the cuttings to take and form new roots.
- It takes about 2-3 months for new growth to appear on crown or root cuttings. After that, you can remove the cuttings from their plastic bag and place them in a high-humidity terrarium.
-
6Repot the cuttings after new leaves emerge. Once you notice new growth, move the baby pitcher plants out of the bag or humidity dome and into new pots.[52] They grow best in a mixture of equal parts composted bark, washed horticultural sand, and perlite or vermiculite. Place the plant under direct light and keep it in an area where the temperature doesn’t drop below 50 °F (10 °C) at night.[53]
- Try to maintain a humidity level of around 60%-80% in your growing area. This is enough to keep the plant moist without encouraging rot or pests.[54]
References
- ↑ Jon Rowland. Plant Specialist. Expert Interview. 7 September 2021.
- ↑ https://www.carnivorousplants.org/grow/propagation/NepenthesStemCuttings
- ↑ https://www.rhs.org.uk/plants/types/carnivorous/growing-guide
- ↑ https://www.carnivorousplants.org/grow/propagation/NepenthesStemCuttings
- ↑ https://www.carnivorousplants.org/grow/propagation/NepenthesStemCuttings
- ↑ Jon Rowland. Plant Specialist. Expert Interview. 7 September 2021.
- ↑ https://www.carnivorousplants.org/grow/propagation/NepenthesStemCuttings
- ↑ https://www.carnivorousplants.org/grow/propagation/NepenthesStemCuttings
- ↑ https://www.carnivorousplants.org/grow/propagation/NepenthesStemCuttings
- ↑ https://www.carnivorousplants.org/grow/propagation/NepenthesStemCuttings
- ↑ https://www.rhs.org.uk/plants/types/carnivorous/growing-guide
- ↑ Lindsey Swett. Plant Specialist. Expert Interview. 1 March 2022.
- ↑ https://www.missouribotanicalgarden.org/PlantFinder/PlantFinderDetails.aspx?taxonid=256279&isprofile=0&
- ↑ https://www.carnivorousplants.org/grow/propagation/SarraceniaDivisions
- ↑ https://www.carnivorousplants.org/grow/propagation/SarraceniaDivisions
- ↑ https://www.nasarracenia.org/guides/cultivation/
- ↑ Lindsey Swett. Plant Specialist. Expert Interview. 1 March 2022.
- ↑ https://www.carnivorousplants.org/grow/propagation/SarraceniaDivisions
- ↑ https://www.carnivorousplants.org/grow/propagation/SarraceniaDivisions
- ↑ Jon Rowland. Plant Specialist. Expert Interview. 7 September 2021.
- ↑ https://www.nasarracenia.org/guides/cultivation/
- ↑ https://www.carnivorousplants.org/grow/propagation/SarraceniaDivisions
- ↑ Lindsey Swett. Plant Specialist. Expert Interview. 1 March 2022.
- ↑ https://www.carnivorousplants.org/grow/propagation/SarraceniaDivisions
- ↑ https://www.gardenersworld.com/plants/sarracenia-flava-var-maxima/
- ↑ https://www.nasarracenia.org/guides/cultivation/
- ↑ https://www.carnivorousplants.org/grow/propagation/SarraceniaSeed
- ↑ https://www.carnivorousplants.org/grow/propagation/SarraceniaSeed
- ↑ https://www.carnivorousplants.org/grow/propagation/SarraceniaSeed
- ↑ https://www.carnivorousplants.org/grow/propagation/SarraceniaSeed
- ↑ https://www.carnivorousplants.org/grow/propagation/SarraceniaSeed
- ↑ https://www.rhs.org.uk/plants/types/carnivorous/growing-guide
- ↑ https://coloradocarnivorousplantsociety.com/darlingtonia_californica1.htm
- ↑ https://coloradocarnivorousplantsociety.com/darlingtonia_californica1.htm
- ↑ https://www.carnivorousplants.org/grow/propagation/Darlingtonia
- ↑ https://coloradocarnivorousplantsociety.com/darlingtonia_californica1.htm
- ↑ https://auscps.files.wordpress.com/2016/09/darlingtonia2.pdf
- ↑ https://www.carnivorousplants.org/grow/propagation/Darlingtonia
- ↑ https://www.carnivorousplants.org/grow/guides/Darlingtonia
- ↑ https://auscps.files.wordpress.com/2016/09/darlingtonia2.pdf
- ↑ https://www.carnivorousplants.org/grow/guides/Cephalotus
- ↑ https://www.rhs.org.uk/plants/types/carnivorous/growing-guide
- ↑ https://coloradocarnivorousplantsociety.com/darlingtonia_californica1.htm
- ↑ https://www.carnivorousplants.org/grow/guides/Cephalotus
- ↑ https://coloradocarnivorousplantsociety.com/darlingtonia_californica1.htm
- ↑ https://coloradocarnivorousplantsociety.com/cephalotus_follicularis1.htm
- ↑ https://www.carnivorousplants.org/grow/guides/Cephalotus
- ↑ https://coloradocarnivorousplantsociety.com/cephalotus_follicularis1.htm
- ↑ https://coloradocarnivorousplantsociety.com/cephalotus_follicularis1.htm
- ↑ https://www.carnivorousplants.org/grow/guides/Cephalotus
- ↑ https://www.carnivorousplants.org/grow/guides/Cephalotus
- ↑ https://www.carnivorousplants.org/grow/guides/Cephalotus
- ↑ https://www.rhs.org.uk/plants/types/carnivorous/growing-guide
- ↑ https://coloradocarnivorousplantsociety.com/cephalotus_follicularis1.htm


