This article was co-authored by Aaron Asghari. Aaron Asghari is a Professional Guitarist and the lead guitarist of The Ghost Next Door. He received his degree in Guitar Performance from the Guitar Institute of Technology program in Los Angeles. In addition to writing and performing with The Ghost Next Door, he is the founder and primary guitar instructor of Asghari Guitar Lessons.
There are 13 references cited in this article, which can be found at the bottom of the page.
This article has been viewed 11,023 times.
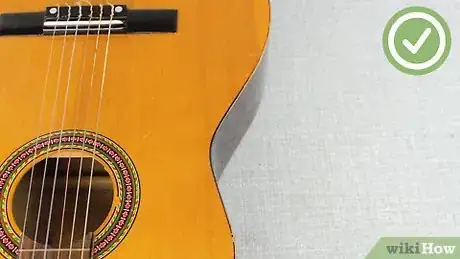
Polishing your guitar is a great way to protect and restore its finish to its original glory. It’s also really easy to do. Remove the strings so you can access the fretboard for a good cleaning. Use lemon oil to naturally polish and condition the wood of the neck and fretboard. For the body of the guitar, choose a polish that’s designed for your finish and buff it well to bring out its shine.
Steps
Removing the Strings
-
1Wash your hands and lay the guitar flat with the strings facing up. Wash your hands well with soap and water to remove oils that can affect the quality of your guitar’s finish when you clean and polish it. Hold the guitar in your lap or lay it flat on a clean surface. Make sure the strings are facing up so you can access all of them easily.[1]
- Make sure your hands are dry as well so you don’t get extra moisture on the finish.
-
2Rotate the tuning head of the first string counterclockwise to loosen it. The tuning heads are the metal gears at the top of the guitar, also known as the headstock, that hold tension in the strings to produce sound. Start with the “E” string, which is the thickest string at the top. Play the string as you turn the tuning head to make sure you’re loosening it. The sound will get deeper as the tension is released. Continue rotating until the string no longer makes a sound when you play it.[2]
- Don’t loosen the string so much that it hangs over the next string.
- If the note that the string makes when you play it gets higher, then you’re rotating the tuning head in the wrong direction.
Advertisement -
3Loosen each of the strings one by one to ease the tension on the neck. Once you loosen the first string, move to the tuning head of the second string next to it, which is the “A” string. Thumb the string as you rotate the tuning head counterclockwise to make sure the tension is being released. Turn the tuning head until the string no longer makes a sound when it’s played, then move to the next string and repeat the process.[3]
- Gently releasing the tension from all of the strings will put less strain on the neck of the guitar.
-
4Take the strings out of the tuning heads. Once all of the strings are loose, unwind the first string from its tuning head. Continue unwinding it until you can pull the end of it out of the slot on the head that’s holding it in place. Remove the rest of the strings from the tuning heads individually.[4]
Tip: If removing a string is from the tuning head is too difficult, use a pair of wire cutters to snip the string around the halfway point to make it easier to take off.
-
5Remove the bridge pins if the guitar has them. The bridge is the piece on the body of the guitar that holds the strings in place. If you have an acoustic guitar or if your guitar has small pins in the bridge to hold the strings, use a screwdriver or another flat object to gently pry the pin straight up to remove it.[5]
- Set the pins aside so you can replace them later.
- Most electric guitars do not have bridge pins.
-
6Slide the strings out of the bridge to remove them. Pull the end of the first string that’s attached to the bridge to start sliding it out of the slot. Continue pulling the string until it’s completely removed from the guitar. Then, pull out the rest of the strings, one by one.[6]
- Don’t yank or jerk the strings or you could damage the bridge or scratch the surface of the body.
Cleaning and Polishing the Neck
-
1Wipe down the entire guitar with a clean cloth to remove any dust. Take a clean dry cloth and run it over the surface of the whole guitar to dust it. Work the cloth around and between the tuning heads as well as on the backside of the body. Use gentle, circular motions to remove as much dust as possible.[7]
-
2Scrape any dirt out from the cracks between the frets with a metal pin. The frets are the small metal wires that cross over the neck of the guitar and are what allow you to change the sound of the strings. Use a small metal pin or another flat object to gently scrape any dust, dirt, or grime that is lodged in the small crevices where the frets are connected to the neck.[8]
- Be careful not to scratch the wooden fretboard.
- If your guitar is well-maintained or new, there may not be much dirt to clean out from the frets.
-
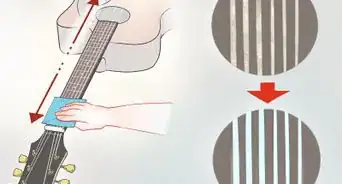
3Use 0000 steel wool to wipe down the fretboard along the grain. Take some fine steel wool and gently rub the spaces between the frets, following the grain of the wood. Start at the top of the fretboard and work your way down to the bottom to remove any grimy buildup that may be present on the wood.[9]
- Do not use a different steel wool grade or you could scratch or damage the wooden fretboard.
- You can find 0000 steel wool at hardware stores, department stores, and online.
-
4Apply a few drops of lemon oil to a cloth and wipe down the neck of the guitar. Take a clean dry cloth and wrap it around your finger. Drip a few drops of lemon oil onto the cloth and run it down the entire length of the guitar neck. Be sure to get the headstock and the spaces between the tuning heads. Wipe the back of the neck as well.[10]
- Do not apply lemon oil to the body of the guitar.
Tip: If you’re polishing an acoustic guitar, apply some lemon oil to the wooden bridge as well.
-
5Wipe up the excess lemon oil with a clean cloth. Use another clean cloth or use a dry section of the one you’re using to apply the oil and wipe over the neck to pick up any extra oil from the surface. Gently pass the cloth over the surface once or twice to soak up any large droplets so most of the oil soaks into the wood.[11]
- You don’t want to scrub or remove the oil from the wood.
Applying Polish to the Body of the Guitar
-
1Choose a guitar polish that is designed for your guitar. There are many different varieties of guitar polishes, and each or designed for specific guitars and finishes. Look up your guitar’s make and model online and find out what type of polish the manufacturer recommends for the best results. You could also ask your local music supply store what type of polish they recommend for your guitar.[12]
- You can find guitar polish at music supply stores and online.
-
2Spray the polish over the guitar from about 6 inches (15 cm) from the surface. Hold the spray bottle over the guitar and apply a fine mist all over the body of the guitar. Be sure to get the back and sides of the guitar and avoid getting the polish on the fretboard and neck.[13]
- You don’t need to saturate the body with the polish. Just apply enough to thinly cover the surface.
Tip: If you do get some polish on the fretboard, wipe it away with a clean cloth as soon as possible so it doesn’t soak into the wood.
-
3Use a microfiber cloth to buff the body of the guitar. Use gentle, circular motions to spread the polish all over the body of the guitar and to buff it so it shines. Be sure to buff the sides and back of the guitar as well. Continue buffing until all of the polish has been absorbed.[14]
- A microfiber cloth will prevent small threads from getting lodged in the polish.
-
4Restring the guitar with a new set of strings when you’re finished. Once the body of the guitar has been buffed, it’s ready to be restrung. Use a new set of strings and replace them in the same order that you removed them so that they’re ordered from the top-down as E, A, D, G, B, E. Tighten the tuning heads and tune the guitar so you can start playing your newly polished instrument![15]
- Use the same type of strings that were originally on the guitar for the best sound quality.
- Look for guitar strings at music supply stores and online.
Expert Q&A
-
QuestionHow can I extend the life of my guitar strings?
 Aaron AsghariAaron Asghari is a Professional Guitarist and the lead guitarist of The Ghost Next Door. He received his degree in Guitar Performance from the Guitar Institute of Technology program in Los Angeles. In addition to writing and performing with The Ghost Next Door, he is the founder and primary guitar instructor of Asghari Guitar Lessons.
Professional Guitarist & Instructor Wash your hands with soap and water before you play the guitar. Wipe the strings down with a microfiber cloth after you finish playing. This will dramatically increase the lifespan of your strings.
Things You’ll Need
- Clean cloths
- Small metal pin (or a similar thin object)
- 0000 steel wool
- Lemon oil
- Microfiber cloth
- Guitar polish
References
- ↑ Aaron Asghari. Professional Guitar Player. Expert Interview. 15 February 2019.
- ↑ https://youtu.be/q_01VoMU4ps?t=34
- ↑ https://youtu.be/8Q13KvFHvf0?t=162
- ↑ http://thevault.musicarts.com/how-to-change-electric-guitar-strings/
- ↑ https://youtu.be/q_01VoMU4ps?t=72
- ↑ http://thevault.musicarts.com/how-to-change-electric-guitar-strings/
- ↑ https://youtu.be/ulXQh9i4jtE?t=21
- ↑ https://youtu.be/ulXQh9i4jtE?t=74
- ↑ https://youtu.be/plU27QJBKn8?t=212
- ↑ https://youtu.be/ulXQh9i4jtE?t=105
- ↑ https://youtu.be/ulXQh9i4jtE?t=216
- ↑ https://youtu.be/H2AAGCkIzt4?t=515
- ↑ https://youtu.be/H2AAGCkIzt4?t=544
- ↑ https://youtu.be/H2AAGCkIzt4?t=555
- ↑ Aaron Asghari. Professional Guitar Player. Expert Interview. 15 February 2019.
