This article was co-authored by Virginia Kelley, MA, a trusted member of wikiHow's volunteer community. Virginia Kelley is an artist and art teacher from New York with over 30 years of experience. She has both a Bachelor's and a Master's degree in Art Education from SUNY-Buffalo State and has taught art at the K-12 and college levels. For the last 20 years, she has focused her work and teaching on watercolor.
This article has been viewed 19,934 times.
Learn more...
Water lilies appear in ponds in temperate and tropical climates. They commonly grow in groups, overlapping one another. The water lily blossom can be found in white, lavender, yellow, and various shades of pink. The bright green leaves are round and can be as large as 12” in diameter. Their surfaces provide ideal resting spots for frogs and dragonflies. The underside serves as an umbrella offering shade and protection for the fish.
Steps
Preparing and Planning
-
1Practice the visual elements required for this painting. Use sheets of drawing paper or designate a few pages in your sketchbook. Go online and find printable coloring pages of lily pads, frogs and dragonflies to use as research.
-
2Start by drawing the lily pads since they will most likely be the largest and most prominent shapes in your painting. Each pad will need to be drawn as an oval and has a slit on one side stopping at the center. It will have veins growing out from that point to the edges of the leaves. It grows on a flexible stalk and is anchored in the mud at the pond’s bottom.Advertisement
-
3Study the flower. It is the most complicated---and showiest part of your painting so practice doing it two ways. Try drawing it slowly and carefully in pencil. Then do it freehand with a brush in a few strokes.
-
4Practice drawing a frog, a dragonfly, and a fish, the animated creatures that will give your painting extra life. They can all be done using simple shapes so doing warm-up drawings will help you become comfortable with them.


Setting Up and Sketching
-
1Open a pad of 140 lb. watercolor paper and turn the page back. The cardboard backing will support your paper as you work. Assemble other supplies: a pencil, eraser, water container and brushes. Tissues are handy for catching runs and wiping up drips and spills.
-
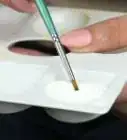
2Prepare your paints. Any type is fine from a watercolor paint box to tube paints squeezed onto a palette or white plastic picnic plate. Have available a range of colors even though your subject requires mostly greens, blues, and whatever color you wish for the blossoms.
-
3Begin sketching the lily pads in pencil. Draw a number of them, larger toward the foreground, getting gradually smaller as they recede or go into the distance. Even though the pads are round, the trick to getting them to lie flat on the water’s surface is to draw them as ovals or ellipses.
-
4Remember to overlap the pads. In nature, they often grow in groups, clustered together, so you will draw some partially visible ones. On each pad, lightly sketch the slit, having it end at the center. Lightly indicate veins coming off that center point going to the edges of the pads.
-
5Do the flowers. These colorful, delicate looking blossoms come one to a lily pad and their colors will grab the viewer’s attention framed by the green of the pad. The flowers have long, tubular stems and the stem can be partially shown or curling below the water.
-
6Plot out where you want to have frogs or other creatures. This is up to you whether you want to include them or not.


Painting the Scene
-
1Begin painting anywhere you wish. Some start with the background which in this painting will be water. Remember to keep your paint well diluted. One approach is to have it more intense closer to the viewer and lighten as it goes back to show it is receding into the distance. Or, vice versa, depending on the way the light is hitting at that moment---or your mood.
-
2Get the hard part out of the way. For some, this might be the lily pads. You might vary the greens slightly as you work to make them interesting. Once you have the first layer, be sure to let it dry thoroughly before adding other layers of color, texture or details. Remember to paint around where the flowers will go to ensure that you put additional colors directly on white paper.
-
3Work on the flowers. Before doing the colors, change the water. Allow the flowers to dry before painting back into them with accents or deeper shades of their colors.
-
4Paint the frogs, dragonflies, and fish if you are including any of them. A special challenge would be to try to make the frogs be camouflaged.
-
5Allow your painting to dry thoroughly. Use a hair dryer to hasten this process, if you wish. When you have it the way you want it, stop! Give yourself a day to gain distance from it before making adjustments and corrections. Check to see if you have signed your work and forego modesty and sign it proudly.
-
6Purchase a mat, frame and metal hook or hanger and display your work. This peaceful painting will no doubt evoke comparisons to the work of the artist Monet who was famous for his water lily paintings. Feel good that you have, if only for a short time, walked in Monet’s shoes and elevated the water lily to fine art.


About This Article