This article was co-authored by Claire Donovan-Blackwood. Claire Donovan-Blackwood is an Arts & Crafts Specialist and CEO of Heart Handmade UK, a site dedicated to helping people live a happy, creative life. With over 13 years of experience, Claire uses art as a form of therapy and focuses on mindfulness in the making of art. She makes crafting easy and accessible for those she works with. Claire received her B.A. in Photography & Visual Imagery from The University of Huddersfield.
There are 7 references cited in this article, which can be found at the bottom of the page.
This article has been viewed 28,287 times.
A craft room is a place where you want to let your creative energies take over. Organizing your craft room will take some work but the result is worth the effort. You will want to start by gathering and sorting all of your available craft supplies. Then, find places to store these items where they will be easy to grab and use amid a project. Use organizing as an opportunity to display those items that inspire you as well.
Steps
Sorting Your Craft Supplies
-
1Gather all of your craft items. Grab a basket and walk through your whole house if you like and grab all craft supplies and tools. Carry them into your designated craft room and place everything in the middle of the floor. Once you think that you’ve gotten it all, go back through one more time just to be certain. Make sure to open all of your drawers and cabinets, as craft supplies can often ‘hide.’
- Likewise, go through your craft room and identify any objects or items that do not belong there and move them out. They may need to go to a ‘staging area’ in another room so that you can concentrate your energy on your craft area.
-
2Sort your supplies out according to item type. Look over your supply pile and begin to build smaller piles based upon different categories of supplies. For example, put all of your wrapping paper together. All fabrics should go together initially. After these first piles are finished, you can go back through them and narrow them even further according to size and color. For example, put all of the red wrapping paper together.
- At this point your room may be in controlled chaos, so be careful walking around or you may slip on one of your piles. For that reason, try to keep other people out of the room as well, at least during this stage.
- To keep you from feeling overwhelmed, bring an egg timer into the room and set it for 15-minutes. When the timer goes off, take a 5-minute break. Then, re-set the timer and start again. This will keep you motivated to work at a steady pace without burning out.
Advertisement -
3Decide what to donate. As you sort, identify items that are worth donating. Perhaps you have multiples of some items or maybe leftover supplies from projects that you’ve completed and moved on from. Make sure that whatever you donate is safe for another user. For example, don’t donate rusty scissors or any cracked glass items.
- Various charity organizations, schools, and libraries will gladly accept donations of craft supplies as long as they are in good condition. This is a great opportunity to share your interest in crafting with other people.
- Depending on the number of items that you have, some charities will come to your house and pick them up for you. This may be a good opportunity to do organize other areas of your home as well.
-
4Create a trash pile and dispose of it. As you sort, identify items that need to be thrown away. These could be items that you no longer find useful, but that isn’t suitable for donation due to condition or quantity. You should also trash any supplies that are no good anymore, such as dried-out glue or frayed ribbons. Ask yourself if you’ve used the item in the past year and if you haven’t odds are it needs to be thrown away or donated.
- Take the trash out after you’ve finished sorting the main pile. If you wait you are likely to leave it there and it will become an eyesore and will slow your organizing progress.
-
5Repeat this process every few weeks. As life goes on, many of your supplies will likely wander out of your craft space once more. To keep your area tidy and useful for you, go through a sorting and cleaning process fairly often, especially after completing a major project.
- Also, devote at least ten minutes after you finish working in your craft room to picking up and storing items in their new proper places. Devoting even this small amount of time can make a major difference in the long-term appearance of your craft room.


Implementing a Storage System
-
1Store similar items together. You’ll want to keep your supplies together in their sorted piles as you place them in their designated storage spots and containers. Extra-small items will need to be placed in extra-small containers and will probably be grouped for storage and then usage.
- Keep an eye out for items that may appear similar but that have slightly different functions. These situations may require that you divide up your storage system even further. For example, you’ll want to divide your fabric scissors from your paper scissors.[1]
-
2Use plastic bins. These are the number one storage option when organizing a craft room. They come in a wide variety of sizes and are easy to stack. They also fit well within a cube shelf. You can see inside the clear bins, making it easy to find an item that you are looking for.[2]
- Depending on how you arrange your bins, you will want to purchase ones that open on the top or via a front panel. Look for lids that snap on tightly to avoid spilling your supplies.
- Bins are also especially useful when working with messy items such as paints. In addition, they contain fumes from paints as well.
- Make sure to purchase extra bins, and to leave space in the ones that you currently use, for new supplies that you may purchase.
EXPERT TIPClaire Donovan-Blackwood is an Arts & Crafts Specialist and CEO of Heart Handmade UK, a site dedicated to helping people live a happy, creative life. With over 13 years of experience, Claire uses art as a form of therapy and focuses on mindfulness in the making of art. She makes crafting easy and accessible for those she works with. Claire received her B.A. in Photography & Visual Imagery from The University of Huddersfield.Arts & Crafts Specialist Claire Donovan-Blackwood
Arts & Crafts SpecialistGet creative when repurposing items for your craft room! Claire Donovan-Blackwood of Heart Handmade UK says: "If you're looking for a DIY budget solution for craft storage, try wrapping fruit tins with pretty patterned paper. You can use them to store paintbrushes, markers, and other things you use often. For small embellishments, try using a ceramic egg dish or a muffin tray. If you're using a muffin tray, you can even paint it to make it prettier."
-
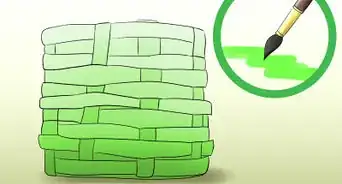
3Arrange items by color. Store and display your craft supplies according to the color wheel. This will create a quick way for you to find an item that you need for a particular project. It will also lead to beautiful displays of items within the room itself. For example, if you have a bunch of balls of yarn, sort them according to color (reds next to orange tints, etc.) and place them in a wooden cube bookcase for quick access and visual appeal.[3]
-
4Repurpose materials as storage containers. Almost any container that is sturdy with a lid can be reused as storage in your craft room. Try to think creatively and find jars, buckets, etc. that you find visually appealing already. They will be even more attractive when holding your supplies.
- Here are a few unique ideas. To house smaller items such as sequins, use little plastic pill storage boxes that you can get at a pharmacy or grocery store.[4] For colored beads, place them in a spice rack by color for ease of access and beauty. Small tins or colored buckets make a great storage option for pens, pencils, and paintbrushes.
- For a more industrial look, grab a magnetic knife holder from your kitchen, attach it to the wall of your craft room, and use it to display your sharp cutting devices and scissors. This works best when positioned close to your standing work area.[5]
- Look at crafting sites and blogs online or buy inspirational craft books/magazines to find additional design ideas that may suit your particular space and taste.
-
5Label everything. This is especially important when storing items in plastic bins or opaque containers. As you put away every storage container, make sure that it has a clear and visible label that you can see from the center of your craft room. For example, the bin with tape should say, “Tape-clear.”[6]
- You can get as fancy as you’d like with the labels. Some people prefer to use a standard label maker while others print directly from online templates. You can even make your labels by hand.
-
6Install shelving. You want to get the most use out of all surfaces within your room, so don’t ignore the walls. Look around your craft room and consider adding shelves to many of the open spaces on the walls. Think creatively about shelving and use materials such as recycled bookcase shelves or even old metal signs repurposed as shelves.


Organizing Your Space for Creative Inspiration
-
1Locate your work table for ease of access. Get a sturdy table that you’d feel comfortable working on and place it in the most convenient space in the room, usually right in the middle. You want to be able to access it from all sides. Consider adding a chair or stool, unless you plan to stand all of the time when crafting.[7]
- In addition to your main table, you may want another one placed against the wall that will almost act like a workbench. You can hang items on the wall next to it for quick grabbing access.
-
2Keep your favorite supplies close by. The materials that you are using for a current project, or those that you consistently rely upon, should be placed close to your table workspace. For example, if you are a seamstress, do not hide your best pair of cutting shears in a labeled storage bin in the closet.
-
3Emphasize the natural light when possible. If you have a choice of room, pick a room with ample light sources. This will help to save you from eye strain as you work on your projects. You can also supplement the light by adding interesting (and bright) lamps. Hanging lamps often work them quite well as they are out of the way.
-
4Create an inspiration board. Pinup photos or drawings to a fabric-covered poster board. Or, hang a magnetic board on your wall and attach items to it. Clip or write down quotes that you like and attach them to the board. Let it keep growing until you feel the need to remove some items into storage. This can be a fairly chaotic, but inspirational space, in another organized room.[8]
- To add even more visual appeal, use colorful and creative stick-pins to attach items to the board. You can even go with pieces of patterned tape too.
-
5Decorate with beautiful craft items. If you love your yarn, don’t hide it, display it. As you sort out items at the start of this process, look for those supplies that you find particularly visually stunning or exciting. Try to create spaces out in the open to store these items. For example, lengths of ribbon can be stored and displayed by hanging a pegboard on the wall.
-
6Create more access by manipulating your space. Don’t be afraid to use every inch of your craft room for some storage, display, or work purpose. You can paint inspirational quotes on the ceiling and hang items from it too. You can go vertical up the walls and increase your reach by employing footstools.[9] Typically neglected areas, such as the backs of doors, can be put to good use with hanging storage pouches.
- Increase your visibility in closet spaces by removing the doors and replacing them with a rod and curtain. When you first enter your room, sweep aside the curtain and you’ve got instant access and visibility into this space.[10]


Warnings
- Think about design and utility, but also safety. If you will have kids in your craft room, watch how you display sharp tools, etc.⧼thumbs_response⧽


References
- ↑ http://www.themarthablog.com/2015/07/organizing-my-craft-room.html
- ↑ http://blog.creativelive.com/how-to-organize-your-craft-room/
- ↑ http://blog.creativelive.com/how-to-organize-your-craft-room/
- ↑ http://www.architectureartdesigns.com/organize-your-craft-room-15-most-amazing-storage-hacks-and-tips/
- ↑ http://blog.creativelive.com/how-to-organize-your-craft-room/
- ↑ http://www.huffingtonpost.com/2012/08/15/craft-room-ideas-organizing-tips_n_1784589.html
- ↑ http://www.huffingtonpost.com/2012/08/15/craft-room-ideas-organizing-tips_n_1784589.html
- ↑ http://www.realsimple.com/home-organizing/decorating/craft-room-ideas/clean-organized-desk
- ↑ http://www.simplify101.com/organizing-tips/scrapbook-organization-tips/7-craft-room-organizing-ideas-from-my-creative-space/
About This Article
To organize a craft room, start by sorting all of your supplies by type and donating or disposing of things you no longer need. Then, store similar items together in plastic bins or storage boxes. You can also use a bookshelf, spice rack, or metal tins to store your crafting supplies in. As you're putting things away, try to arrange similar items, like fabrics and yarn, by color, which will make it easier to find what you're looking for. Also, label all of your storage containers using a label maker or with labels you printed off the computer. To learn how to arrange the furniture in your craft room, scroll down!


