X
This article was co-authored by wikiHow staff writer, Jack Lloyd. Jack Lloyd is a Technology Writer and Editor for wikiHow. He has over two years of experience writing and editing technology-related articles. He is technology enthusiast and an English teacher.
The wikiHow Tech Team also followed the article's instructions and verified that they work.
This article has been viewed 116,423 times.
Learn more...
This wikiHow teaches you how to import multiple different photos into one Photoshop project as a series of layers. While it is possible to do this from within Photoshop without using any additional software, some versions of Adobe Bridge also allow you to send multiple files to a Photoshop project.
Steps
Method 1
Method 1 of 2:
Using Photoshop
-
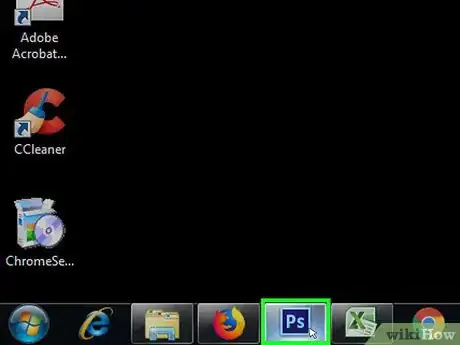
1Open Photoshop. Double-click the Photoshop app icon, which resembles a blue "Ps" on a square background.
- Since you'll be creating a new file when you import the photos, you don't need to open an existing file or create a new one here.
-
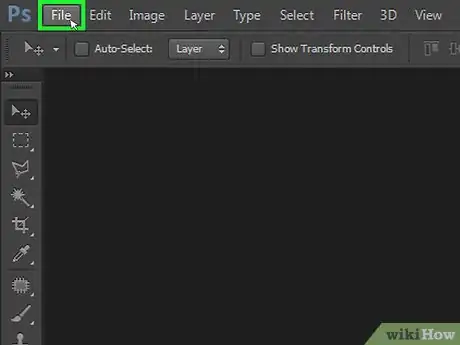
2Click File. It's in the top-left corner of the Photoshop window (Windows) or the screen (Mac). A drop-down menu will appear.Advertisement
-
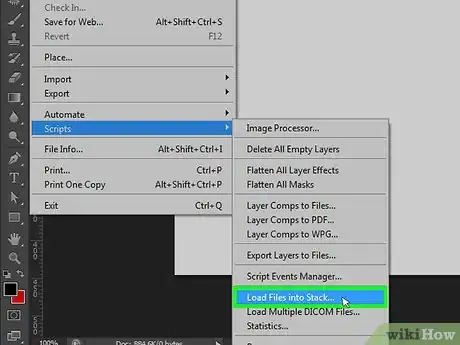
3Select Scripts. You'll find this option near the bottom of the drop-down menu. Selecting it prompts a pop-out menu.
-
4Click Load Files into Stack…. It's near the bottom of the pop-out menu. A new window will open.
-
5Select a type of file location. Click the "Use" drop-down box near the top of the window, then click either Files if you want to select individual photos or Folder if you want to use a folder full of images as the location.
-
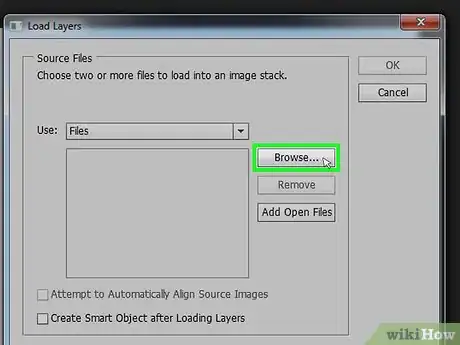
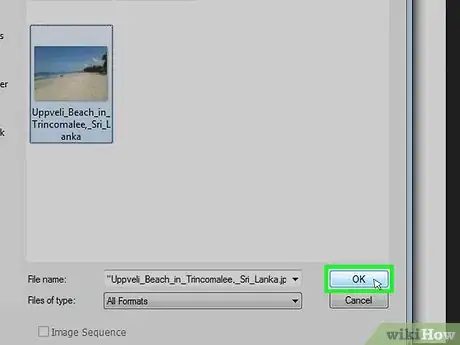
6Click Browse…. You'll find this option on the right side of the window. Clicking it opens a window from which you can select your images (or folders).
-
7Select files. Hold down either Ctrl (Windows) or ⌘ Command (Mac) and click each file or folder that you want to import.
- If you're selecting a folder, the entire folder's photo contents will be imported into Photoshop.
-
8Click Open. It's in the bottom-right corner of the window. You should see the photos' names appear in the middle of the window.
-
9Add any currently open files if needed. If you did open an existing Photoshop file, you can add photos which are in the current file to the list of layers by clicking Add Open Files on the right side of the window.[1]
-
10Click OK. It's in the top-right corner of the window. Photoshop will begin turning the photos into layers, after which point you'll be able to edit your Photoshop project like usual.
- This process can take several minutes during which Photoshop will most likely be fairly unresponsive.
- Photoshop may appear to glitch out during the layer assimilation; this is part of the process, so don't close or restart Photoshop until your layers finish importing.
Advertisement
Method 2
Method 2 of 2:
Using Bridge
-
1Update both Bridge and Photoshop. A bug in Creative Cloud 2015 and 2017 products prevents the "Photoshop" option from appearing in Bridge if either Photoshop or Bridge is out of date. You can update both of these programs by doing the following:[2]
- Open the Creative Cloud program.
- Click ⋮ in the upper-right corner.
- Click Check for App Updates
- Click Update All if prompted.
- Keep in mind that updating doesn't always fix this problem. If your programs are both updated to the 2017 version, consider deleting and reinstalling Photoshop and Bridge, or use Photoshop's Scripts instead.
-
2
-
3Open both Bridge and Photoshop. In order to speed up the process of opening your selected images in Photoshop, both Bridge and Photoshop should be open.
-
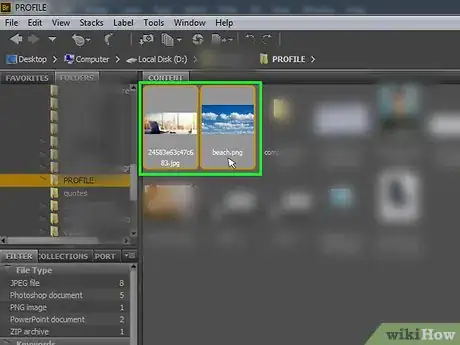
4Select photos in Bridge. Click a photo location on the left side of Bridge, then hold down Ctrl (Windows) or ⌘ Command (Mac) while clicking each photo that you want to open as a layer.
-
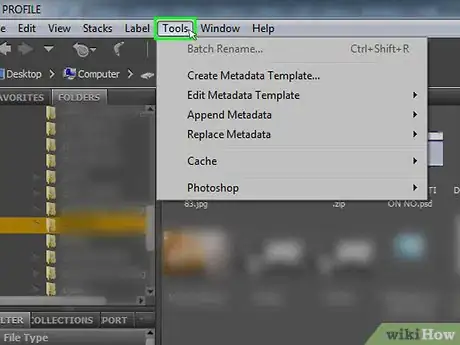
5Click Tools. It's a tab in the upper-left corner of the Bridge window (Windows) or your Mac's screen (Mac). A drop-down menu will appear.
-
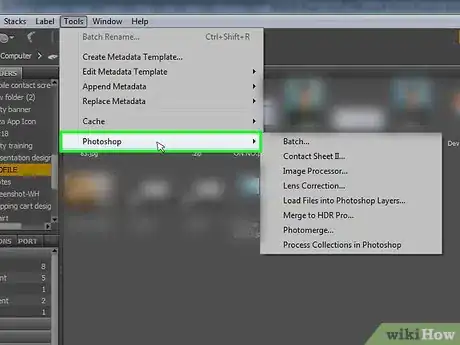
6Select Photoshop. This option is near the bottom of the drop-down menu. Doing so prompts a pop-out menu to appear.
- If you still don't see Photoshop in the Tools menu, you may need to use Photoshop's Scripts instead. You can also try deleting and reinstalling both Photoshop and Bridge.
-
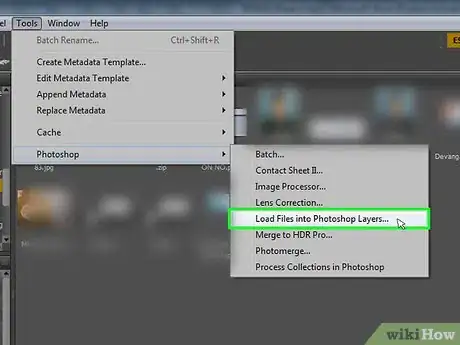
7Click Load Files into Photoshop Layers…. You'll find this option in the pop-out menu. Clicking it prompts Bridge to send your selected images into Photoshop, where they will be organized into one project as multiple layers.
-
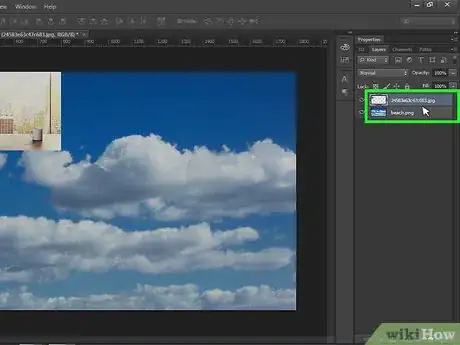
8Wait for your photos to finish importing into Photoshop. Once Photoshop displays your new project with your photos displayed as layers, you're free to close Bridge and begin working in Photoshop.
- You can switch between the individual layers by clicking the one that you want to view in the "Layers" window that's on the right side of Photoshop.
Advertisement
Warnings
- Unfortunately, there isn't a reliable way to ensure that the Photoshop option appears in Bridge, though using Photoshop's Scripts option is just as effective as using Bridge to begin with.⧼thumbs_response⧽
Advertisement
References
About This Article
Advertisement
