X
wikiHow is a “wiki,” similar to Wikipedia, which means that many of our articles are co-written by multiple authors. To create this article, 18 people, some anonymous, worked to edit and improve it over time.
This article has been viewed 65,233 times.
Learn more...
With just a little know-how, you can create reusable, simple, and helpful open educational resources (OER) to share with others. We'll show you how to create a small OER (approximately 4 hours of activities), but you can easily scale this to a bigger resource!
Steps
Part 1
Part 1 of 2:
Developing the OER
-
1Crack open your idea and mix in the creativity. You'll be coming to this development with an idea; it could be anything. Take that idea and flip it on its head - think to yourself "this idea would never work as an X...", then challenge yourself and make it work!
- Or, take a random idea generator (examples are explored below in Part 3, the step commencing with 'Immerse yourself'). Think whether your activity could be inspired by something in that resource.
- Alternatively, look around you and find a random item, e.g. a spoon, and apply it to the learning activity you have in mind, e.g. cultural analysis and comparison through the use of a culture's cutlery - or - poetry about common objects, displayed in their shape to make interesting art works.
-
2Choose a suitable platform. When making an OER, you need to think not only about the suitability of the delivery platform for the initial intended content use but also its suitability for future (re)use. Delivery needs to be 'open' - freely accessible, no password protection - and ideally editable (at the very least, able to be copied).
- You do not need to always make a new website: you could develop and upload a text-based document; create a bank of new images in an existing space; edit an existing space, like a wiki; create a closed resource but share how you made it openly through social media; or you could develop a new webpage. These are just a few examples.
Advertisement -
3Give yourself plenty of time. Good learning resources often take a lot of time to develop through reflection and sourcing content. This is especially true with OERs, as finding open content - or authoring your own images and text, etc. - can take a lot of time. That said, it's well worth the effort.
- Often you will find yourself stumbling upon something new and unexpected through your development journey. In turn, this may inspire you to decide to completely change what you initially had in mind. No worries, just run with it! The time you had spent up to then was not wasted, it helped you achieve your new and exciting plan.
-
4Do not fear the not-yet-tried. Things can seem scary, then you put flowers in it! Be prepared to take risks and try something new––you have nothing to lose but a lot to gain from giving a new idea a go.
-
5Immerse yourself. Learning resources are everywhere and so are ideas for new ones. Jump in at the deep end and fully immerse yourself in different spaces and resources. For inspiration and potentially sourcing content, check out the following ideas:
- Blogs
- Mailing lists
- Stumble Upon websites
- MOOCs
- OER and CC content banks and search engines
- Online articles
- Social media
- … etc. (often the first jump is the hardest, then it's a lot of fun!)
-
6Recycle, repurpose, reuse. Do not feel like you have to make everything from scratch - there are loads of great ideas and resources out there, available for use in a new context. It is important to note that content can be used in various ways:
- If forming part of the core activity, open access content can be pulled out and reused directly, partially or simply be inspiring;
- There is also the opportunity to use or sign-post to other non-CC content, providing you have obtained the author's direct permission to use it in this context (and there is no harm in asking);
- However, should the content be supplementary to the core activity (for example, you might also like to look at this link) the sign-posted content is not necessarily required to hold a CC license too (however, should high-volumes of traffic be expected, such as for use in a MOOC, it is polite and thoughtful to give the author a heads-up, as it could be sitting on a personally-hosted server.)
-
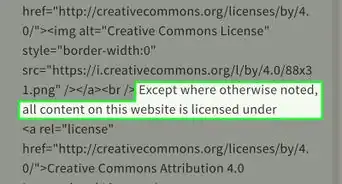
7Be careful what you open. Not everything on the internet is an open resource - just because it appears open, does not mean there is an open license to use it. This is particularly true for images, where the image may be found in multiple places with different licenses available. It is important to try to find the original image (or at least show that you made every effort to find it) rather than simply choosing the version with the most open attribution! If in doubt, try a different image.
- Start from a position of open. Using creative commons search engines to source images where you do not hold the license personally makes the development of open content easier (although do double-check the licenses just to be sure!).
- Keep an eye on the particular license of the content, for example, share-alike, which stipulates you must use the exact same license for the final work the resource is incorporated into (more information available in the video)
-
8Remember: attribution, attribution, attribution. If someone has taken the time to create a(n open) resource, acknowledge their effort through attribution. Even if it is not a requirement of the license, it is a good habit to develop and a nice way to say thank you. It also makes it easier for others to use the resource after you.


Advertisement
Part 2
Part 2 of 2:
Assembling and Revealing the OER
-
1Assemble the layers of your OER. So you've immersed yourself in exciting resources, you've been inspired, you have a list of content to use - now all you've go to do is link it back to your vision for the learning activity, applying all the steps and insight previously gained. Again, leave yourself plenty of time!
-
2Set your newly created OER free and open. Don't forget to apply an open license to what you produce - Creativecommons.org helps you build a suitable CC license for your content, which can be embedded into your resource in lots of different forms. Displaying an open-license badge signifies to other users that your content is part of a growing community of open practice and resources. Lovely!


Advertisement
Things You'll Need
- 1(+) enthusiastic educator
- Internet connection (this can be achieved without digital materials but does make further sharing more difficult)
- 1 or more digital platforms
- A selection of (links to) digital materials, e.g. search engines, websites, glitter-glue


About This Article
Advertisement