This article was co-authored by Bess Ruff, MA. Bess Ruff is a Geography PhD student at Florida State University. She received her MA in Environmental Science and Management from the University of California, Santa Barbara in 2016. She has conducted survey work for marine spatial planning projects in the Caribbean and provided research support as a graduate fellow for the Sustainable Fisheries Group.
This article has been viewed 52,132 times.
A rain gauge is an instrument used to record the amount of rainfall. A simple rain gauge can be built at home using a plastic bottle and a ruler. All you have to do after that is calibrate the gauge so that you can take accurate readings. This can be done by adults, but it is a great science activity for kids, too.
Steps
Building the Instrument
-
1Peel the label off of a plastic bottle. Common choices are a 500 ml (16.9 fl oz) drinking bottle or a 2 L (67.6 fl oz) bottle. No matter which you choose, peel or cut the label off of the bottle. This will allow you to clearly see inside the bottle as well as make marks on the outside of it.[1]
-
2Cut the top off of your bottle. Use a pair of scissors or a utility knife to cut the top off of the bottle. Cut right where the sides start to slope inward for the mouth of the bottle. This will leave you the most room in your rain gauge and provide you an effective funnel.[2]
- Have an adult assist or supervise this step.
Advertisement -
3Use the top to make a funnel. Take the part you cut off the bottle, flip it upside down, and put it back on top of the bottle. This should leave the top of the bottle pointing inside the bottle (make sure the cap is off). Now, water can effectively flow into the gauge. Tape your funnel in place with packing tape.[3]
Calibrating the Instrument
-
1Add 1⁄2 inch (1.3 cm) of sand to the bottom of the bottle. Adding sand to the bottom of the bottle will provide weight to keep the bottle from tipping over. It will also give you a level surface to measure water (the bottoms of most bottles are uneven).[4]
- You can use any sand. If you collect it along a river bank or on the beach, make sure it’s free of debris like weeds, sticks, shells, or rocks. Or, you can purchase sand at your local hardware store.
-
2Saturate the sand with water. Add just enough water to cover the sand completely. The amount of water needed to fill all of the holes between sand particles and cover the top of the sand is called the saturation point. Use a marker to mark the saturation point on the outside of your bottle.[5]
-
3Make a ruler on the bottle. From the saturation mark, measure up the bottle and make marks every 1 inch (2.5 cm). You can also make marks in between these lines to designate fractions of an inch (1⁄2 inch (1.3 cm), 1⁄4 inch (0.64 cm), 1⁄8 inch (0.32 cm), etc.). Put clear tape over your markings to protect them from weather.[6]
- You can also use clear tape to tape a ruler to the bottle.
- Alternatively, you could mark the bottle in centimeters or millimeters.
Using the Instrument
-
1Put the bottle in a hole outside. Usually, rainfall is measured at ground level. This means that you will need to dig a hole just deep enough to put your bottle in. The top of the bottle should be flush with the ground around it.[7]
-
2Let the bottle collect rain. Leave the bottle uncovered. When it rains, rainwater will be funneled into the bottle. This will allow you to record the amount of rain that fell on that particular day.[8]
-
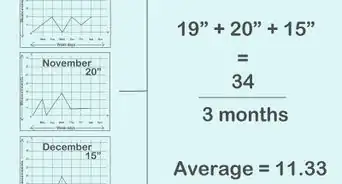
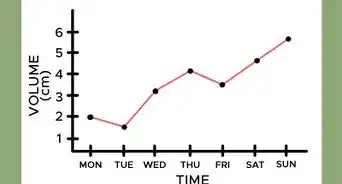
3Record your readings. Remove the bottle from the hole and observe how much water has collected. Write down the amount of rainfall that you record. This way, you can put the rain gauge back in the same place and collect water from the next rain. Over time, you can chart how much rainfall your area has received.[9]
- Note that these readings will differ depending on the size bottle you use. Any bottle will differ from the official rain gauge used by meteorologists.
Community Q&A
-
QuestionWhy do I need to put sand in the bottom of the container?
 Community AnswerSand is used as a counter-weight so the bottle will not easily fall over.
 -
QuestionWhy don't you put a ruler in the rain gauge?
 DonaganTop AnswererAny object inserted into the gauge will slightly affect the reading. Many gauges have a measuring scale incorporated into their side.
 -
QuestionWhy do I have to bury the gauge?
 Community AnswerSo it will not tip over and no animals will hurt themselves on it.
Warnings
- Adult supervision may be required with scissors or a utility knife.⧼thumbs_response⧽


References
- ↑ https://www.science-sparks.com/weather-make-a-rain-gauge/
- ↑ https://www.science-sparks.com/weather-make-a-rain-gauge/
- ↑ https://www.science-sparks.com/weather-make-a-rain-gauge/
- ↑ https://www.communityplaythings.com/resources/articles/making-a-rain-gauge
- ↑ https://www.communityplaythings.com/resources/articles/making-a-rain-gauge
- ↑ http://www.sciencekids.co.nz/projects/raingauge.html
- ↑ https://www.kbtx.com/content/news/Science-Outside-The-Classroom-Making-a-rain-gauge-570079741.html
- ↑ https://www.education.com/science-fair/article/DIY-rain-gauge/
- ↑ https://www.education.com/science-fair/article/DIY-rain-gauge/
About This Article