This article was co-authored by Alessio Iadicicco. Alessio Iadicicco is an Apparel Manufacturing Specialist and the CEO and Co-Founder of MarkersValley, an online apparel and manufacturer sourcing platform that connects luxury fashion brands to a network of highly-vetted, truly Italian manufacturers. He holds a Bachelor's degree in Economy and Management of Financial Enterprises from The University of Naples Federico II. MarkersValley has connected fashion brands in over 100 countries and has a network of over 100 independent Italian factories and artisans. MarkersValley has been featured in Forbes, EQ, St. Louis Business Journal, Il Mattino, and Corriere Della Sera.
There are 18 references cited in this article, which can be found at the bottom of the page.
This article has been viewed 232,392 times.
Purses come in all sorts of shapes, sizes, and colors. They are different from handbags in that they are smaller, stiffer, and have a flap. Handbags are usually larger and have a zipper closure. Making your own purse is a great way to let your creativity to shine, and you'll have a useable accessory to carry small items, such as cellphones and lipstick. Best of all, you don't need a lot of fancy supplies to get started.
Steps
Creating the Base
-
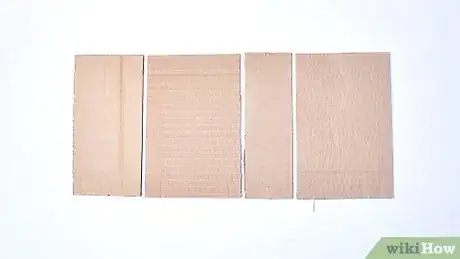
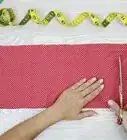
1Cut 2 rectangles out of cardboard for the front and back panels. Use a pen and ruler to draw 2 identical rectangles on a sheet of cardboard. Next, use a metal ruler and a craft blade to cut them out. The size of the rectangles does not matter, but something around 7 by 5.5 inches (18 by 14 cm) would work just fine.[1]
- For a more unique purse, make the panels trapezoids instead, where the bottom edge is longer than the top, and the side edges slant upwards.
- You can use regular cardboard for this, but thin cardboard, like what you'd get from a cereal box, would give you a neater finish.
-
2Cut a skinny rectangle from cardboard for the bottom panel. The length of the rectangle needs to be the same as the front and back panels. The width is up to you, but something around 2 3⁄4 inches (7.0 cm) would be good.[2]
- For example, if your front and back panels are 7 inches (18 cm) long, then your bottom panel should be 7 by 2 3⁄4 inches (17.8 by 7.0 cm).
- Use a pen and ruler to draw this rectangle, and a metal ruler and craft blade to cut it out.
Advertisement -
3Cut a third rectangle out of cardboard for the flap. Here is where you can get a little creative. The top edge of the rectangle needs to match the top edge of your front panel. It can be whatever height you want it to be, but something around 2/3 the height of the front panel would be good.[3]
- For example, you could make your front flap 18.5 by 10 centimetres (7.3 by 3.9 in).
- The shape of the bottom edge is up to you. You can make it rectangular, rounded, pointed, etc.
-
4Line the panels up, side by side, to create a rectangle. Arrange the panels in this order: back, bottom, front, and flap. Make sure that the long edges are parallel to each other, and that they have about 1⁄4 inch (0.64 cm) of space between them. You'll end up with a rectangular shape.[4]
- If you made the front flap pointed or rounded, position the shaped edge on the outside of your rectangle.
-
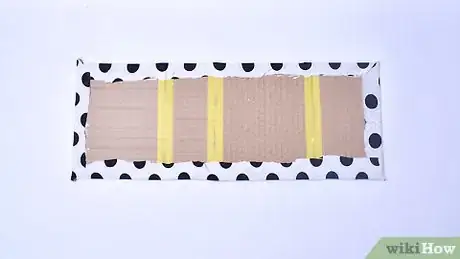
5Tape the edges of the panels together. Cut 3 strips of tape that are the same length as your panels. Lay each strip of tape across the gaps between the panels. You only need to do this for the front of the rectangle; not the back.[5]
- Use masking tape or duct tape; it sticks the best to cardboard. Don't use clear tape or scotch tape because it doesn't stick as well.
-
6Trace the purse onto poster paper, cut it out, then set it aside. You will be using this to secure the outer fabric to the purse. Use white poster paper for light fabrics and black poster paper for dark.
- It is easier to trace a flat, unassembled purse than a 3D, assembled purse.
Adding the Lining
-
1Cover the back of the taped panels with glue. Flip the panels over so that you can't see the tape. Use a wide, flat paintbrush to coat the panels with liquid glue. White school glue or tacky glue will work just fine here, but you can also use a decoupaging glue, such as Mod Podge.[6]
- Don't use hot glue for this because it will create too much bulk.
-
2Press the panels, glue-side-down onto your desired lining. Cotton will work just fine for this, but you can also try silk or satin. A darker color will work the best for this; otherwise, the cardboard may show through.[7]
- If you really want a lighter-colored lining, then consider linen or thick satin. This way, the cardboard won't show through as much.
-
3Cut the lining out, leaving a 1 in (2.5 cm) seam allowance. If you rounded the corners on your front flap, cut slits into the seam allowance all the way down to the cardboard. This will help reduce bulk when you fold and glue the seams down.[8]
- You won't be doing any actual sewing here, but you still need the seam allowances so that you can hem them nicely.
-
4Fold and glue the edges of the lining down. You can apply your liquid glue again with a paintbrush, or you can use a thin layer of fabric glue instead. Apply the glue directly onto the fabric, then wrap it around the edge of the cardboard and onto the front.[9]
- The fabric may peel away from the cardboard as you glue. If that happens, just clip it in place with clothespins. You can also tape it down temporarily.
- Don't use binder clips to hold the edges of the fabric down. They are too strong and will create dents.
-
5Let the glue dry before you move on. How long this takes depends on the type of glue that you used. It shouldn't take more than 15 to 20 minutes, however. Weigh the cardboard down with a couple of heavy books. This will help the lining dry nice and flat.
Creating the Side Panels
-
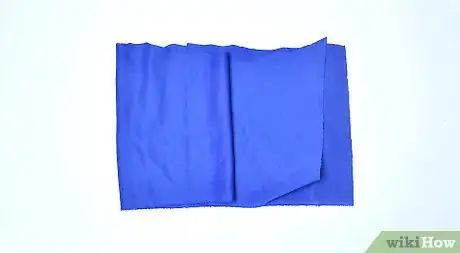
1Choose a material for your side panels. It can match your lining, or it can match your outer fabric. You can even choose a different fabric altogether.
- Make sure that your outer fabric is at least 1 mm thick. If the material is too light, the structure of your purse might not hold up. Heavy cotton, hemp, linen, eco-leather, and textured fabrics are all good options.
-
2Cut 2 rectangles out of your desired side panel material. They need to be about 2 inches (5.1 cm) taller and thicker than your purse. For example, if your purse is 5.5 inches (14 cm) tall and 2 3⁄4 inches (7.0 cm) thick, your side panels should be 7.5 by 4 3⁄4 inches (19 by 12 cm).[10]
- The side panels won't have any lining. If you want lined panels, repeat this step with the lining material.
-
3Fuse the lining to the outer material, if desired. Cut some fusible interfacing to the same size as your side panels. Set your first outer panel down, wrong-side-up and place the interfacing on top. Place your lining panel on top, wrong-side-down, then iron the panels following the instructions on the interfacing package. Repeat this step for the second set of panels.
- The wrong side of the fabric is the same as the back. It's the side without any prints on it. If you're using satin, then it's the dull side.
- You only need to do this if you are lining the side panels. If you aren't lining the side panels, skip this step.
- You can also fuse the lining panels to the outer panels with spray adhesive.
-
4Hem the top edge of your side panels by 1⁄4 inch (0.64 cm). Turn your first panel so that the wrong side (or lining side) is facing you. Fold the top edge down by 1⁄4 inch (0.64 cm) and secure it with hot glue or fabric glue. Repeat this step for the other panel.[11]
- For a nicer finish, fold the hem over a second time and glue it down as well.
- You can sew this portion of the purse. Fold and iron the hem twice by 1⁄4 inch (0.64 cm), then sew it using a straight stitch on your sewing machine.
-
5Glue the side panels to the side edges of the back panel. Turn your purse and side panels so that the wrong/lining side is flat against the table. Overlap the side edges of the back and side panels by 1 inch (2.5 cm), then glue them down.
- The hemmed top edge of the side panel needs to be level with the top edge of the back panel.
- Hot glue will work the best for this, but you can use fabric glue too. Don't use regular liquid glue; it doesn't dry fast enough.
-
6Overlap and glue the side panels onto the front panel by 1 inch (2.5 cm). Fold the front and back panels together so that the lining is on the inside. Coat the left and right side edges of the front panel with glue. Overlap the side panels onto the front panel by 1 inch (2.5 cm) and press them down.[12]
- You need to be able to open the purse by 2 3⁄4 inches (7.0 cm) or whatever the width of the bottom panel is.
- The side panels should look like rectangles, not triangles. If they look like triangles, you won't be able to open your purse.
-
7Fold and glue the bottom edges of the side panels down. Turn your purse over so that you can see the bottom panel. Coat the left and right side edges with hot glue or fabric glue, then press the bottom edges of the side panel into it.[13]
- The bottom edges of the side panels will develop little flaps or wings. Fold and glue these down onto the bottom panel as well.
Adding the Outer Fabric
-
1Glue the poster paper tracing to your desired outer fabric. Take your purse tracing from before and coat it with liquid glue. Press it onto the wrong side of your desired outer fabric.
-
2Cut the fabric out, leaving a 1 in (2.5 cm) seam allowance. If you added curves to the front flap, cut slits into the seam in those areas as well—just like you did for the lining.
-
3Fold and glue the seams down, then let the fabric dry. Apply liquid glue to the seams with a brush, then fold the seams over onto the poster paper. Allow the fabric to dry beneath a stack of books.[14]
- This is just like how you did the lining. Be a little more careful here, however; poster paper is more flexible than cardboard, and you don't want to warp it.
-
4Glue the poster paper to the outside of the purse. Apply hot glue or fabric glue to the cardboard portion of your purse, then press the poster paper into the glue so that the fabric is showing. Work 1 panel at a time, starting from the front flap and finishing with the front panel.[15]
- After the front flap, do the back panel. Move onto the bottom panel, then do the front panel last.
- Focus the glue on the edges of each panel. This will prevent peeling and unsightly gaps.
- Don't apply any glue to the seams between the panels.
Finishing the Purse
-
1Glue a trim to the edges of the purse. Starting from the top-left corner of the front panel, hot glue your desired trim to the left side. Work your way down to the bottom panel, up the back panel, and around the front flap. Continue down the back panel, and finish on the right side of the front panel.[16]
- You don't have to do this, but it will help conceal the gap between the lining and the outer fabric.
- Thin cording and ribbon work the best for this.
- Use a contrasting color to make the trim stand out. If your purse has a print on it, match the trim to the print.
-
2Add a Velcro closure to the front flap, if desired. Open the front flap, and find the center of the top edge. Hot glue a Velcro dot or square. Find the coordinating spot on the front panel, and hot glue the matching Velcro dot or square.[17]
- Use white Velcro for light-colored fabrics and black Velcro for dark.
- You should still glue self-adhessive Velcro. The glue on that kind of Velcro is not very strong.
-
3Embellish the purse further, if desired. This is completely optional, but it's a great way to give your purse more character. Choose embellishments that match the color and theme of your purse, and secure them with hot glue or fabric glue. For example:[18]
- Add a ribbon bow to the top corner of your purse for a cute touch.
- Mimic a closure by adding a large rhinestone or button to the center of the flap.
- Outline prints with puffy paint or glitter glue.
- Create your own pattern with stencils and fabric paint or fabric markers.
-
4Glue a ribbon to the top of the purse to make a handle. Cut a piece of ribbon twice the length you want it, then fold it in half and glue it together; this will make it thicker. Next, hot glue the ends of your ribbon to the top edge of your purse.[19]
- Make the ends of the handle 1 to 2 inches (2.5 to 5.1 cm) away from the edges of the purse.
- You can make a shoulder strap instead. Just make the ribbon longer, wider, and glue it to the top edges of the side panels instead.
Expert Q&A
-
QuestionHow can I stiffen my homemade clutch?
 Alessio IadiciccoAlessio Iadicicco is an Apparel Manufacturing Specialist and the CEO and Co-Founder of MarkersValley, an online apparel and manufacturer sourcing platform that connects luxury fashion brands to a network of highly-vetted, truly Italian manufacturers. He holds a Bachelor's degree in Economy and Management of Financial Enterprises from The University of Naples Federico II. MarkersValley has connected fashion brands in over 100 countries and has a network of over 100 independent Italian factories and artisans. MarkersValley has been featured in Forbes, EQ, St. Louis Business Journal, Il Mattino, and Corriere Della Sera.
Apparel Manufacturing Specialist Reinforce it with a bit of cardboard! For a more professional touch, use salpe or a regenerated leather that gives your clutch flexibility and does not cause creases.
 -
QuestionCan I make a purse without buying anything?
 Community AnswerYou can make one from an old t-shirt by cutting out the sleeves and neckline, then cutting the bottom hem into vertical strips. Turn it inside out and knot the strips to make your interior seam. Hem the shoulder pieces if you wish, or leave them frayed for an edgier look. Turn it back right side out and it's done.
 -
QuestionIs poster paper cardboard paper? Where can I get Velcro? Is it compulsory to use white ribbon?
 Mary Beth TocaCommunity AnswerPoster paper is waterproof and should feel glossy. It is available at many craft stores. Velcro is also available at craft stores. Any ribbon color is okay, so long as it matches your fabric.
Things You'll Need
- Cardboard
- Poster paper
- White school glue or tacky glue
- Wide, flat paintbrush
- Hot glue or fabric glue
- Scissors
- Fabric
- Craft blade
- Metal ruler
- Pen
- Ribbon
- Embellishments (optional)
References
- ↑ https://www.youtube.com/watch?v=SZ2HunJu6zE&t=27s
- ↑ https://www.youtube.com/watch?v=SZ2HunJu6zE&t=27s
- ↑ https://www.youtube.com/watch?v=SZ2HunJu6zE&t=27s
- ↑ https://www.youtube.com/watch?v=SZ2HunJu6zE&t=29s
- ↑ https://www.youtube.com/watch?v=SZ2HunJu6zE&t=33s
- ↑ https://www.youtube.com/watch?v=SZ2HunJu6zE&t=1m
- ↑ https://www.youtube.com/watch?v=SZ2HunJu6zE&t=1m5s
- ↑ https://www.youtube.com/watch?v=SZ2HunJu6zE&t=1m15s
- ↑ https://www.youtube.com/watch?v=SZ2HunJu6zE&t=1m25s
- ↑ https://www.youtube.com/watch?v=SZ2HunJu6zE&t=1m49s
- ↑ https://www.youtube.com/watch?v=SZ2HunJu6zE&t=1m51s
- ↑ https://www.youtube.com/watch?v=SZ2HunJu6zE&t=1m59
- ↑ https://www.youtube.com/watch?v=SZ2HunJu6zE&t=2m4s
- ↑ https://www.youtube.com/watch?v=SZ2HunJu6zE&t=2m45s
- ↑ https://www.youtube.com/watch?v=SZ2HunJu6zE&t=2m49s
- ↑ https://www.youtube.com/watch?v=SZ2HunJu6zE&t=3m10s
- ↑ https://www.youtube.com/watch?v=SZ2HunJu6zE&t=3m19s
- ↑ https://www.youtube.com/watch?v=SZ2HunJu6zE&t=3m35s
- ↑ https://www.youtube.com/watch?v=SZ2HunJu6zE&t=3m40ss
- Make a Paper Purse
About This Article
To make a purse, start by cutting out 4 cardboard rectangles so you have a front, back, bottom, and top panel. Then, tape the panels together, and trace the outline of all the panels onto some poster paper. Next, glue the back of the panels to a piece of fabric, and cut out the fabric around the edges. Once you've done that, cut 2 rectangles out of some fabric to make the side panels, and glue them to the side edges of the front and back panels. Finally, glue fabric to the outside of your purse. To learn how to accessorize your homemade purse, scroll down!
