wikiHow is a “wiki,” similar to Wikipedia, which means that many of our articles are co-written by multiple authors. To create this article, 13 people, some anonymous, worked to edit and improve it over time.
This article has been viewed 114,133 times.
Learn more...
With many devotees, pinhole photography is the art of taking photos in a "lensless" fashion; instead, a pinhole is placed over the usual lens, in order to create soft, "artsy" images. You can make your own pinhole lens for your SLR (digital or film) from the camera's body cap, using simple materials and tools. Doing this will even improve the effects on older, less capable cameras and you'll capture some neat effects on film.
Be aware that pinhole lenses don't ever produce an extremely sharp image, especially when used on the very small image sensors of digital cameras, but the artistic effect is definitely worth the loss of sharpness. Here is how to make your own pinhole lens at home.
Steps
-
1
-
2Drill a hole measuring approximately 1/4" / 6.35mm. Using the center mark that you created in the previous step, drill a hole in the body cap.
- Use something under the body cap to protect your working surface if needed.
Advertisement -
3Cut a square piece measuring approximately 3/4"x 3/4" / 1.9 centimeter (0.7 in) x 1.9 centimeter (0.7 in) (approximately) from the aluminum sheet.
- Using a soda can with the top and bottom cut off, cut a 3/4" (1.9 cm) square to 1" (2.5cm) square piece. The size does not need to be exact nor exactly square, however the size must be small enough to fit flush inside the body cap yet large enough to hold while sanding.
- Round the corners of the square piece for safety.
-
4Make a dimple in the center of the aluminum piece. Take a sturdy sharp needle, and slowly use a twisting motion with gentle pressure, to make a dimple in the center of the aluminum.
- Go slowly and steadily so as not to create a hole that is too large.
- The dimple should be just visible on the underside of the aluminum piece.
- Do not push the needle all the way through; there shouldn't be a visible hole at this point, only a dimple.
-
5Sand the dimple. Using very fine grit wet/dry sanding paper (emery cloth) of 600-800 grain or finer, gently sand the dimple flush with the surface of the aluminum surface.
-
6After the dimple has been sanded away, a small hole should appear in the aluminum. Use the needle once more to gently round out the hole (both sides).
- The optimum diameter of the pinhole depends on the distance from the pinhole to the film surface (digital sensor). For most (D)SLR cameras that is somewhere around 50mm. Using a pinhole calculator, the optimum pinhole size is apx .3mm. A #13 sewing needle should pass through a .3mm hole but a #12 needle should not.
- The size does not have to be exact at any rate, any hole close to .3mm will work just fine.
- If the hole is too small, gently use the needle again to enlarge the hole and sand both sides smooth.
- If the hole is too large, try the lens to see how well it works, or discard the piece and cut a new one.
- What is important is to make the hole as round as possible and to keep the edges smooth and flush with the surface. Jagged edges will cause diffraction effects and show up on the final image.[1]
-
7After you have sized the pinhole correctly, clean the aluminum piece and the pinhole with rubbing alcohol and blowing through the pinhole. Doing this is important since residue can get in the pinhole and cause image distortions or worse the residue can get on your camera sensor and require a cleaning.
-
8Apply adhesive. Using a toothpick, or something equivalent, sparingly spread the adhesive around the edge of the aluminum piece, being careful not to get any adhesive near the pinhole.
- Use silicone adhesive as you can easily remove the pinhole from the body cap and remove the adhesive from the body cap if you ever need or want to.
-
9Carefully place the aluminum piece into the center backside of the body cap. Make sure to center the pinhole in the drilled hole in the body cap.
- Try to be exact when positioning the first time, in order to keep the adhesive from getting all over the body cap and possibly into the pinhole.
-
10Tape the aluminum piece in place while the adhesive dries. Do a final check to make sure the pinhole is still centered on the hole in the body cap.
-
11After the adhesive dries, carefully remove the tape.
-
12Cut a very small square piece of tape and cover the pinhole.
-
13Mask the body cap. Leave the aluminum piece exposed so it can be painted black.
-
14Spray flat black paint over the aluminum piece. This will greatly improve the image quality.
-
15Remove the small square piece of tape covering the pinhole.
-
16Using a black permanent marker, dot the remaining aluminum surface so it is black. The ink sticks better when dotted onto the surface rather than wiped because the aluminum surface has no tooth for the ink to adhere to.
- Be careful not to dot over the pinhole. This area does not have to be perfect as it will not reflect as much light as the entire aluminum surface would.
-
17
-
18Put your SLR in manual mode and set the shutter speed to 2 seconds to start. Take a photo. Look at the histogram. If the graph indicates that the image is over-exposed (the histogram will show data bunched to the extreme right) or under-exposed (histogram data is bunched to the left), adjust the shutter speed to compensate.
- Once the exposure is set you can use this exposure while shooting in similar light conditions.
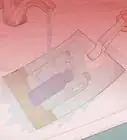
- Depending on how bright the scene is your exposure time may vary from several seconds to just under a second. The yellow flower photo shown here was exposed for 1/2 a second at ISO 400 in full sun.
- The sun through the leaves photo was exposed for 1/15 of a second at ISO 400.
- If your scene lighting changes, recheck the histogram and adjust shutter speed to compensate.


Warnings
- Pinhole lenses by their nature may cause an accumulation of dust on a digital camera's sensor; this requires periodic cleaning.⧼thumbs_response⧽
- Make sure you thoroughly clean the body cap from construction residue before attaching it to the camera body. Failure to do so will cause the residue to get inside of the camera body and ultimately it risks being deposited on the image sensor.⧼thumbs_response⧽
- A cold camera from indoor air-conditioning will fog the image sensor when taken outside on a warm humid day. Allow the camera time to acclimate before taking photos.⧼thumbs_response⧽
- Pinhole lenses will show dust on a digital sensor that would not show up with a normal glass lens. This is due to the very small aperture of the pinhole. This is completely normal and is not cause for alarm. Spots are easily removed by using digital imaging software.⧼thumbs_response⧽
Things You'll Need
- Body cap that fits your camera
- Soda can for aluminum sheet
- Silicone adhesive
- Flat black paint / large sharpie marker
- Large sewing needle
- 1/4" (apx) drill bit
- Drill (optional)
- Heavy duty scissors
- Paper scissors
- Tooth picks (or similar)
- 600-800 grit sanding block/paper
- Center punch (optional)
- Tape (to hold aluminum while glue dries and mask body cap during painting)


References
- ↑ Wikipedia, Diffraction, http://en.wikipedia.org/wiki/Diffraction
- Original source of article, http://photographyrulez.blogspot.com/2010/09/digital-pinhole-anyone-part-1.html – shared by blog author who is also the initial author of this article
- http://www.flickr.com/photos/florida_sail_ham/sets/72157624906289397/with/5023401086/ – source of images