This article was co-authored by wikiHow staff writer, Kyle Hall. Kyle Hall works on the content team at wikiHow. He helps manage our team of editors and creates content for a variety of wikiHow projects. Kyle continually looks for new ways to improve the content at wikiHow and make it more helpful and enjoyable for readers. He graduated from Eckerd College in 2015, where he majored in Political Science.
The wikiHow Video Team also followed the article's instructions and verified that they work.
This article has been viewed 51,304 times.
Learn more...
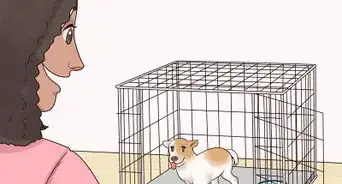
Clickers are great tools for dog training that reinforce good behavior. While you can buy a dog clicker at your local pet store, you can save some money by making your own at home. There are multiple ways to make your own dog clicker using things you can find around the house, like a jar lid, a flashlight, and an aluminum can. Once you make your clicker, use it with your dog as much as possible for the best results!
Steps
Using a Jar Lid
-
1Find a small aluminum jar lid. The lid on a jar of baby food or the lid to a small mason jar will work. You want a lid that's around 2-3 inches (5-7.6 cm) in diameter.[1]
-
2Place the jar lid face down on a flat surface. The underside of the jar lid should be facing up.[2]Advertisement
-
3Tap the center of the jar lid with a hammer several times. You want to create an indent in the jar lid that you can use to make the clicking sound. Don't hit the jar lid too hard with the hammer. Three or four firm taps should be enough.[3]
-
4Pick up the jar lid and flip it over. The center of the jar lid should be sticking out. If it's not, set the jar lid back on the flat surface, face down, and tap it with the hammer a few more times.
-
5Press down the raised bump on the jar lid to make the clicking noise. The bump should pop back up into place after you release it.
Using an Empty Flashlight
-
1Find a flashlight with a clickable “on” button. Only a flashlight that has one of these buttons will work. The button is what makes the clicking sound. Usually these buttons are made out of rubber and found at the end of the flashlight.
- If you're not sure whether your flashlight will work, press the button to turn it on. If it doesn't make a loud clicking noise, it won't work.
-
2Unscrew the top of the flashlight to remove the batteries. Find the seam where the two halves of the flashlight connect. Twist the top half counterclockwise. Keep twisting until the two halves of the flashlight separate. Dump the batteries out of the flashlight.[4]
-
3Put the flashlight back together. Screw the top half of the flashlight back onto the bottom half. Keep twisting until the two halves are securely connected.[5]
-
4Press and release the “on” button to make the clicking sound. Don't hold the button when you press it in. Just quickly press and release to make the loud clicking noise.
Making an Aluminum Can Clicker
-
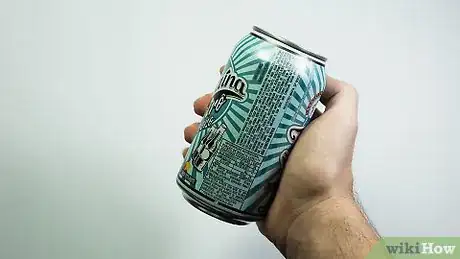
1Find an aluminum can. Any soda or beer can will work. Make sure the can is empty. Rinse the can out with water and let it dry.
-
2Use scissors to cut a square strip out of the side of the can. Make the strip 2 inches x 2 inches (5 cm x 5 cm). You want the strip to come from the curved side of the can, not from the top or bottom of the can.[6]
- Wear gloves when you're cutting the can. Sharp edges on the can could cut you.
-
3Make a fold with each corner of the square. Fold each corner so the tip touches the center of the concave side of the strip. Unfold the corners.[7]
- When you're done, there should be four creases on the strip.
-
4Tape two opposite sides of the square to a small plastic lid. Use a thin, flexible plastic lid, like the lid to a plastic container. Tape the square strip so that the curve is sticking up away from the lid.[8]
- Be careful, the edges of the aluminum strip may be sharp.
-
5Press down on the curved aluminum strip to make the clicking sound. The center of the strip should pop down when you press it, making the noise. When you let go, the center of the strip should pop back up.
Community Q&A
-
QuestionCan you just buy a clicker instead?
 CGOS951Community AnswerYes. It is easier to buy a clicker, but if you want to save money, just try one of these methods.
 -
QuestionWill big flashlights work, too?
 CGOS951Community AnswerAny size is acceptable, but the preferred one is a smaller flashlight.
Things You'll Need
Using a Jar Lid
- Aluminum jar lid
- Hammer
Using an Empty Flashlight
- Flashlight
Making an Aluminum Can Clicker
- Aluminum can
- Scissors
- Small plastic lid
- Tape
- Gloves
References
- ↑ http://www.rover-time.com/can-you-clicker-train-without-a-clicker/
- ↑ https://www.youtube.com/watch?v=KSgpIwhJ6Sg&feature=youtu.be&t=80
- ↑ https://www.youtube.com/watch?v=KSgpIwhJ6Sg&feature=youtu.be&t=97
- ↑ https://www.youtube.com/watch?v=uaQcM6_7mMc&feature=youtu.be&t=68
- ↑ https://www.youtube.com/watch?v=uaQcM6_7mMc&feature=youtu.be&t=68
- ↑ https://www.youtube.com/watch?v=EFr4yrfJB_U&feature=youtu.be&t=26
- ↑ https://www.youtube.com/watch?v=EFr4yrfJB_U&feature=youtu.be&t=26
- ↑ https://www.youtube.com/watch?v=EFr4yrfJB_U&feature=youtu.be&t=26
About This Article
To make a clicker for dog training, start by finding a small aluminum jar lid and placing it face down on a flat surface. Then, tap the center of the lid a few times with a hammer to create an indent in it. Finally, flip the lid over, and press down on the raised bump to make a clicking noise. Alternatively, you can make a clicker using an empty flashlight instead. Just find a flashlight with a clickable "on" button, and take out the batteries. Then, all you have to do is press the "on" button to make a clicking sound while you're training your dog. To learn how to make a clicker for dog training using an aluminum can, scroll down!
