This article was co-authored by wikiHow Staff. Our trained team of editors and researchers validate articles for accuracy and comprehensiveness. wikiHow's Content Management Team carefully monitors the work from our editorial staff to ensure that each article is backed by trusted research and meets our high quality standards.
The wikiHow Video Team also followed the article's instructions and verified that they work.
This article has been viewed 82,570 times.
Learn more...
Building and decorating a fort can be a great way to have fun, no matter how old you are. While there are all sorts of forts you can build, none of them will be as customizable or as easy to make as a cardboard box fort. By getting the base right, adding extra rooms and decorating your fort, you can make a secret cardboard base that's all your own.
Steps
Making the Main Room
-
1Find some big cardboard boxes. You'll need at least two big cardboard boxes to make the main room of your fort, and even more than that if you want to make it bigger. Ask your parents if they have any old boxes from furniture or moving that you could use to make a fort. Here are a few other places you could find some cardboard:
- Ask at a supermarket or big store to see if they have any old cardboard boxes that you could take. Make sure the boxes are dry and don't have any funny smells in them.[1]
- See if your parents could bring some home from work. If either of your parents works in an office, there might be cardboard boxes that they could bring home for you.
- Visit home improvement stores or department stores that sell furniture or large appliances. They'll be sure to have giant cardboard boxes you might be able to have
- Always get your parents to go with you when out looking for cardboard. They'll make sure you get it from the best places and can help you carry it home.
-
2Pick the biggest box to be the start of your fort. This will be the first room in your fort, so make sure you use the biggest box you have for the most space inside. Stand the box up so the open side is facing upwards.[2]
- If the biggest box you have is flattened, use some tape to put it back together. Unfold it so that it looks like a box again and then tape the flaps on the bottom together to keep it sturdy.
Advertisement -
3Cut off the flaps on the open side of the box. Use a pair of scissors or a box cutter to carefully remove all of the flaps, keeping them for later. Try and keep the cut as straight as possible, because this is where your roof is going to go.[3]
- Get your parents to help with the cutting if you're using sharp knives.
-
4Cut two pieces of cardboard the same size to make a roof. Find another box or piece of spare cardboard to cut two roof pieces from. Make sure the pieces of cardboard are the same width as your fort and at least as long. The longer your two pieces of cardboard are, the pointier the roof of your fort will be!
- Make sure the two pieces of cardboard are the same size or else your roof will be crooked.
- This will make a slanted roof with a point in the middle, but there are lots of other ways to make a roof. See what else you can come up with. As long as it covers the top of your fort, it's a roof!
- You might be able to use the cardboard flaps you cut off to make part of the roof. Tape two of the bigger ones together and cut another piece of cardboard the same size.
-
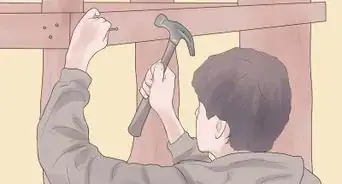
5Tape the roof to the top of your fort. Use a long strip of tape to connect the two pieces of cardboard along the middle. Tape one side of your roof to the top of your fort, using a lot of tape so it stays in place. Do the same on the other side so the tape in the middle makes a point on your roof.[4]
- Use brightly colored tape to make your fort look even cooler.
- This part can be difficult if you're doing it on your own. Get a sibling, friend or parent to help out if you need it. Having someone to share your fort with can make playing in it even more fun!
-
6Cut out triangular pieces of cardboard and tape them over the holes in your roof. Lay a big piece of cardboard on the ground and turn the fort on its side, so the hole in the roof lines up with the cardboard. Use a marker to trace the outline of the roof onto the piece of cardboard, then cut around it to make your gable. Cut another one the same size for the other side and tape them in place.[5]
- These pieces on the inside of the roof are called "gables" and help keep the whole fort stable.
- If you want to leave the holes in your roof open, you can skip this step. You could also cover them up with cellophane or paper later on to make cool stained-glass windows!
- You might need to cut off little bits and pieces of the cardboard to make it fit perfectly.
- If you can't move the fort around, you can hold or tape the cardboard to the top of the fort and trace around it instead. This might be a little more difficult to do by yourself, so get someone else to help out.
-
7Cut a door in the side of your fort. Now that your fort is all put together, you need to make a way inside. Choose which side you want to be the front of your fort and measure out the four sides of a door. Use a box cutter to cut three of the sides, leaving one of the longer ones to be a hinge for your door.[6]
- Cover the hinge on your door with tape to make it sturdier when you're opening and closing it.
- Tape a piece of cardboard or some string to each side of your door to make a door handle. This will make it easier to open and close.
- Make sure the door opens outwards so that you'll have more room on the inside of your fort.[7]


Expanding Your Fort
-
1Choose another big box if you want to expand your fort. If you have another big box, you can use it to expand your fort and make it even bigger! Find another box that you can attach to one side of your main room.
- Think about what sort of rooms you want to add to your fort and choose a box the right size. You might need a bigger box for a bedroom than you'll need for a secret storage closet.
-
2Tape the flaps on the open side of the box together to make it bigger. Unfold the flaps so they make a straight line with the rest of the box. Use some long strips of tape on the inside and outside of the box to hold the flaps together and give you more room inside.[8]
- If the flaps are damaged, or you can't tape them together easily, you can also just cut them off. Make sure you cut in a straight line to make connecting the rooms easier.
-
3Tape your new room onto the side of your fort. Line the open side of your new box up with one of the solid sides of your fort. Using more tape or hot glue, connect the two rooms together. Make sure they're held together tightly so your finished fort stays in one piece.
- If you can line one edge of the new room up with an edge of the main room to make a flat surface, it'll be much easier to tape the rooms together.
- Always be careful when using hot glue, as you can easily burn yourself. Don't touch the glue or the end of the hot glue gun until it has completely cooled. Ask an adult for help for extra safety.
-
4Cut a door to connect the rooms. Climb inside the main room of your fort and work out where you want to put the connecting door. Cut around three sides of it to make a door.
- If you don't want another door on the inside, cut around all four sides to make a passageway between rooms instead.
- Start with a small door and make it bigger as you go. It's much easier to cut away cardboard than it is to add it back.
-
5Add a roof. Cut some more cardboard and keep expanding the roof of your fort. You can make the same kind of roof as you did for the first room, or you can try something entirely new. See what kind of roof you can come up with to make your fort look even cooler.
-
6Keep expanding your fort. The only limits to the size of your fort are the amount of cardboard you have and your imagination! Keep adding rooms and expanding the size of your fort. Try making a bedroom, or a gaming room, or a secret safe hidden in the wall. See what else you can come up with to add to your fort!
- Make sure you don't make your fort too big that it takes over the whole house. Ask your parents how big you can make your fort and make sure to add the most important rooms first.

Decorating Your Fort
-
1Add some windows to let more light in. Choose a spot on an outside wall where you want to put a window. Use a marker to trace the outline of the window before cutting out a window with scissors or a knife.[9]
- Use leftover cardboard to make window frames in the windows. Make a cross out of thin strips of cardboard and tape it onto the inside of your window.
- Add some colored cellophane to make some funky colored windows. Cut a square the same size as your window and tape it in place from the inside.
-
2Use paint if you want to change the color of your whole fort. If your fort is all the same cardboard brown color, you can try making it brighter with some paint. Ask your parents to help you move the fort outside to paint it, or get them to help put down some newspaper so you don't get any paint on the carpet.[10]
- Make sure to wait for the paint to fully dry before you start playing in your fort again.
-
3Decorate the outside with markers or crayons if you can't paint. Make your cardboard fort into whatever you want it to be by drawing the outside.[11] Work out what you want your fort to look like and start drawing! Here are a few ideas to get you started:
- Add some bushes on the front, some tiles to the roof and a door knocker on the front to make your fort look like a house.[12]
- Try drawing on some portholes, periscopes, and metal plating to turn your fort into a deep-sea submarine.
- Put a sign over the door and draw on some stands for fruit and vegetables to make your fort into a grocery store. What else could you sell from your fort?
-
4Add some wallpaper with wrapping or craft paper to decorate the inside. Find some colorful paper to decorate the inside of your fort with. Use some glue or tape to put wallpaper up on the inside of your fort, making sure to leave holes for any doors and windows you made.[13]
-
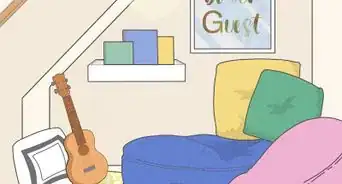
5Use some light strings if you want to brighten up the inside of your fort. Ask your parents if they have any fairy lights or Christmas lights you could use to decorate your fort. Tape them onto the roof on the inside of your fort and turn them on to brighten up any rooms that feel a little dark.[14]
- If your lights need to be plugged in, cut a small hole somewhere in your fort to thread the cables through to the nearest socket.
- Be careful when working with fairy lights. The lights can be quite fragile and might break easily if you're too rough with them.
-
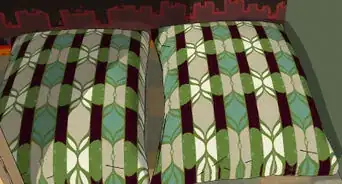
6Bring in some pillows and blanket if you want a softer fort. Grab some cushions from around the house, or take pillows and blankets off your bed to add to your box fort. Make the inside of your fort as comfortable as you can!


Community Q&A
-
QuestionWhat should I put in my box fort?
 Community AnswerYou can put in blankets, pillows, books, and other things to do, like board/card games, as well as snacks/drinks.
 -
QuestionWhere can I get the boxes?
 Community AnswerCheck with local shops that have deliveries and ask them for the boxes.
 -
QuestionWhere do I get all of the boxes from?
 Community AnswerLarge boxes can be obtained from furniture stores, box stores (no pun intended!), places that sell large appliances, supermarkets, etc. You may need to ask for the store manager to keep some boxes aside for you though as most large stores have efficient box crushing machines to get rid of excess boxes rather than giving them away.
Warnings
- Always be careful when using sharp scissors or knives to cut holes in your fort. Get a parent or someone older to help out to be extra safe.⧼thumbs_response⧽
Things You'll Need
- Cardboard boxes
- Markers
- Scissors or box cutter
- Tape
- Colored paper
- Cellophane
- Paints
- Paintbrushes
- Fairy or Christmas lights
- Pillows
- Blankets


References
- ↑ http://www.mykidsadventures.com/build-cardboard-playhouse/
- ↑ https://www.sheknows.com/parenting/articles/967135/diy-collapsible-cardboard-playhouse
- ↑ https://www.sheknows.com/parenting/articles/967135/diy-collapsible-cardboard-playhouse
- ↑ https://www.sheknows.com/parenting/articles/967135/diy-collapsible-cardboard-playhouse
- ↑ http://www.mykidsadventures.com/build-cardboard-playhouse/
- ↑ https://handsonaswegrow.com/build-fun-cardboard-fort/
- ↑ http://www.mykidsadventures.com/build-cardboard-playhouse/
- ↑ https://www.sheknows.com/parenting/articles/967135/diy-collapsible-cardboard-playhouse
- ↑ http://www.mykidsadventures.com/build-cardboard-playhouse/
About This Article