This article was co-authored by Maggie Moran. Maggie Moran is a Professional Gardener in Pennsylvania.
This article has been viewed 146,969 times.
Watering cans aren't always the cheapest item at the garden center. While you can always water your plants with a bucket, you may risk over watering them or damaging them. Luckily, it is easy to make a watering can from a plastic bottle at home. Best of all, you are helping the environment by recycling!
Steps
Making a Basic Watering Can
-
1Find a plastic bottle to use and remove the label. If the bottle is dirty on the inside, fill it with water, close the cap, and shake it, then pour the water out. Do this a few times until the bottle is clean inside. When you are done, peel off the label and remove any glue residue.
-
2Figure out the placement for the holes on the side of the bottle. Use a permanent marker to draw a square on the side of the bottle, just below where it starts to curve upward into a dome shape. You can also mask off the patch with masking tape. The square should be no longer than your finger.Advertisement
-
3Use a nail or thumbtack to punch holes in the square. Space the holes as evenly as you can. You will need to make five rows of five holes each for a total of 25 holes. If the plastic is very thick, you can heat up the nail over a flame for about 10 seconds; hold the nail with a pair of pliers so that you don't burn yourself.[1]
- Wiggle the nail to remove it from the bottle.
-
4Cut a pouring hole on the opposite side of the bottle. Rotate the bottle so that the holes are facing away from you. Draw a 1-inch (2.54-centimeter) U-shape on the side of the bottle. Have the top of the U touch the bottom of the bottle's dome. Cut the U shape out with a razor blade.
-
5Add designs, if desired. Your watering can is more or less finished, but you can make it look more interesting by decorating it. Draw some gardening-themed designs on it using permanent markers. You can also stick on some stickers instead, but be aware that they may fall off if they get too wet.
-
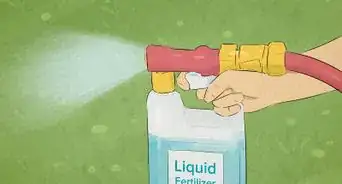
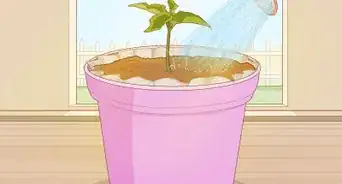
6Close the bottle tightly and fill it through the U-shaped hole. Fill the bottle until the water level reaches ½ to 1 inch (1.27 to 2.54 centimeters) below the bottom row of holes. If you want to, you can even add some water-soluble fertilizer to the water.
-
7Tilt the bottle over your plants to water them. Hold the bottle by the sides, then tilt it on its side. Keep the watering holes on the bottom and the pouring hole on the top. When you are done watering, tilt the bottle back upright.
- Refill the container as necessary.


Making a Large Watering Can
-
1Choose a large bottle with a handle and a screw-on lid. Detergent jugs and milk jugs are great choices. Large water jugs and juice jugs may also work, as long as they have a handle. Most importantly, make sure that the lid screws on. A cap that you pop on and off will not work for this due to the water pressure.
-
2Clean out the bottle and remove any labels. This is especially important if you are recycling a detergent bottle. The easiest way to clean the bottle is to fill it partway with water, close the cap tightly, shake it, then pour the water out. When you are done, remove the label and any glue residue left behind.
-
3Punch holes into the cap with a nail. Keep the cap on the bottle. Use a nail to punch holes into the lid. You can also use a needle or thumbtack instead. Punch as many holes as you want.
- If the cap is too hard to pierce, heat the nail over a flame first. Hold the nail with a pair of pliers so that you don't scorch your fingers.[2]
- If your bottle had a thick lid (ie: detergent bottle), use a drill and a ⅛-inch (0.32-centimeter) drill bit instead.
-
4Consider adding a hole above the handle. Do this with a drill and a ½-inch (1.27-centimeter) drill bit. This will help make the water flow smoother and help release pressure.
-
5Fill the bottle with water. Unscrew the cap, then fill the bottle with water from the sink or hose. Close the cap when you are done. How much you fill it depends on how much weight you are able to carry; the more you fill it, the heavier it will become.
- If you used a drill bit, you will need to rinse the bottle out first to get rid of any plastic dust.
-
6Use the watering can. Make sure that the cap is on tightly. Use the handle to carry the jug over to your plant. Use your other hand to hold the jug by the bottom and tilt the cap downward.[3]


Making a Thumb-Controlled Watering Can
-
1Find a large, plastic bottle or jug. You can use just about any type of bottle for this. A large jug without a handle will work just as well as a milk jug with a handle. You can even use a regular water bottle!
-
2Clean out the bottle. Fill the bottle with water, then close the cap tightly. Shake the bottle, then pour the water out. Do this a few times until the water comes out clean. If there is a label, peel it away, then remove any residue.
-
3Drill a hole in the cap of your bottle. The size of the hole does not really matter, but it needs to be small enough so that you can cover it completely with your thumb. Something around 3/16-inch (0.48-centimeter) wide would be ideal, however. If you make the hole too big, you won't get a tight enough seal.
-
4Poke 6 to 15 small holes in the bottom of the bottle. If the bottle is made from soft plastic, you can do this with a nail or thumbtack. If the bottle is made from thicker plastic, you will need to use a drill and 1⁄16 to 1⁄8 inch (0.16 to 0.32 cm) drill bit.
-
5Fill the bottle in a bucket. Fill a large bucket with water. Place the cap on your bottle, then dunk the bottle into the water. Cover the cap hole tightly with your thumb then lift the bottle out.
- If your bucket is deeper than your bottle, dip the bottle only ¾ of the way.
- The bottle will only fill to the same water-level that's already in the bucket.
-
6Unplug the cap to water your plants. Carry the bottle to your plant, then lift your thumb. This will release the pressure, and allow the water to flow out of the bottle. When you want to stop the water flow, simply cover the hole in the cap with your thumb.


Community Q&A
-
QuestionI don't get the first way to make a watering can out of a water bottle. Any help?
 NinoxTop AnswererYou simply need to make holes in one side of the bottle to water the plants with small drops and a bigger opening on the opposite side to fill the can with water.
 -
QuestionHow does putting my thumb over it stop the pressure?
 T. ChinsenTop AnswererAs long as the water and air pressure remain the same (by holding the thumb over the cap hole), the water will remain in the jug. Opening the hole lets air rush in and allows the greater water pressure to flow out through the bottom holes of the jug.
 -
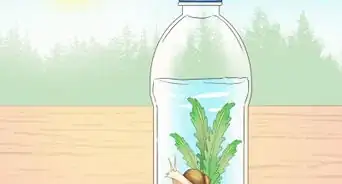
QuestionHow do I make a self-watering plant using a bottle?
 Community Answer
Warnings
- Replace the bottle watering can regularly or plastic may leach into the water supply.⧼thumbs_response⧽
- Monitor your watering bottle for signs of mold and bacteria, and remove the lid and let the bottle dry out completely after watering.⧼thumbs_response⧽
- Avoid using water that is too cold or too hot, which could kill the plants.⧼thumbs_response⧽
Things You'll Need
Making a Basic Watering Can
- Plastic bottle
- Nail or thumbtack
- Permanent marker
- Sharp knife or razor blade
- Markers or stickers (optional)
Making a Large Watering Can
- Empty jug with handle and screw-on lid
- Nail or electric drill
- Water
Making a Thumb-Controlled Watering Can
- Plastic bottle with a cap
- Electric drill and drill bits
- Nail or thumbtack (optional)
- Bucket
- Water


References
About This Article

To make a bottle watering can, you’ll need an empty plastic bottle or jug. Peel any labels off of the bottle and remove the cap. Then, heat the end of a nail or needle with a lighter, and make a small hole in the cap with it. Reheat the nail and make several more holes in the cap for the water to pour out of. Next, make a hole near the neck of the bottle. This will help the water flow out of the cap better. Finally, fill the bottle partway with water and put the cap back on. Now you can use your bottle watering can to water your plants. For tips about how to make the water flow smoother, keep reading!