wikiHow is a “wiki,” similar to Wikipedia, which means that many of our articles are co-written by multiple authors. To create this article, 12 people, some anonymous, worked to edit and improve it over time.
wikiHow marks an article as reader-approved once it receives enough positive feedback. In this case, 85% of readers who voted found the article helpful, earning it our reader-approved status.
This article has been viewed 99,658 times.
Learn more...
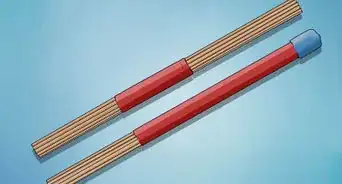
There’s no need to buy an expensive drum kit if you want to learn to play the drums. A beginner can learn from a basic drum practice pad. Drum pads are quiet, and help you focus on technique instead of just making a ton of noise. The best drummers use practice pads all the time to get perfect sticking and speed -- now you can do.
Steps
Building Practice Pads
-
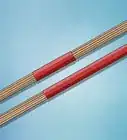
1Purchase a sheet of gum rubber for your pad's practice surface. You have several options, depending on your style and needs. Thinner rubber, around 1/8", is generally the standard thickness. But you can go thicker for a quieter, less bouncy practice surface. Usually, you'll need to buy a sheet of gum rubber online, which will allow you to choose your thickness and length. If, however, you cannot get a hold of rubber, you can try out:
- An old mouse pad.
- Foam rubber
- Rubber soles from old shoes
- 1/2" thick cork board.[1]
-
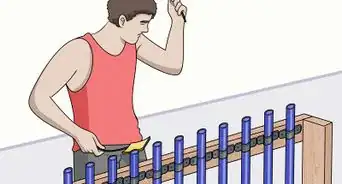
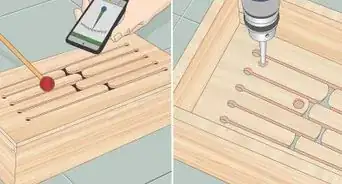
2Cut your plywood in the shape of your desired pad. Make sure there are no cracks or splinters in the wood before beginning. You can make the pad in any shape you want -- circular, square, oblong-- as long as you have enough room to practice. While sawing unique pads let you choose the shape, you can also cut the rubber, not the wood, to fit a bit of pre-existing wood if you already have a usable slab of plywood or pine.
- If you're cutting the pad to a pre-existing shape, like a mouse pad, trace the shape of rubber on the wood and then cut to that.
- You don't have to use plywood, though it is easily worked and light enough to carry around. Any wood will do.
Advertisement -
3Sand the plywood. Using the roughest sandpaper you can find, sand the corners of the wood so that the edges are rounded. Take your time with the center of the pad as well, making sure it is smoothed over without splinters or jagged bumps.
- You don't want the wood to rip up your rubber pad, forcing you to build a new one.
-
4Trace the shape of the pad on your rubber sheet. Whatever you're using for rubber, lay it down flat and place your plywood on top. Trace out the shape of the plywood on the rubber.
-
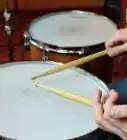
5Cut the rubber to fit your practice pad using a precision blade. An X-acto knife, box cutter, or another precision knife can be used to finely cut the rubber into the right shape. Work slowly, pulling the knife in one long, fluid motion, not sawing with it.
-
6Liberally apply strong glue to the top of the plywood. You want superglue, Gorilla glue, Krazy glue, or some other multi-surface adhesive. Make sure to read the bottle to ensure it sticks to both rubber and wood (or whatever other surface, like fabric, is on your pad. Generously apply a thin line of glue across the entire surface of the pad, stopping roughly 1/4" away from the edges.
-
7Press the mouse pad onto the wood and leave it to dry for 1-2 hours. Do not go any further until the glue is completely dry.
-
8Make the pad thicker and quieter by covering the top in duct tape. If you want to make a thicker pad, wrap the whole thing carefully in tape. Go slowly, overlapping the lines of tape carefully so that they don't wrinkle and bunch up, ruining your playing surface.[2]


Making Pads out of Household Objects
-
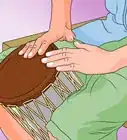
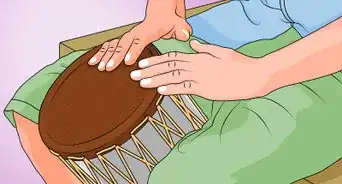
1Use a mouse pad to practice your rudiments anywhere in the house. A mouse pad, usually between inches thick, can be used to practice sticking on just about any hard service. While you can't work on fills or drum solos, you can work on essential rhythms, your stick speed, and control.
- You want the fabric coated pads, not the plastic ones.
- Glue two pads together and to make a quick practice pad that you can bring anywhere.
-
2Use pillows to focus on stick control and speed without the benefit of a rebound. A pillow has none of the pop of an actually drum set -- when you hit the stick down, it will stay there until you pick it back up. But this can actually be a good thing, forcing you to focus on your technique and wrist movement with every hit. You might not be able to practice drum rolls, but your stick control will go way up, as will speed and strength.
- It will take time, but world-famous drummers like Tony Royster Jr. are blazing fast because they the grew up practicing on pillows.[3]
-
3Cover hard surfaces with 2-3 sweaters or pieces of fabric for a quick, quiet playing surface. The tighter you can stretch the fabric across the surface, the better. All you really need for a practice pad is a soft, slightly rebounding surface -- so hit blankets, sweaters, old shirts, and comforters.
- You can, with some patience, even wrap these around your actual drum heads, pots, or pans, allowing you to quietly "play" your kit.
- In time you're more than likely to rip the fabric to shreds. Use old or discarded sheets and clothing that you no longer car for.
-
4Try hitting on an old basketball. While the rounded surface takes getting used to, it forces you to aim accurately when landing the stick. You can also add or leak out air to make drumming easier or harder. Less air will require more wrist strength, much like playing on a pillow.[4]
-
5Play on your own thigh. It will take some getting used to, but your legs have good rebound for your sticks. And they come with you everywhere. If you're looking to be the best drummer you can be, you need to practice all the time. Your thighs may be just the place in a pinch.[5]


Community Q&A
-
QuestionHow can I get the rubber and the duct tape?
 SgtPotatoCommunity AnswerHit your local hardware store and check out their flooring pads, furniture floor protectors, or just about anything else. If you can't find a size you're looking for, then grab what you can based on texture/thickness and cut it down to size. When using duct tape, you can really use whatever you can find. Try something relatively solid (not a pillow or padded surface) that is about 14"x14" and wrap it in duct tape until you get the right feel. Too much duct tape will dampen sound and decrease stick bounce.
Warnings
- Only use saws and similar equipment if you know how to handle them.⧼thumbs_response⧽
Things You'll Need
- Mousepad or Rubber
- Wood
- Saw
- Super glue
- Sandpaper
- Duct tape
References
- ↑ http://www.rockdrummingsystem.com/underground/drum-articles/practice-pad-use.php
- ↑ http://www.drummerworld.com/forums/showthread.php?t=43146
- ↑ http://takelessons.com/blog/build-your-own-drum-set-z07
- ↑ https://www.pearldrummersforum.com/showthread.php?8181-homemade-practice-pads
- ↑ https://groovru.wordpress.com/category/tips-tricks/