This article was co-authored by Mallika Sharma and by wikiHow staff writer, Janice Tieperman. Mallika Sharma is a Certified Leather Care Technician and the Founder of The Leather Laundry, a niche spa service for luxury leather gear in India. Mallika specializes in leather cleaning, coloring, repairing, and restoring for shoes, handbags, jackets, wallets, belts, and sofas. She holds a Master’s degree in Finance and Investment from the University of Edinburgh Business School. Mallika is a certified Professional Leather Care Technician and trained with the globally reputed leather care company, LTT in the United Kingdom.
There are 24 references cited in this article, which can be found at the bottom of the page.
wikiHow marks an article as reader-approved once it receives enough positive feedback. In this case, 100% of readers who voted found the article helpful, earning it our reader-approved status.
This article has been viewed 160,209 times.
Fresh leather can be a stunning addition to your home… but the price tag isn’t quite as beautiful. If you’re looking for an inexpensive, natural, and relatively simple way to make your own leather, you’ve come to the right place. We’re here to walk you through the entire process, so you can make beautiful pieces of leather on your own.
Steps
Assembling Your Workspace
-
1Set up an outdoor work area for yourself. Tanning your own leather can be pretty messy, and is best done outside. Find a large, open area, like your backyard, where you can get your hands dirty.[1]
- If you don’t have a lot of yard space, you could try making leather in your garage.
-
2Choose an animal hide to make into leather. Most animal hides will work for your project. Making natural leather is a pretty niche pastime, so there aren’t a lot of specific recommendations out there. However, some experts suggest starting out with a squirrel or deer hide, since they’re easy to work with.[2]
- Rabbit hides are pretty thin, and a bit trickier to prepare.
Advertisement -
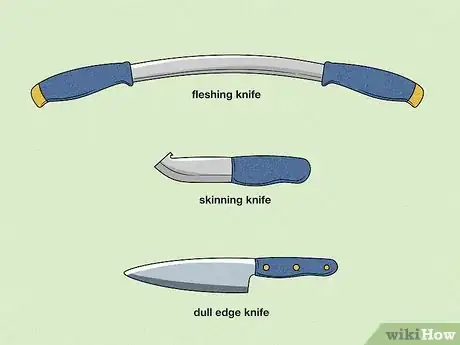
3Set aside a fleshing knife, a skinning knife, and a knife with a flat, dull edge. A fleshing knife is a long, straight blade that helps remove the flesh from the animal. A skinning knife is a little smaller than a fleshing knife, and has a smaller, curved blade. You’ll use this knife to cut into the hide after you’ve fully tanned it.[3] The dull edge of your third knife will help you de-hair the hide.[4]
- Try to find a fleshing knife with a handle on each end of the blade. This will make it a lot easier to use.
-
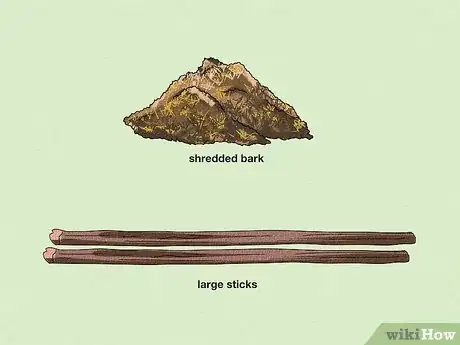
4Collect plenty of shredded bark and 2 large sticks. Set aside enough tree bark to fill a standard bucket about halfway. Any tree bark will work for this, but try to collect some from a fallen tree instead of a living one. The shredded bark will be the main ingredient in your tanning mixture, and you’ll use 1 of the sticks to stir your homemade “brew.” You’ll use the other stick to soften your leather later on.[5]
- Tree bark is naturally high in tannins—these are molecules that help protect your leather and keep it from breaking down.[6]
-
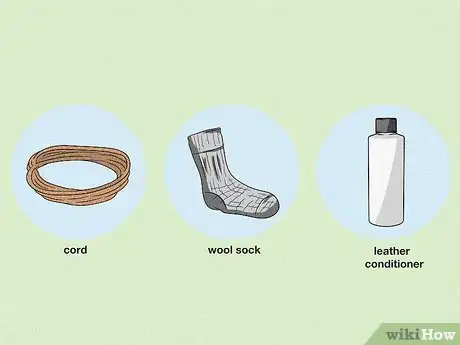
5Grab lots of twine or cord, a wool sock, and natural leather conditioner. Once your leather is tanned and prepped, you’ll need to hang it up in a wooden frame with cord or twine. At that point, you’ll apply leather conditioner all over the leather with your wool sock.[7]
- If you don’t have a wool sock, feel free to use a sponge instead.
Preparing the Skin
-
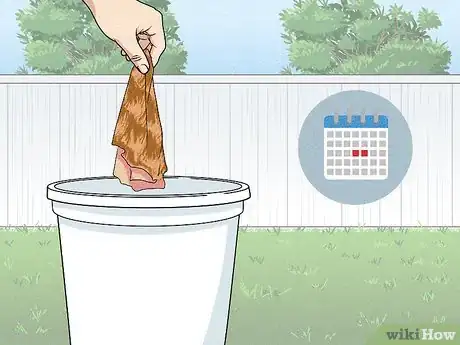
1Soak the hide in a bucket of water for 2 days and rinse it off. This helps make the skin more pliable. Once you finish soaking the hide, rinse it off in clean water to wash away any leftover blood in the skin.[8] Keep in mind that a soaked skin will be extremely heavy, so ask a friend or loved one for help if you need it.
- You don’t have to soak the skin if you don’t want to. However, make sure your hide isn’t completely dry when you start scraping off the flesh.[9]
-
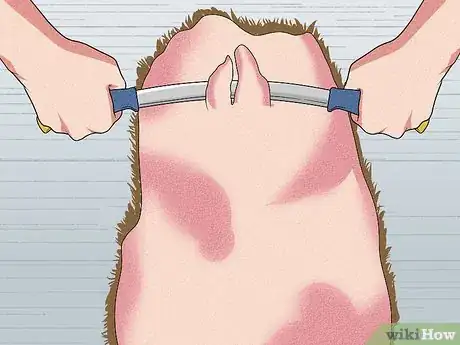
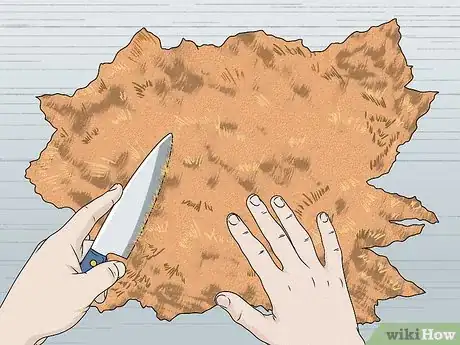
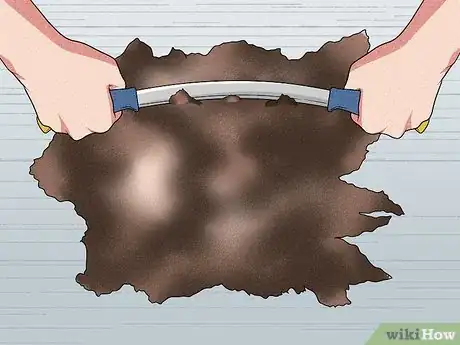
2Scrape off the flesh with your fleshing knife. Drape your skin flesh-side-up on a flat surface. Then, grab your fleshing knife. Using both hands, guide the blade over the fleshy side of the hide. Continue scraping off the flesh until only the skin is left.[10]
-
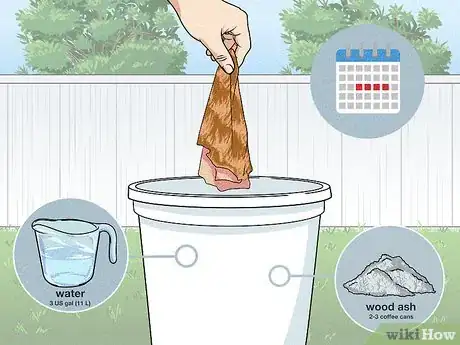
3“Buck” the hide in a wood ash solution. Fill a large bucket or basin with water.[11] Then, stir 2-3 coffee cans worth of wood ash into about 3 US gal (11 L) of water.[12] Submerge your skin in this mixture and let it soak for 3 to 4 days.[13]
- Bucking helps shift the pH of your hide, which makes it easier to tan.[14]
- You can buy wood ash from an online marketplace like Amazon or Etsy.
-
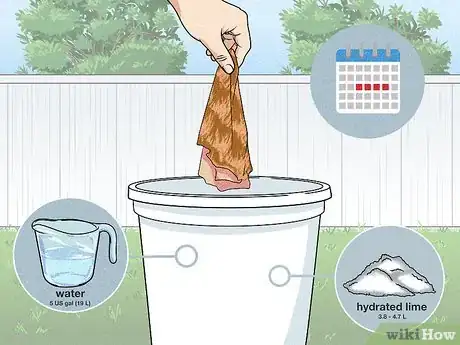
4Soak the skin in a hydrated lime mixture for 6 to 10 days. Mix 4 to 5 US qt (3.8 to 4.7 L) of hydrated lime and 5 US gal (19 L) of water in a large basin, bucket, or barrel. Place the skin into the mixture for at least 6 days, so the hair comes off easily.[15]
- The hydrated lime mixture helps loosen the hair, so it’s much easier to slide off your hide.
-
5De-hair the skin with the blunt side of a dull knife. Set your hide on a flat, smooth board. Then, guide the knife over the skin, removing the fur as you go. Flip the hide over, removing the hair on that side, as well.[16]
-
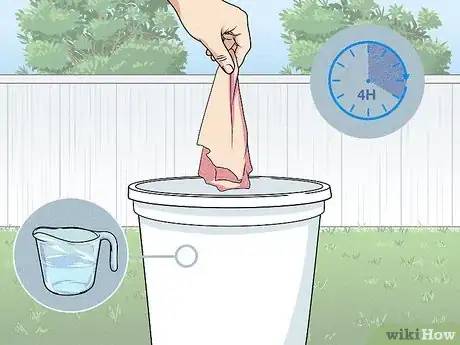
6Soak and scrape the de-haired skin one more time. Place the skin in a bucket of clean water for at least 4 hours, and then remove any leftover hairs with the knife.[17]
- You don’t need a specific knife for this—any blade with a flat, dull edge will work.
-
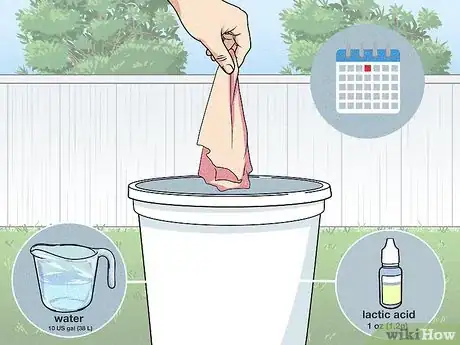
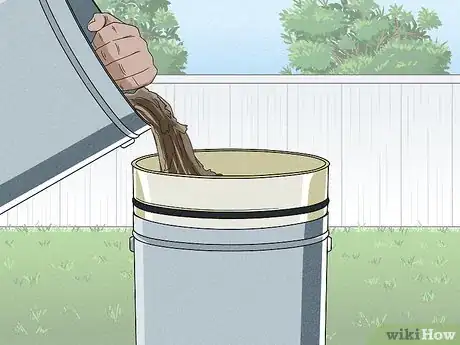
7Submerge the skin in a lactic acid solution to deactivate the lime. To make a lactic acid solution, combine 1 oz (1.2 g) of lactic acid in 10 US gal (38 L) of water. Let the hide soak for at least 1 day, so the lime stops working into your hide.[18]
- If you don’t have any lactic acid, use 1 US pt (0.47 L) of vinegar instead.
Tanning the Hide
-
1Create an all-natural tanning solution with tree bark and water. Stuff the tree bark into a large bucket or basin until it’s about halfway full, then fill it up the rest of the way with water. Stir and heat up the mixture until it’s steaming, and strain out the tree bark.[19]
- Some expert tanners prepare their mixture over an outdoor fire pit.
- If you don’t have access to a fire pit, boil the mixture on your stovetop, instead.[20]
-
2Strain out the tree bark. Place a strainer or sieve over a bucket or basin. Then, strain the heated bark mixture into the bucket, sifting the bark out from the liquid. Pour the filtered tree bark “brew” into a large bucket or basin, so your skin can soak.[21]
-
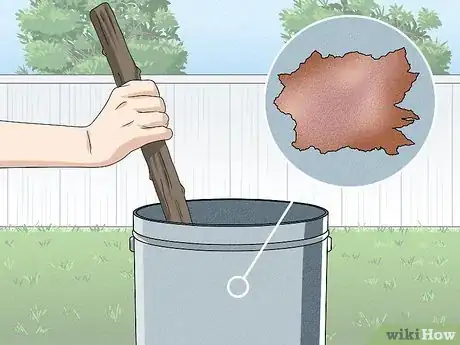
3Soak and stir the skin in the tree bark solution for several days. Soak the hide in your tanning mixture, stirring it every day with a large stick.[22] You can stir the mixture multiple times a day, if you’d like.
-
4Scrape off the hide after a few days of soaking. Drape your skin over a flat surface. Then, guide the blade over the skin to remove the very outer, dark brown layer of the hide.[23]
- Experts don’t suggest a specific time frame for this. However, try doing this about 3-5 days after you first start soaking the hide.
-
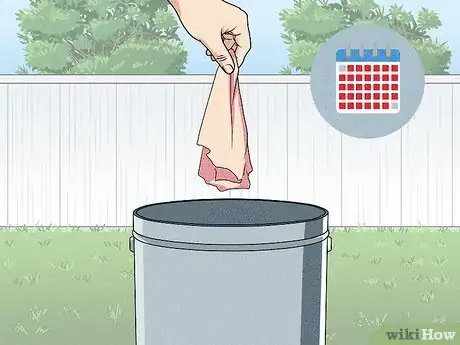
5Soak the hide for at least 1 more month. Place the skin back in the tree bark mixture, where it will finish tanning.[24] Slice a sliver off a thick portion of your hide—if it’s dyed all the way through, then you can take it out of the bark solution. It might take several months before the hide is completely tanned.[25]
- For instance, a deer hide could take up to 6 months to tan completely.
- This may seem time-consuming, but it’s a really important part of the process. Since leather is essentially the skin of a living animal, tanning prevents this skin from breaking down and rotting.[26]
Drying the Leather
-
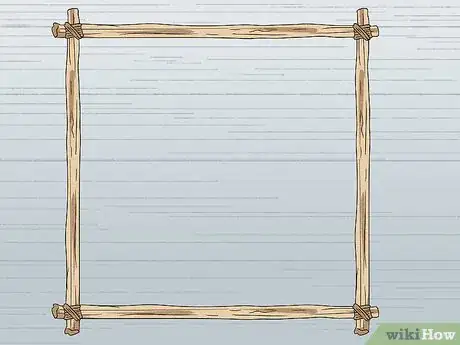
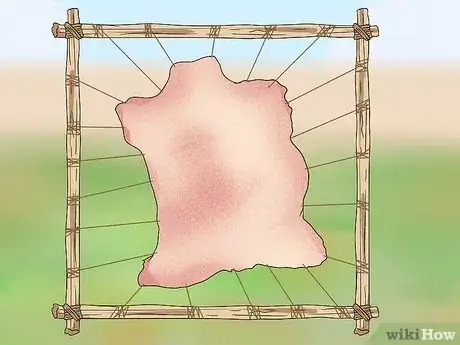
1Tie branches together to create a large, rectangular frame. Lay several long, thick tree branches on the ground in a rectangle shape. Check that your hide can comfortably fit in the center of the frame. Then, tie the branches together with twine.[27]
-
2Hang up your skin from a frame. Cut small holes along the perimeter of your leather with your skinning knife. Tie long pieces of twine between the frame and each leather hole until the leather is tautly strung up.[28]
-
3Work the leather with a large stick. Prop up the frame so your leather is totally upright. Then, press and glide the end of a large stick along the surface of the leather. This helps soften the leather, so it isn’t as tough.[29]
- Experts recommend working the leather as the hide dries out, instead of working the hide when it’s totally dry.[30]
-
4Wait for your leather hide to dry completely. Natural leather experts don’t suggest an estimated drying time, so just wait a few hours or days until your hide is completely dry to the touch.
-
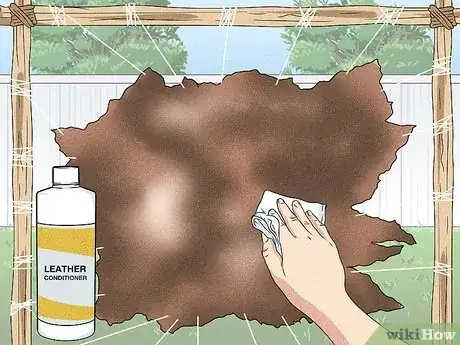
5Apply leather conditioner to the hide. Dip a sponge or wool sock into your natural leather conditioner and rub it all over the leather. Now, your leather is ready to use![31]
- If you don’t have leather conditioner on hand, feel free to make your own! Just mix 1 part beeswax, 1 part cocoa butter, and 2 parts sweet almond oil in a saucepan over medium heat. Once all the ingredients melt, move the saucepan off the burner, letting it cool for 30 to 40 minutes. Then, rub the cooled wax mixture all over your leather, and then buff it down with a clean cloth.[32]
- You can also make leather conditioner with natural baby soap. Simply fill a large bucket or basin with 1 US qt (0.95 L) of warm water. Then, stir in 2-3 drops of vinegar, along with 1 US tbsp (15 mL) of natural baby soap. Then, dip a clean cloth into the mixture and rub it all over the leather.
- You can also use melatonin wax to soften your leather.
Community Q&A
-
QuestionHow can I dye the leather black?
 Community AnswerBuy leather dye after you've made your leather and apply it. You can find lots of tutorials in the internet.
 -
QuestionWhat happens if I don't tan the hide?
 Community AnswerIt will eventually rot, even if salt-dried. It will also have zero immunity to any change in the weather.
 -
QuestionIf there are no oak trees in my country, can I use another tree?
 Community AnswerThe key is to find a tree with a high amount of tannin. If you know of a tree where you are from that, when it falls into a body of water, discolors the water to a tea color, you're on the right track.
Things You’ll Need
- Animal hide
- Fleshing knife
- Skinning knife
- Knife with a flat, dull edge
- Buckets or basins
- Sieve or strainer
- Tree bark
- Water
- Large sticks
- Hydrated lime
- Wood ash
- Lactic acid
- Branches
- Twine or cord
- Wool sock
- Leather conditioner
References
- ↑ https://m.youtube.com/watch?v=nEcJVruXj-s&t=0m29s
- ↑ https://thecta.org/quiver/media/Tanning-Hides.pdf
- ↑ https://m.youtube.com/watch?v=-ecf8LoyPCk&t=0m5s
- ↑ https://thecta.org/quiver/media/Tanning-Hides.pdf
- ↑ https://m.youtube.com/watch?v=-ecf8LoyPCk&t=0m15s
- ↑ https://www.fs.fed.us/wildflowers/ethnobotany/tannins.shtml
- ↑ https://m.youtube.com/watch?v=-ecf8LoyPCk&t=0m30s
- ↑ https://m.youtube.com/watch?v=nEcJVruXj-s&t=0m3s
- ↑ https://m.youtube.com/watch?v=nEcJVruXj-s&t=0m3s
- ↑ https://m.youtube.com/watch?v=-ecf8LoyPCk&t=0m37s
- ↑ https://m.youtube.com/watch?v=-ecf8LoyPCk&t=0m48s
- ↑ https://m.outdoorrevival.com/instant-articles/making-and-using-rawhide.html
- ↑ https://m.youtube.com/watch?v=-ecf8LoyPCk&t=0m48s
- ↑ https://steemit.com/diy/@ofsedgeandsalt/diy-bark-tanning-leather-naturally
- ↑ https://thecta.org/quiver/media/Tanning-Hides.pdf
- ↑ https://thecta.org/quiver/media/Tanning-Hides.pdf
- ↑ https://thecta.org/quiver/media/Tanning-Hides.pdf
- ↑ https://thecta.org/quiver/media/Tanning-Hides.pdf
- ↑ https://m.youtube.com/watch?v=-ecf8LoyPCk&t=1m34s
- ↑ https://steemit.com/diy/@ofsedgeandsalt/diy-bark-tanning-leather-naturally
- ↑ https://m.youtube.com/watch?v=-ecf8LoyPCk&t=1m55s
- ↑ https://m.youtube.com/watch?v=-ecf8LoyPCk&t=2m5s
- ↑ https://m.youtube.com/watch?v=-ecf8LoyPCk&t=2m18s
- ↑ https://m.youtube.com/watch?v=-ecf8LoyPCk&t=2m24s
- ↑ https://steemit.com/diy/@ofsedgeandsalt/diy-bark-tanning-leather-naturally
- ↑ https://www.tannins.org/leather-tanning/
- ↑ https://m.youtube.com/watch?v=-ecf8LoyPCk&t=2m40s
- ↑ https://m.youtube.com/watch?v=-ecf8LoyPCk&t=2m39s
- ↑ https://m.youtube.com/watch?v=-ecf8LoyPCk&t=2m44s
- ↑ https://thecta.org/quiver/media/Tanning-Hides.pdf
- ↑ https://m.youtube.com/watch?v=-ecf8LoyPCk&t=2m58s
- ↑ https://www.bobvila.com/articles/homemade-leather-conditioner/
- ↑ https://m.youtube.com/watch?v=KX8g0Yt0ZmI&t=12m54s
- ↑ https://www.gsmw.org/content/dam/girlscouts-gsmw/documents/Knife%20%26%20Axe%20Safety.pdf
