This article was co-authored by wikiHow Staff. Our trained team of editors and researchers validate articles for accuracy and comprehensiveness. wikiHow's Content Management Team carefully monitors the work from our editorial staff to ensure that each article is backed by trusted research and meets our high quality standards.
The wikiHow Video Team also followed the article's instructions and verified that they work.
This article has been viewed 5,025,111 times.
Learn more...
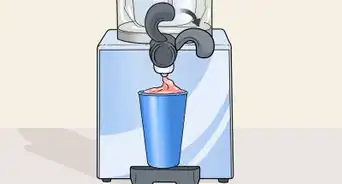
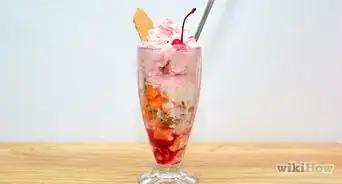
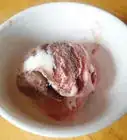
Who doesn't love a bowl of rich, creamy ice cream? But instead of picking up a liter at the store, you can make it at home, where you can control all of the ingredients and get creative with flavors. You can opt for a custard base that uses eggs or an egg-free Philadelphia style base, but the most important decision is how you're going to churn it. An electric ice cream maker makes it very easy, but you can also churn by hand with a spoon. You can also use an ice cream maker bowl, plastic bags with ice and rock salt, or a food processor to do the job. And if churning seems like too big a hassle, you could even whip up no-churn ice cream with sweetened condensed milk. The possibilities are endless! This article will show you different ways to make ice cream.
Ingredients
- 3 cups (710 ml) whole milk
- 1 cup (200 g) sugar
- 8 egg yolks
- Pinch of salt
- 1 teaspoon (5 ml) vanilla
- 14-ounce (396 g) can sweetened condensed milk
- 2 teaspoons (10 ml) pure vanilla extract
- Pinch of fine salt
- 2 cups (473 ml) heavy cream, cold
Steps
How to Prepare a Custard Ice Cream Base
-
1Simmer the milk. Pour 3 cups (710 ml) of whole milk into a medium pot and place it on the stove. Heat the milk on medium-high for about 5 minutes or until it comes to a simmer. Take it off the heat as soon as bubbles form on the surface, and allow it to cool. You can substitute heavy cream or a combination of whole milk and heavy cream if you prefer.[1]
This recipe will make a basic vanilla ice cream base. If you want to create a specific ice cream flavor, you can add herbs such as lavender, coffee beans, or even chocolate into the milk to steep or melt into it.
-
2Combine the eggs, sugar, and salt. Add 8 egg yolks, 1 cup (200 g) of sugar, and a pinch of salt to a large bowl. Whisk the ingredients together until a thick paste forms.[2]Advertisement
-
3Cool the milk and add it to the egg mixture. Once the milk has cooled to room temperature, which should take about 10 minutes, slowly pour it to the egg mixture in a steady stream. Stir the milk in gently until it is fully incorporated.[3]
-
4Transfer the mixture to a pot and cook it until it reaches 170°F (77°C). When the egg mixture and milk are fully combined, return it to the pot. Place it back on the stove over medium-low heat. Stir the mixture in an “S” shape so you can scrape the bottom of the pot, and allow it to cook until it reaches 170°F (77°C).[4]
- Check the mixture’s temperature with a candy or deep-fry thermometer.
- You can also tell that the base has cooked enough when it is thick enough to cling to the back of your spoon.
-
5Strain the mixture over an ice bath and add vanilla. Place a wire mesh strainer over a bowl that’s set in a larger bowl filled with ice water. Pour the ice cream base through the strainer and into the smaller bowl to remove any lumps. Next, mix in 1 teaspoon (5 ml) of vanilla and stir well.[5]
- You can substitute a fresh vanilla bean for the extract if you prefer. Cut the bean in half and scrape the seeds out to mix them into the base.
-
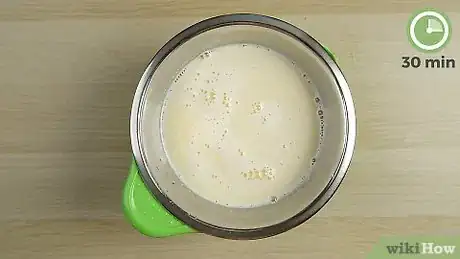
6Chill the mixture for a half hour. Once the ice cream base is fully mixed, cover the bowl with a piece of plastic wrap and leave it over the ice bath for 20-30 minutes. Alternatively, place it in the refrigerator, and chill it for 3 hours or overnight.[6]
How to Mix the Base with an Electric Ice Cream Maker
-
1Freeze the maker’s bowl overnight. The bowl that holds your ice cream base must be fully chilled so the cooling liquid inside it is frozen solid. Place it in your freezer until is completely frozen, which should take 10 to 22 hours.[7]
If you’re having a problem with the bowl getting freezer burn, wrap it in a plastic bag before putting it in the freezer.
-
2Set the bowl in the machine and insert the mixing arm. When the bowl is completely frozen, remove it from the freezer and place it inside the ice cream maker. Next, place the dasher, or mixing arm, in the bowl to ready it for churning.[8]
- The bowl must be completely frozen. If it isn't, the ice cream base won't freeze fast enough, which will result in ice crystals.
- How exactly you reassemble the ice cream maker depends on the brand and how it is constructed. Refer to the manufacturer's instructions, if needed.
-
3Turn on the machine and add the chilled base. The ice cream maker should be turned on before you add the base so it begins churning it immediately. Carefully pour the base into the machine, then place the lid on top.[9]
-
4Allow the ice cream to process according to manufacturer instructions. Consult the manual that comes with your machine to know how long it takes for the ice cream to churn. In most cases, it will need 20 to 30 minutes to reach the proper consistency.[10]
- If you want to add mix-ins such as nuts, crumbled cookies, and candy pieces to the ice cream, you should also consult your manual. You’ll likely be advised to add to them just before the ice cream is finished mixing.
-
5Transfer the ice cream to a freezer-safe container and freeze it until solid. When the ice cream maker is finished churning the ice cream, it will have the consistency of soft serve. If you like that texture, you can eat it right away. Otherwise, spoon it into a freezer-safe container with a lid and freeze it for another 2 to 4 hours.[11]
- Make sure your container is airtight to prevent the ice cream from becoming freezer burned.
How to Churn the Ice Cream By Hand
-
1Freeze a freezer-safe container. You’ll need a freezer-safe, shallow pan or bowl to make the ice cream. Before you begin making the base, place the container in the freezer to chill it for 3 to 6 hours.[12]
- A stainless steel pan that’s approximately 9 by 13 inches (23 by 33 cm) works well for making the ice cream.
-
2Pour the base into the container and freeze it for a half-hour. When the pan or bowl is properly chilled, transfer your prepared ice cream base to it and cover it. Return the container to the freezer for 20 to 30 minutes so the ice cream begins to solidify.[13]
- You’ll know that the ice cream is ready for the next step when the edges just begin to freeze.
-
3Remove the mixture from the freezer and beat it with a hand mixer. Once the ice cream has chilled for a while, take the container out of the freezer. Use an electric hand mixer to mix up the ice cream on medium speed. That will help break it up and create a smooth, creamy texture.[14]
- If you don’t have an electric mixer, you can mix the ice cream by hand with a wooden spoon. It will just take a little more time and elbow grease.
-
4Repeat the process of freezing and beating for about 2 hours. After you’ve broken up the ice cream into creamier texture, cover it again and return it to the freezer. Let it chill for another 20 to 30 minutes and then mix it again. Repeat this process another 3 to 4 times until the ice cream is firm but still creamy and smooth.[15]
- If you’d like to add crumbled cookies, brownies, or candy to the ice cream, mix them in by hand just before the last time you return the ice cream to the freezer.
-
5Store the ice cream in a freezer container until you’re ready to serve it. If you aren’t going to eat your ice cream right away, transfer it to an airtight, freezer-safe container. Store it in the freezer until you serve it.[16]
- It’s a good idea to let the ice cream sit out for 5 to 10 minutes before you serve it so it’s easier to scoop.
How to Mix Up No Churn Ice Cream
-
1Chill a freezer-safe pan. For the ice cream, you’ll need a 9 by 5 in (23 by 13 cm) stainless steel loaf pan that's about 3 inches (7.6 cm) deep. Place the pan into the freezer, and allow it to chill for at least 1 hour.[17]
- The reason you want to chill the pan is so that the ice cream freezes faster. If the ice cream doesn't freeze fast enough, it will develop ice crystals.
-
2Combine the condensed milk, vanilla, and salt. Add a 14-ounce (396 g) can of sweetened condensed milk, 2 teaspoons (10 ml) of pure vanilla extract, and a pinch of fine salt to a medium bowl. Whisk the ingredients together until they’re fully blended, then set the mixture aside.[18]
- Don't use plain, unsweetened condensed milk, or the ice cream won't be sweet enough.
-
3Whip the cream until stiff peaks form. Pour 2 cups (473 ml) of cold heavy cream into the bowl of a stand mixer. Use medium-high speed to whip the cream until stiff peaks form, which should take about 5 minutes.[19]
- For the best results, chill the stand mixer bowl in your refrigerator for 15 to 20 minutes.
- You can use an electric hand mixer or whip the cream by hand if you prefer.
-
4Fold half of the cream into the condensed milk mixture. After you’ve whipped the cream, spoon about half of it into the bowl with the condensed milk mixture. Use a rubber spatula to gently fold the whipped cream into the mixture until it is just incorporated.[20]
- Be careful not to overmix the mixture or you’ll take some of the air out of the cream.
-
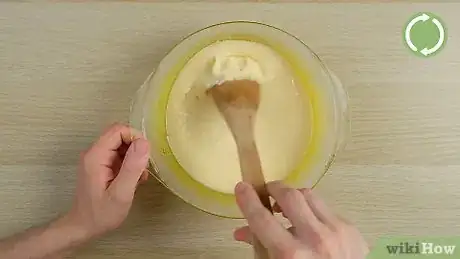
5Add the condensed milk mixture to the rest of the cream. Once you’ve lightened the condensed milk mixture with some of the whipped cream, spoon it into the bowl with the rest of the whipped cream. Fold the two together until they’re well blended.[21]
- When folding the ingredients together, scrape the bottom and sides of the bowl often.
- Be sure to fold the ingredients--not stir. This will help introduce more air into the ice cream, which will give you a lighter texture.
-
6Pour the mixture into the pan and cover. Use the rubber spatula to help transfer all of the ice cream mixtures into the chilled pan. Cover it with a piece of plastic wrap, making sure that it’s airtight.[22]
- Covering the pan is important. If you don't do this, the ice cream may develop ice crystals on top. It may also absorb not-so-tasty odors from your freezer.
-
7Freeze the mixture for a couple of hours, then add mix-ins. Place the pan in the freezer, and allow it to freeze until it reaches the consistency of soft-serve, which should take approximately 2 hours. If you’d like to add any cookies, nuts, candy, or other mix-ins, stir them in until they’re incorporated.[23]
- Match the mix-ins to the flavor of the ice cream. For example, nuts would taste great in chocolate ice cream, but not so great in mint.
-
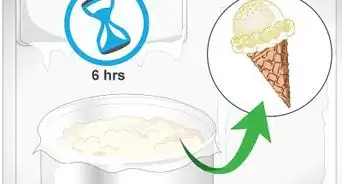
8Continue to freeze the ice cream until it’s scoopable. Cover the pan once more, and return it to the freezer. Let the ice cream freeze for another 3 hours, or until it is solid and able to be scooped.[24]
Community Q&A
-
QuestionCan I add melted chocolate and cocoa powder to make chocolate ice cream?
 KiaSutraCommunity AnswerOf course you can. Add sugar to make it sweeter if it's dark chocolate or 100% cocoa.
 -
QuestionHow do you make it without the vanilla?
 Community AnswerJust leave it out and substitute a different flavor. You can use any juice such as orange juice to make an orange sherbet-like ice cream. Or, make strawberry ice cream, by adding frozen strawberries to the mixture. Other flavored extracts could be used, such as banana or chocolate extract.
 -
QuestionCould you use nitrogen to make ice cream?
 Community AnswerYes. Just make sure it doesn't mix in with the ice cream.
Things You’ll Need
Custard Ice Cream Base
- Medium pot
- Large bowl
- Whisk
- Candy or deep-fry thermometer
- Medium bowl
- Wire mesh strainer
- Plastic wrap
No-Churn Ice Cream
- 9 by 5 by 3 in (22.9 by 12.7 by 7.6 cm) stainless steel loaf pan
- Medium bowl
- Whisk
- Stand mixer
- Rubber spatula
- Plastic wrap
- Electric ice cream maker (optional)
- Freezer-safe container (optional)
- Electric hand mixer (optional)
References
- ↑ http://www.thekitchn.com/ice-cream-basics-recipe-for-a-59205
- ↑ http://www.thekitchn.com/ice-cream-basics-recipe-for-a-59205
- ↑ http://www.thekitchn.com/ice-cream-basics-recipe-for-a-59205
- ↑ http://www.thekitchn.com/ice-cream-basics-recipe-for-a-59205
- ↑ http://www.thekitchn.com/ice-cream-basics-recipe-for-a-59205
- ↑ https://www.thekitchn.com/how-to-make-vanilla-ice-cream-221812
- ↑ https://whatscookingamerica.net/KellyPatey/ElecIceCreamMaker.htm
- ↑ https://whatscookingamerica.net/KellyPatey/ElecIceCreamMaker.htm
- ↑ https://whatscookingamerica.net/KellyPatey/ElecIceCreamMaker.htm
- ↑ https://whatscookingamerica.net/KellyPatey/ElecIceCreamMaker.htm
- ↑ https://whatscookingamerica.net/KellyPatey/ElecIceCreamMaker.htm
- ↑ http://www.tasteofhome.com/recipes/how-to-cook/how-to-make-ice-cream-without-an-ice-cream-maker
- ↑ http://www.tasteofhome.com/recipes/how-to-cook/how-to-make-ice-cream-without-an-ice-cream-maker
- ↑ http://www.tasteofhome.com/recipes/how-to-cook/how-to-make-ice-cream-without-an-ice-cream-maker
- ↑ http://www.tasteofhome.com/recipes/how-to-cook/how-to-make-ice-cream-without-an-ice-cream-maker
- ↑ http://www.tasteofhome.com/recipes/how-to-cook/how-to-make-ice-cream-without-an-ice-cream-maker
- ↑ http://www.foodnetwork.com/recipes/food-network-kitchen/no-churn-vanilla-ice-cream-3364776
- ↑ http://www.foodnetwork.com/recipes/food-network-kitchen/no-churn-vanilla-ice-cream-3364776
- ↑ http://www.foodnetwork.com/recipes/food-network-kitchen/no-churn-vanilla-ice-cream-3364776
- ↑ http://www.foodnetwork.com/recipes/food-network-kitchen/no-churn-vanilla-ice-cream-3364776
- ↑ http://www.foodnetwork.com/recipes/food-network-kitchen/no-churn-vanilla-ice-cream-3364776
- ↑ http://www.foodnetwork.com/recipes/food-network-kitchen/no-churn-vanilla-ice-cream-3364776
- ↑ http://www.foodnetwork.com/recipes/food-network-kitchen/no-churn-vanilla-ice-cream-3364776
- ↑ http://www.foodnetwork.com/recipes/food-network-kitchen/no-churn-vanilla-ice-cream-3364776
About This Article
To make ice cream without an ice cream maker, start by mixing condensed milk, vanilla, and salt in a bowl. Then, in a separate bowl, whip some cold heavy cream until stiff peaks form. Once you've whipped the heavy cream, add it to the condensed milk mixture and stir them together. Next, pour the mixture into a chilled freezer pan and place it in the freezer for 5 hours. After 5 hours, take your ice cream out, scoop it into a bowl, and enjoy. If you want to learn how to make custard-based ice cream, keep reading the article!

