X
wikiHow is a “wiki,” similar to Wikipedia, which means that many of our articles are co-written by multiple authors. To create this article, volunteer authors worked to edit and improve it over time.
This article has been viewed 50,015 times.
Learn more...
Flipping your fried eggs to avoid the emotional trauma that a burnt bottom and raw yolk can wreak? Fear no more. There's nothing as splendid as a perfectly fried egg -- and with a little practice, you'll be the envy of the breakfast club!
Steps
-
1Place a pan on an even burner and begin with a burner temperature just below medium heat. Use a pan with enough space to allow for some running between eggs. Avoid frying more than three eggs at a time. Watch the temperature as you cook. Be on the safe side - turning down the heat a little is better than too much heat. A burned egg isn't appealing.
-
2Within a few minutes of turning the burner on, spray olive oil (see the tips section on this) or place three tablespoons of melted butter into the bottom of the pan. Monitor the burner temperature to avoid browning the oil or butter.Advertisement
-
3Allow the pan to heat, but not so much as to cause the oil or butter to burn. A lower temperature is better; too high, and you will burn the oil and eggs quickly.
-
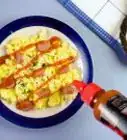
4Break the first egg into a small dish or bowl and then lower the dish into the hot pan and gently pour the egg into the pan. You should hear a slight sizzle, but there shouldn't be popping or violent splattering occurring.
-
5Continue to break up to three eggs, one at a time, into the dish and transfer them to the pan. Do this quickly so your eggs will finish at approximately the same time.
-
6After one or two minutes of cooking, take the cover for the pan and run approximately one to two tablespoons of tap water into its underside. Pour this water into the pan, but not directly onto the eggs. Then put the lid on the frying pan and cook the eggs for four to seven minutes, depending upon the heat. The water will create a hood over the egg yolks. (You can also melt butter and spoon it over the egg yolks and then put the pan lid on to create approximately the same effect, but with a much higher calorie count.)
-
7Observe the hardness of the yolk by lifting the pan lid from time to time. When the desired "doneness" is near, remove the lid of the pan so that the remaining water can evaporate. The goal is to have a well-cooked egg without the crispy edges -- that may take some practice, but once you've found the right burner setting, remember what it is. The water helps to provide a moist cooking environment so the oil is never allowed to directly burn the egg.
-
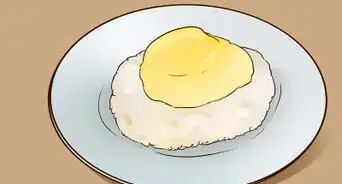
8Use the spatula (and this is the first and only time you should have to use the spatula) and gently lift the eggs out onto a plate.


Advertisement
Community Q&A
-
QuestionHow can I tell when it's done based on the hardness of the yolk?
 ArtBrainedCommunity AnswerJiggle the pan, if the yolk jiggles too, it's still runny. The less the jiggle, the more done the yolk is. Also the whites of the egg will get whiter as it cooks more, and those will cook faster than the yolks will.
Advertisement
Warnings
- A frying pan that is not level will cause problems. The pan will not be oiled evenly and the eggs will slide to the low side.⧼thumbs_response⧽
Advertisement
Things You'll Need
- A sturdy frying pan, preferably stainless steel with a copper bottom or a non-stick pan. This should have a lid, although a plate can be used as long as you're careful about removing it from the hot pan.
- A stainless steel (for stainless steel or cast iron pans) or plastic spatula (for non-stick pans).
- Fresh eggs, either room temperature or refrigerated.
- Spray-type olive oil, butter, or vegetable cooking oil.
- Small dish or bowl to crack the eggs into.
About This Article
Advertisement