wikiHow is a “wiki,” similar to Wikipedia, which means that many of our articles are co-written by multiple authors. To create this article, 23 people, some anonymous, worked to edit and improve it over time.
The wikiHow Tech Team also followed the article's instructions and verified that they work.
This article has been viewed 152,450 times.
Learn more...
All you need to make your own 3D photos is a camera and photo editing software. This tutorial will walk you through the process of making 3D images using freeware available for PCs. StereoPhoto Maker (SPM) is a freeware program for Windows and Intel/PowerPC Mac that allows for cropping and aligning a stereo image pair to make it suitable for comfortable 3-D viewing. Once aligned it will let you save the pair in a variety of viewing formats, including "anaglyph" -- the one that uses the cyan and red 3-D glasses. AutoPano works with StereoPhoto Maker, and finds thousands of features in your left and right photographs that allow SPM to automatically align the two images for you.
Steps
Take your pictures
-
1Find a subject with a foreground and background objects to give the photo depth. Unless you're using two digital cameras at the same time, you're going to be pretty much stuck with taking still life shots for now. You can try asking a friend to hold still between shots, but good luck having it work with kids or animals. If you plan on viewing your 3D pictures with red-blue anaglyph glasses, it's best to avoid photographing things that are red or cyan.
-
2Take a photo 10 to 15 feet (3.0 to 4.6 m) away from the main subject. Then slide the camera about 2.5" to the right for the right eye picture.
- Try to be consistent. If you sometimes take the right picture first and sometimes the left first, you'll have a hard time knowing which is which. Make it a habit to always take the left picture first.
- It's best if your camera is on a tripod, but if you are doing this hand-held try to keep the camera as still as possible as you move to take the second shot.
- Keep the overall framing of the pictures the same while you are shifting. Try to keep whatever is touching the bottom of the frame the same in both images to minimize vertical error.
Advertisement -
3Move the images to your computer. If you're using a digital camera, it's useful to organize the images for easier processing later. Create a folder called "3D Photos". Inside 3D Photos create some sub folders. One might be named "Original Right" or "OR" and "Original Left" or "OL". Create another folder called "Anaglyph" and perhaps another called "Side by Side". These are for storing your finished work.
- Move the images from your camera into the 3D Photos folder, and then move the right shots into the "OR" folder and the left shots into the "OL" folder. There should be the same number of shots in each folder.
- Rename the files. Suppose you've started by taking five pairs of images. You might name them Photo1-L, Photo1-R, Photo2-L, Photo2-R, Photo3-L, Photo3-R, and so on. If you've taken 10 or 20 or 50 or several hundred "stereo pairs" of images, renaming them individually would take a long time. There's a way to rename a whole folder full of files (Multi-Rename) in SPM that's described later in this tutorial.


StereoPhoto Maker
-
1Go to the SteroPhoto Maker website and at the top you'll see:
- StereoPhoto Maker Ver4.01 836KByte 22/May/2009
- StereoPhoto Maker Ver4.01 include help file 11087KByte 22/May/2009
-
2Click on one of those links to download StereoPhoto Maker. The program itself is amazingly small in size, at only about 700 Kilobytes. There is also a help file which can be downloaded, and it takes up about 5 megabytes. This has extensive illustrated instructions, and is strongly recommended both for help and tutorial.
-
3Save the file. A box should pop up asking if you want to open or save a file named "stphmkr310.zip". Hit the Save button. A box titled Save As pops up, asking you where to save it. In the "Save in" section, save it on your desktop so you'll be able to find it easily.
-
4Once it's downloaded, open it. A folder containing the file "stphmkre.exe" should open. Drag it onto your desktop so that it will be easy to get to later on. You can now close the StereoPhoto Maker website window.


Creating 3D Images
-
1Choose File, Open Left/Right Images. The program will guide you, asking where it can find the left image, and then where it can find the right image. After you've selected the images, both will appear side by side.
-
2Click on the "Easy Adjustment" icon (K)(the red square overlapping the blue square ). It takes you to a window that displays both images semi-transparently. You can then drag one until it lines up well with the other.
- Ideally you want to make the two images match up perfectly vertically, and match up horizontally for things in the very center of the picture. Line up the two images as well as you can and click OK.
-
3Preview the anaglyph. The multicolored icon to the left of the vertical red-blue icon is there to see your image as an anaglyph. Now that you've aligned them, click on that and put on your 3D glasses. To get a big view, click on the icon that looks like a rectangle with an X through it . That will give you a full screen view. After you've had a good enough look at it, to go back to the regular program screen, hit the Esc key. Make any adjustments in aligning the images until you're happy with it.
-
4Save the image. Choose File, Save Stereo Image.
-
5Put it into your "anaglyph" folder. You may want to change the name to that it doesn't have a -L or -R on it.
-
6Experiment with the Auto-align. Again, choose File, Open Left/Right Images, and tell the program which files to open. Then select Adjust, Auto-Align . If it ever asks if you want to use previous report files, always click No. The program will perform its magic comparing the two images and lining them up as perfectly as it can. If you want you can save this image also, perhaps with another name. You can later look at the two images and see how they compare.


Batch rename photos with Multi-Rename
Multi-Rename is located in the FILE pop down menu (File > Multi-Rename). This will allow you to rename groups of images from the cryptic number names given by the cameras (for example: DSC000561) to more useful names such as Name001_L and Name001_R. Even if there were holes in the original number sequence due to deletions, the batch rename function will number them 1 to the total number in the file, consecutively. This is very useful. It will make if much easier to identify the two images that form a stereo pair, and is essential if you use the Multi-Conversion function in StereoPhoto Maker, which can automatically batch process countless stereo pairs.
-
1Select your files. Once you've chosen File, Multi-Rename, a box comes up.
-
2In the Look In box, browse to the folder where you stored your original LEFT files.
-
3Select Full Rename.
-
4Provide information about the files. Suppose these are some desert images you just took, and/or maybe you want to indicate when you took them. For the moment let's suppose you've taken 25 stereo pairs, and that the left images are in a folder called OL and the right images in a folder called OR.
- In the box that says "Stereo" you could replace "Stereo" with Desert2007February or with any meaningful notation you wish.
- In the numbering box that shows "0001", you could replace the "0001" with "01", since you really only need two digits for 25 images.
- In the box that contains "_B.JPG", leave the "_" and the ".JPG", but replace the "B" with "L" or "OL" when renaming the LEFT files, and with "R" or "OR" when renaming the RIGHT files. Do this for both the left and right image folders, and now it will be much easier to identify your files.


Convert multiple images with Multi-Conversion
Above we've mentioned Easy Align and Auto-Align, two very powerful tools in SPM. Now for the real power of the program, try Multi-Conversion.
-
1Double check your images. If you've done a multi-rename of LEFT and RIGHT image folders in preparation for doing a multi-conversion, be sure to look at how many files are in each folder. It's not uncommon to have made a mistake or to have an unequal number of files in them. Doing a multi-conversion in such circumstances will be a mess. If you have an unequal number, you may need to look through them to remove "stray" single images, and then run multi-rename again.
-
2Select File, Multi-Conversion. In Multi-Conversion you tell the program which files you want it to work on, how you want them to be saved, and where to save them. For this tutorial we're assuming that you're starting with two independent images files. As you become more advanced in working with StereoPhoto Maker this may not be true, but for the purpose of this tutorial let's start there.
-
3In the Look In box, browse until you've brought up the folder containing the LEFT image files you want to work on. You don't need to choose a file name or file type.
-
4In the Input File Type (Stereo) box, choose Independent (L/R). When you choose this, just below it a box saying Right Image Folder appears.
-
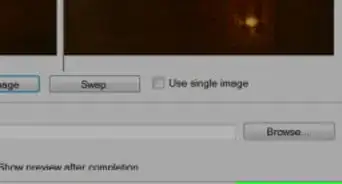
5Check that box and a Browse window appears. Click on Browse and choose the folder that contains your RIGHT image files. Leave the L Normal and R Normal boxes as they are. You'd use these if you needed to rotate the images or flip them..
-
6Choose Output File Type. For the sake of this tutorial, choose Color anaglyph . After you've run this conversion sequence you may want to do it again and choose Gray anaglyph , Side-by-Side , or Independent L/R, but for the moment choose Color anaglyph.
-
7In the Adjust box, select Auto-alignment, Auto Crop after adjustment and Auto Color Adjustment. There are lots of other options that you can explore later.
-
8Near the bottom you set the Output Folder box. This is where you tell the program where you want the new files you're creating to go. Remember at the beginning of this tutorial we suggested that you create folders called "anaglyph".
-
9Hit the Browse button and choose "anaglyph" folder. Even if you didn't create those folders before, it's not too late. Go to Windows Explorer and create that folder, and browse to it.
-
10Click on the Convert All Files button. If it asks you whether you want to use the "previous report files", click on No. Now just walk away or watch if you must. You'll see no dramatic graphics, just the computer running madly through its paces, trying to make sense of your stereo pairs. Depending on the speed and configuration of your PC it can take from 5 seconds to 3 minutes per pair.
-
11The program will automatically adjust the images for a correct stereo window, corrects image rotation, size differences, and vertical difference errors. If you've been careful taking the two images here should be no problem in the majority of the images it produces.
-
12You can optionally save the choices you've made so that the next time you run Multi-Conversion you don't need to click on all the same choices again. Just click on the Save box on the lower right of the window, and give it a name. To use those setting another time you'll click on Restore(File) and choose the file you saved.


Community Q&A
-
QuestionStereo pairs are more clearly printed on my DX8400 printer than on the one I now own, ET-2650. How can I get rid of this graininess?
 Community AnswerTry using a new, different kind of paper or ink. They usually are grainy because the ink doesn't sit well on the paper or the paper isn't the right kind of paper for the printer. You can also check Print Properties to ensure that you're printing at the best resolution.


References
- 3Ddigitalphoto.com Original source, shared with permission.