wikiHow is a “wiki,” similar to Wikipedia, which means that many of our articles are co-written by multiple authors. To create this article, 25 people, some anonymous, worked to edit and improve it over time.
wikiHow marks an article as reader-approved once it receives enough positive feedback. In this case, 96% of readers who voted found the article helpful, earning it our reader-approved status.
This article has been viewed 351,542 times.
Learn more...
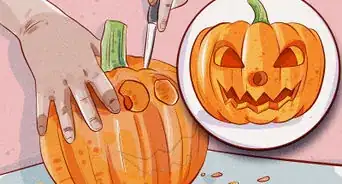
Carving a great pumpkin for Halloween takes a lot of time and effort. Many people get frustrated when their work of art starts to mold right after Hallow's Eve comes to a close. Luckily, there are several ways to keep your pumpkins smirking and mold-free far past Halloween.
Steps
Silica
-
1Find some silica gel packets. Silica is used as a desiccant, meaning that it wicks away excess moisture. What causes your pumpkin to start rotting and molding? Excess moisture. The two are a devilishly simple but effective combination.
- Check your closet or dresser drawers, as you may have left some lying around from recent purchases. If you can't find any, packets of silica are available in bulk for very economical prices online. Silica packets are largely available with the following items:
- Beef jerky
- Shoes and shoe boxes
- Cat litter
- Check your closet or dresser drawers, as you may have left some lying around from recent purchases. If you can't find any, packets of silica are available in bulk for very economical prices online. Silica packets are largely available with the following items:
-
2Remove silica beads from their packets. Don't leave any lying around for your pets because, while silica gel itself is nontoxic, sometimes manufacturers add other toxic chemicals (for example, cobalt chloride) to the product.Advertisement
-
3Embed the silica into the pumpkin. Remove the top of the pumpkin. Take a silica bead and embed it into the interior of the pumpkin. Don't stick the bead in so far that it changes the appearance of the pumpkin's exterior.
- When applying the beads, use 3/4 grams of silica for every 100 cubic inches of pumpkin.


Bleach
-
1Mix 1 teaspoon bleach per gallon of water to create enough water to dunk the pumpkin into. You'll need a vat and a good amount of bleach/water, depending on the size of the pumpkin.
- The idea is that bleach is an antimicrobial, and that water will hydrate the skin of the pumpkin like a moisturizer would on human skin.
-
2Dunk the pumpkin into the bleach solution, covering completely. Soak the pumpkin in the bleach solution for approximately 8 hours.
-
3Remove the pumpkin from the bleach solution and pat dry with paper towels or sponges.
-
4Every day, moisturize the pumpkin with the bleach solution. Spray the outside and inside with the bleach solution used to treat the pumpkin initially. Soak up any excess moisture after spraying. Moisture is the ally of mold.


Pumpkin Preservative
-
1Purchase a pumpkin preservative. Pumpkin preservative, like Pumpkin Fresh, are available online and at Halloween specialty stores. Pumpkin preservatives may contain water, sodium tetraborate decahydrate (borax), and/or sodium benzoate (a preservative and fungicide). They act as fungicides.
-
2Spray the pumpkin with the preservative or dunk the pumpkin into the preservative. Spraying is more convenient, but dunking may be more long-lasting.
- If choosing to dunk, be sure to pat the pumpkin dry. Remember that mold hits where moisture fits.
-
3Continue to spray the pumpkin with preservative every day. Spray the outside and inside with the preservative and watch as it fights off mold and decay. Pumpkin preservatives help the pumpkin last relatively mold-free for up to 14 days.


Methods That Do Not Work
-
1Do not use white glue to preserve a pumpkin. The idea is that white glue is supposed to create a seal around the inside of the pumpkin, preventing moisture from developing into mold. Sadly, white glue just hastens the demise of the pumpkin.
-
2Do not use petroleum jelly to preserve a pumpkin. The idea here is that the petroleum jelly is supposed to keep the pumpkin from dehydrating, thereby staving off decay. Unfortunately, this method also hastens the production of mold.
-
3Do not use acrylic spray to preserve a pumpkin. Again, this method is supposed to seal a pumpkin's inner flesh, creating a barrier that keeps out mold. The idea is better than its execution: pumpkins sprayed with acrylic do not outlast pumpkins that aren't treated at all.


Community Q&A
-
QuestionWhat about un-carved pumpkins that are just painted?
 Heather Kenyon-HaffTop AnswererPumpkins that are not carved carved pumpkins will stay mold-free for a very long time--weeks longer than carved ones. However, as vegetables, they will eventually decompose. How much longer depends on the freshness of the pumpkin and the environment.
 -
QuestionHow do I balance a tealight in a Halloween pumpkin?
 Community AnswerTry scraping out the bottom portion of the pumpkin to make it more of an even surface. This should allow the tealight to balance on its own. If not, try taking a bit of hot glue and gluing it down to the bottom of the pumpkin. This is less ideal, however, because in order for the glue to stick, the bottom of the pumpkin would have to be fairly dry, so it's not going to work well on freshly-carved pumpkins. You could also get battery operated lights so there's no fire hazard if they do tip over.
 -
QuestionWhat should I do if my pumpkins already have mold?Community AnswerYou could use them as fertilizer or something similar, but it might not be a good idea to carve them if they're already molded.
Warnings
- Silica has been linked to Scleroderma, so be extremely careful when handling the beads out of their packets.⧼thumbs_response⧽