This article was co-authored by wikiHow Staff. Our trained team of editors and researchers validate articles for accuracy and comprehensiveness. wikiHow's Content Management Team carefully monitors the work from our editorial staff to ensure that each article is backed by trusted research and meets our high quality standards.
This article has been viewed 361,356 times.
Learn more...
You can install a homebrew channel for your Wii U by using a simple internet browser exploit. This will allow you to install homebrew applications, such as programs that let you run games from other regions. You can also install a homebrew channel in your Virtual Wii. This channel allows you to access Wii homebrew, such as USB Loader GX, which can save and run games directly from an external hard drive.
Steps
Installing the Wii U Homebrew Channel
-
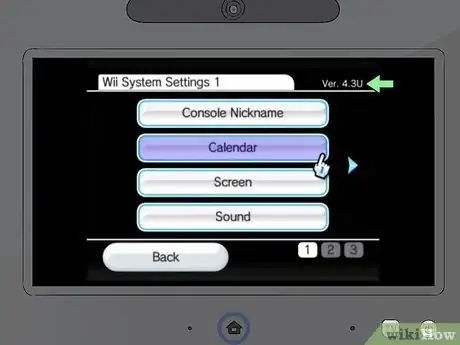
1Check your Wii U firmware version. These instructions were written for firmware version 5.5.1 and earlier. 5.5.2 is currently the latest firmware version at the time of this writing (August 2017). This method currently does not work on version 5.5.2. [1]
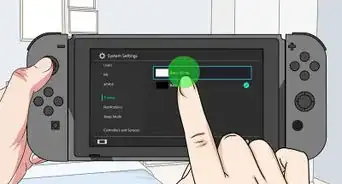
- Turn on your Wii U and select the "System Settings" option in the main menu.[2]
- Find the version number in the upper-right corner. If it is 5.5.1 or below, the method outlined below should work fine. Currently 5.5.2 does not work.
-
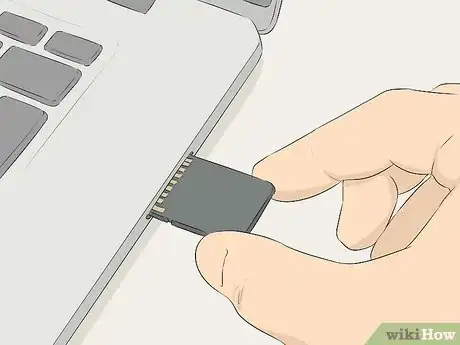
2Insert a blank SD card into your computer. You'll need to load a few files on an SD card from your computer in order to load the homebrew channel on your Wii U. Insert an SD card that's blank or that you don't need for anything else into your computer's card reader.
- If you don't have a card reader, you can get a USB reader for a few dollars online.
Advertisement -
3Format the SD card as FAT32. Most SD cards will already be in this format, but it doesn't hurt to check before you get started. Formatting the card will delete all of its contents.
- Windows - Press ⊞ Win+E and right-click your inserted SD card. Select "Format" and then choose "FAT32" as the "File system."
- Mac - Open the Disk Utility from the Utilities folder in your Applications folder. Select your SD card from the left frame. Click the "Erase" button at the top of the window, then select "FAT32" from the "Format" menu.
- Linux - Open GParted. If you don't have it, you can install it from your package manager (or if you have Ubuntu, you can use the live CD), open it, and click the drive that closely matches the size of the card (16 GB may show up as 14.5 for example), and if the file system does not show up as "fat32", go to the "Partition" tab, click "Format to", and select "fat32". Then click the check mark.
-
4Download dimok789's Wii U homebrew channel software. As it is open-source software, the you can visit github.com/dimok789/homebrew_launcher/releases to download the ZIP file for the latest release.[3]
-
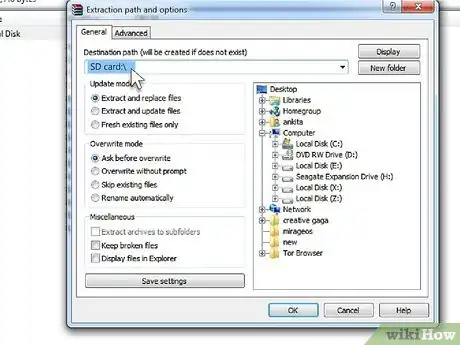
5Extract the downloaded ZIP file to your SD card. Double-click the downloaded ZIP file to open it. Click the "Extract" button, and then browse to your SD card. This will extract the files to your SD card in the proper folder structure.
-
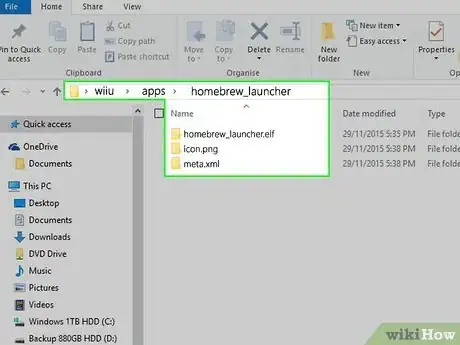
6Verify that the files are correctly placed on your SD card. Open your SD card in your file explorer. The files should be in the following folder structure:
- /wiiu/apps/homebrew_launcher/
- There should be three files in the homebrew_launcher folder: homebrew_launcher.elf, icon.png, and meta.xml.
-
7Download any homebrew apps you want to use. The homebrew channel doesn't come with any software, it simply allows you to use homebrew software. You'll need to download this software yourself and add it to the SD card. Homebrew apps are added to the "apps" folder on your SD card. There are a variety of homebrew apps that you can find online designed for the Wii U. Below are a few examples you can look for to get started:
- loadiine_gx2 - This lets you load out-of-region games and modded games.
- HID to VPAD - This allows you to use other USB gamepads such as the Wii Pro Controller, PS3 controllers, and more.
- ddd - This is the Wii U title dumper, allowing you to create local copies of your Wii U games.
-
8Insert the SD card in your Wii U. Once the SD card is ready, you can eject it from your computer and then insert it in your Wii U.[4]
- Open the front panel on your Wii U.
- Insert the SD card into the SD card slot with the label facing up.
-
9Enter custom DNS settings on your Wii U to prevent automatic updates. You'll want to prevent your Wii U from connecting to the automatic update servers, as updates from Nintendo may break your ability to use the homebrew channel. Entering the following DNS information will route you through a custom community DNS that blocks the Nintendo update servers:[5]
- Open the System Settings menu from the main Wii U screen.
- Select "Internet" and then "Connect to the Internet."
- Select your wireless network and then select "Change Settings."
- Tap the DNS option, turn "Auto-Obtain DNS" OFF, and change the first and second address to 104.236.072.203
-
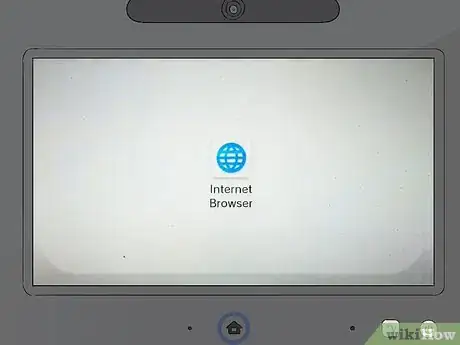
10Open your Wii U's Internet Browser. You'll be performing the exploit using your Wii U's web browser. You can find the button for this at the very bottom-center of the Wii U main menu.
-
11Tap the "Settings" button in the upper-right corner of the start page. This will open the browser settings.
-
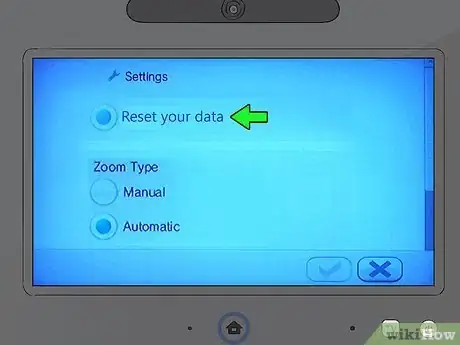
12Tap "Reset your data." This will clear your browser data, which will increase the likelihood of your homebrew channel launching correctly.
-
13Enter .http://loadiine.ovh/ into the browser address bar. This website contains the payload that will exploit the web browser and load the homebrew channel.
- Bookmark this site so that you can quickly run the exploit again next time.
-
14Press the green button on the website to launch the homebrew channel. This will run the exploit on your Wii U's internet browser, and the homebrew channel menu will appear after a few moments.
- If the system freezes on a white screen, you'll need to press and hold the Wii U's Power button until the system shuts down. Turn the system back on and try again. It will usually work the second time, though it may take a few tries.
-
15Select the homebrew you want to use. The homebrew software that you added to your SD card will be displayed in the menu that appears. Select one to start using it.
-
16Run the web exploit every time you power your Wii U on. The homebrew channel exploit is not permanent, and you'll need to run it each time you turn your Wii U on again. Bookmarking the site will make the process much quicker, as you can just select the bookmark from the browser's start screen.
Installing the Virtual Wii Homebrew Channel
-
1Use this method to install the homebrew channel in the Virtual Wii. All Wii U consoles contain a virtual Wii mode that allows them to play Wii games. You can install a homebrew channel in Wii mode, which will give you access to Wii homebrew like game backups, Gamecube support, emulators, and more.
-
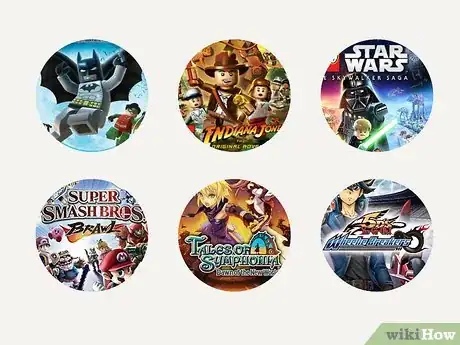
2Obtain one of the games necessary for installation. The virtual Wii homebrew channel is installed by exploiting vulnerabilities in certain Wii games. You will need one of the following games in order to install the homebrew channel:
- LEGO Batman
- LEGO Indiana Jones
- LEGO Star Wars
- Super Smash Bros. Brawl
- Tales of Symphonia: Dawn of a New World
- Yu-Gi-Oh! 5D's Wheelie Breakers
-
3Get an SD card 2 GB or smaller. You'll have more success with an SD card that is 2 GB or smaller than you will with a larger card. The card 'cannot be SDHC or SDXC.
- If you followed the steps in the previous section to create an SD card for the Wii U homebrew channel, you can use the same card.
-
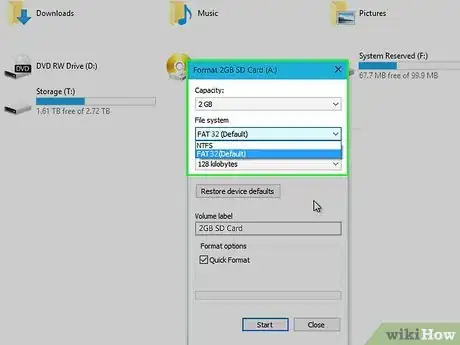
4Format the card with the FAT32 file system. This is required in order for the virtual Wii to read your card. Formatting the card will erase everything on it. If you are using the same card from the previous section, it doesn't need to be formatted.
- Windows - Press ⊞ Win+E, right-click your SD card, and select "Format." Choose "FAT32" from the "File system" menu and then click "Start."
- Mac - Open the Disk Utility from the Utilities folder in your Applications directory. Select the SD card in the left frame, then click the "Erase" button. Select "FAT32" from the "Format" menu and then click "Erase."
-
5Download the homebrew channel installer. Find and download the Hackmii Installer v1.2. This ZIP file contains the software necessary to install the homebrew channel. You can download it from bootmii.org/download/.
-
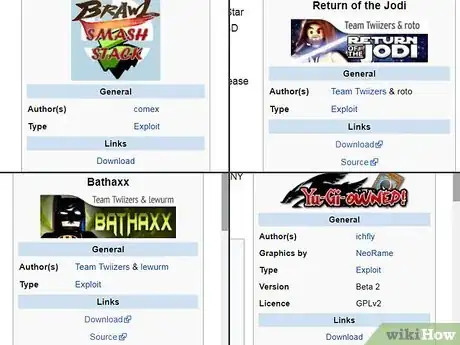
6Download the hack for the game you are using. Each of the games listed above requires a different hack file. You can find these files in various locations online. Look for the following hack files depending on the game you are planning on using to exploit:
- LEGO Batman - bathaxx
- LEGO Indiana Jones - Indiana Pwns
- LEGO Star Wars - Return of the Jodi
- Super Smash Bros. Brawl - Smash Stack
- Tales of Symphonia: Dawn of a New World - Eri HaKawai
- Yu-Gi-Oh! 5D's Wheelie Breakers - Yu-Gi-Vah!
-
7Move all of your Smash Bros. Brawl custom stages to the SD card (Smash Bros. method only). If you're using Smash Bros. Brawl to install the homebrew channel, you'll need to move your stages to the SD card before you start the exploit. if you're using any other game to install the homebrew channel, you can skip this step.
- Insert your SD card into the Wii U and launch Smash Bros. Brawl from the virtual Wii.
- Open the "Vault" on the SSB main menu and then select "Stage Builder."
- Select each stage and move it to the SD card. You need to do this for every stage, including those that came installed with the game.
- Close the game and move the SD card to your computer. Open the SD card in your file explorer and name the "private" folder to "private.old"
-
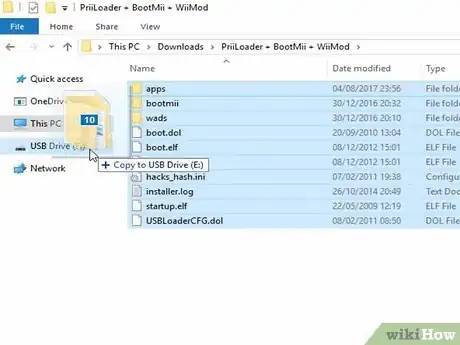
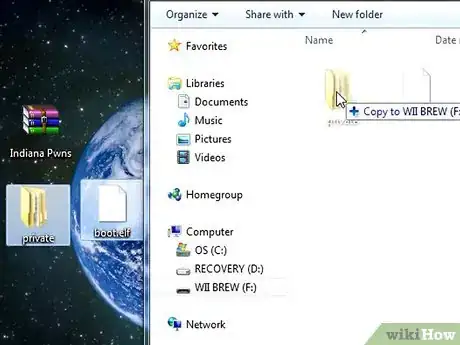
8Extract the Hackmii installer onto your SD card. Double-click the Hackmii ZIP file that you downloaded and then click the "Extract" button. Point the extractor to the root folder of your SD card. When extracted, you'll see a folder called "private" appear in the root of the SD card.
-
9Extract the game-specific hack files to the SD card. Double-click the ZIP file that contains your game-specific hack files and click "Extract." Extract the files to the SD card, just like you did the Hackmii installer. If you get a warning that the "private" directory already exists, just confirm that you want to continue.
- Your SD card should now have a "private" folder when you first open it on your computer. This folder contains the Hackmii files as well as the game-specific hack files.
-
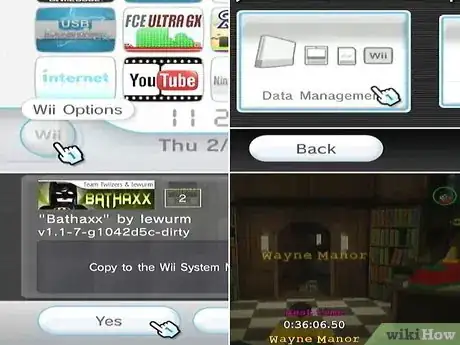
10Install the LEGO Batman exploit. The following instructions are for users with LEGO Batman. If you're using a different game, you can find it in the steps below this one:
- Open the Wii section of the Wii U menu and then insert your SD card.
- Select "Wii Options" → "Data Management" → "Save Data" → "Wii"
- Select "Bathaxx" from the SD card and copy it to your virtual Wii.
- Start LEGO Batman and load the save file you just copied.
- Take the elevator on the right in the Batcave, then enter Wayne Manor from the Trophy Room. Select the last character in the lowest row to launch the exploit. Skip down to Step 16.
-
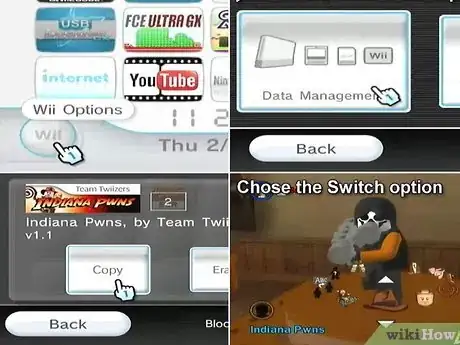
11Install the LEGO Indiana Jones exploit. The following instructions are for users with LEGO Indiana Jones:
- Open the Wii section of the Wii U menu and then insert your SD card.
- Select "Wii Options" → "Data Management" → "Save Data" → "Wii"
- Select "Indiana Pwns" from the SD card and copy it to your virtual Wii.
- Start LEGO Indiana Jones and load the save file you just copied.
- Walk to the Art Room and look at the left character on the podium. Select "Switch" when you approach. Skip down to Step 16.
-
12Install the LEGO Star Wars exploit. The following instructions are for users with LEGO Star Wars:
- Open the Wii section of the Wii U menu and then insert your SD card.
- Select "Wii Options" → "Data Management" → "Save Data" → "Wii"
- Select "Return of the Jodi" from the SD card and copy it to your virtual Wii.
- Start LEGO Star Wars and load the save file you just copied.
- Approach the bar on the right and choose the "Return of Jodi" character. Skip down to Step 16.
-
13Install the Super Smash Bros. Brawl exploit. The following instructions are for users with Super Smash Bros. Brawl:
- Make sure you moved all of the custom stages to your SD card (Step 7).
- Open the SSB main menu, then insert your SD card.
- Open "Vault" and then "Stage Builder." The hack files will load automatically. Skip down to Step 16.
-
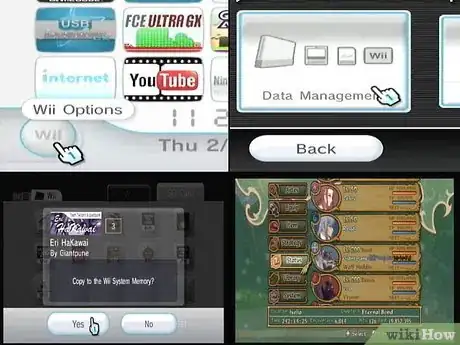
14Install the Tales of Symphonia: Dawn of a New World exploit. The following instructions are for users with Tales of Symphonia: Dawn of a New World:
- Open the Wii section of the Wii U menu and then insert your SD card.
- Select "Wii Options" → "Data Management" → "Save Data" → "Wii"
- Select "Tales of Symphonia" from the SD card and copy it to your virtual Wii.
- Start Tales of Symphonia and select your new save file.
- Press the Plus button on the controller to open the game menu.
- Select "STATUS" and then select the "Eri HaKawai" monster. Skip down to Step 16.
-
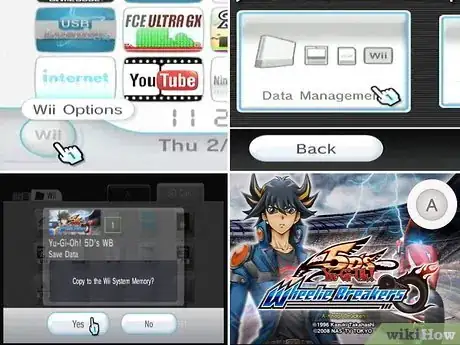
15Install the Yu-Gi-Oh! 5D's Wheelie Breakers exploit. The following instructions are for users with Yu-Gi-Oh! 5D's Wheelie Breakers:
- Open the Wii section of the Wii U menu and then insert your SD card.
- Select "Wii Options" → "Data Management" → "Save Data" → "Wii"
- Select "Yu-Gi-Oh 5D's Wheelie Breakers" from the SD card and copy it to your virtual Wii.
- Start Yu-Gi-Oh! 5D's Wheelie Breakers and press A to load the menu. Press A again and wait for the Hackmii installer to load.
-
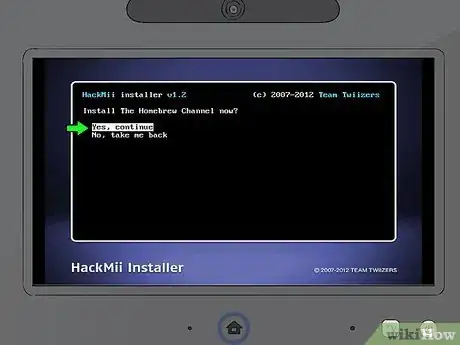
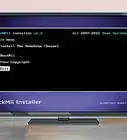
16Install the Homebrew Channel after running the exploit. Once you've run one of the exploits outlined above, the Hackmii installer will begin. You may have to wait a little while before you can move past the initial loading screen.
- Once the installer opens, install the "Homebrew Channel" option. You cannot install "BootMii" on the virtual Wii.
-
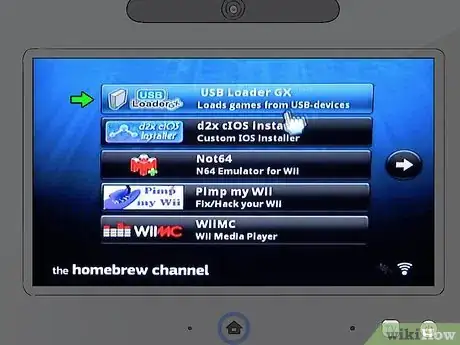
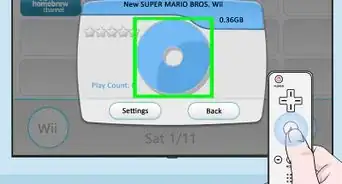
17Start installing homebrew programs. At this point, you have successfully installed the Homebrew Channel in your virtual Wii console, and should be able to select it from the Wii menu. There won't be anything in it at this point, as you'll have to install different homebrew applications separately. This will involve extracting the installation files to your SD card and then running the installer in the Homebrew Channel. Here are a few to look for to get started:[6]
- cIOS - This is required for certain other homebrew applications to run. You'll need "d2x cIOS Installer Mod v2.2" installed and able to run from your Homebrew Channel. You'll also need "IOS236 Installer MOD v8 Special Wii Edition" installed for the virtual Wii.
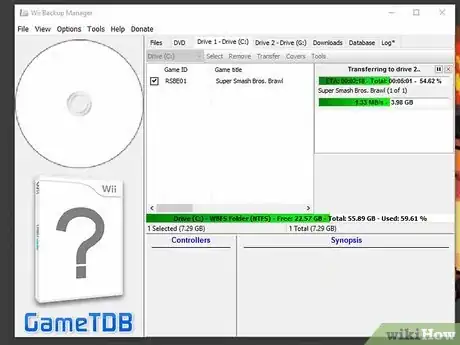
- USB Loader GX - This is a backup launcher that will allow you to create and load game backups so that you can play without the disc. You'll need an external USB drive in order to dump and store game files.
- Nintendon't - This homebrew program allows you to play Gamecube discs and files, and can be installed directly from USB Loader GX.
Community Q&A
-
QuestionDo I need an SDHC card to install the channel on a Wii?
 Community AnswerNo, you need a card that *is not* SDHC or SDXC. Also, the card must be 2GB or less.
 -
QuestionI've already done all of this but when I downloaded GX file loader and Gecko and started them, my Wii remote stopped working. What can I do?
 Community AnswerI think it's because the remote is a new model. If it came out around the time the Wii U came out, or if it has Wii Motion Plus built in, then it probably won't work.
 -
QuestionWhen should I remove my SD card?
 Community AnswerOnly remove it when you are 100% done using the Homebrew software. If not, the Wii U could freeze or corrupt your files. The apps always run off of the SD card.
References
- ↑ http://digiex.net/guides-reviews/console-guides/nintendo-wii-u-guides/14675-easy-nintendo-wii-u-homebrew-channel-hack-guide-5-3-2-5-4-5-5-1-a.html
- ↑ http://en-americas-support.nintendo.com/app/answers/detail/a_id/1140/~/how-to-determine-the-wii-u-consoles-menu-version
- ↑ https://gbatemp.net/threads/the-definitive-guide-to-wii-u-hacking.396828/
- ↑ http://en-americas-support.nintendo.com/app/answers/detail/a_id/1135/~/how-to-insert-an-sd-card
- ↑ https://www.reddit.com/r/WiiUHacks/comments/4i4rv7/flimflam69s_551_kernel_exploit_guide_and_other/?st=iri1qhjm&sh=2d65fe2f
- ↑ https://gbatemp.net/threads/the-definitive-vwii-hacking-guide.425852/












-Step-6-Version-2.webp)




-Step-6-Version-2.webp)


