This article was co-authored by Egor Shevtsov. Egor Shevtsov is a Home Improvement Specialist and Managing Partner at Appliance Techie in Orange County, California. With over seven years of experience, he specializes in maintaining and repairing appliances. He earned a Bachelor of Arts in Business Administration and Management from the International American University and a Master of Business Administration from the Russian University of Cooperation, former Moscow University of Consumer Cooperation.
There are 8 references cited in this article, which can be found at the bottom of the page.
This article has been viewed 229,761 times.
A dryer vent is an essential part of your home dryer that helps funnel moist exhaust air out of your house, keeping it from combining with hazardous gases. Though installing a new dryer vent hose may seem daunting, the process is fairly simple and straightforward once you know what to do.
Steps
Trimming and Attaching a Flexible Vent Hose
-
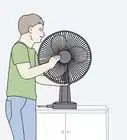
1Find the distance between your vent hood and dryer. Using a tape measure, find the distance between your vent hood’s cap extension and the dryer’s exhaust vent. Write down the measurement to use later.[1]
-
2Put tape around the area of hose you need to cut. Set your vent hose on a smooth surface and extend it if necessary. Then, use a tape measure to find an amount of hose equal to your previous measurement. Mark the area with a small amount of tape.[2]Advertisement
-
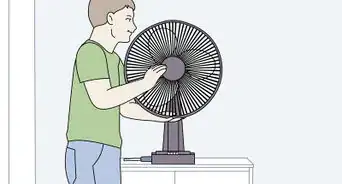
3Cut your hose using snippers. Using a pair of tin or aviation snips, cut through the marked area until you’ve divided your hose into 2 pieces. For safety, make sure to wear thick working gloves while cutting.[3]
-
4Attach your hose to the dryer and vent hood. Slip one end of your hose over the dryer’s exhaust port. Hold it in place using a dryer tube clamp or a piece of foil tape. Then, slip the other end over the vent hood’s cap extension and secure it with a tube clamp or foil tape.[4]
- To use foil tape, simply wrap the tape around the connecting seams.
- To use a tube clamp, unscrew the clamp to loosen it. Slip it onto the hose, line it up over the connecting seam, then tighten it back up.
-
5Secure the vent hose with pipe straps. Make sure the dryer vent hose is free of kinks and bends. Then, fix it to the wall using screws and pipe straps. For every 6 to 8 in (15 to 20 cm) of hose, use 1 pipe strap.[5]
- Use pipe straps made of stainless steel and not plastic as they tend to dry over time, crack and break.


Cutting and Fashioning a Rigid Vent Hose
-
1Measure the length between your dryer and vent hood. Run a tape measure between your dryer’s exhaust vent and the vent hood. Measure the path as if the hose were already assembled to account for any curves or bends. Record the measurement for later reference.[6]
-
2Set your hose on a firm surface. Grab a piece of hose that is not yet assembled, meaning it looks like a sheet instead of a pipe. Then, set it on a flat, sturdy surface like a wooden table. Slightly flatten the hose with your hands to make it easier to manipulate.[7]
-
3Mark the area you need to cut. Measure out an amount of hose equal to the measurements you took earlier. Then, mark the spot with a Sharpie or piece of tape. To make cutting easier, create multiple marks around the hose.[8]
- If you plan on assembling your vent using multiple pieces, mark the length you need for the segment you’re preparing.
-
4Cut the vent using snippers. Before cutting, put on a pair of thick working gloves to protect yourself from the blade and the pipe’s edges. Then, with a set of aviation or tin snips, slowly cut through the marked area on the hose.[9]
-
5Press the edges of the hose together. Vent hoses have small seams along the edges so you can easily assemble them. To do so, simply press the seams against each other until they snap together, then secure them by pressing down on the hose. Repeat this for the entire length of the vent piece.[10]


Connecting the Rigid Hose to the Dryer and Vent Hood
-
1Connect your hose pieces together if necessary. Unless you’re using a single piece of dryer vent hose, you’ll need to assemble everything into one unbroken segment. If you’re using elbow pieces, slide the crimped end of one elbow piece into the hose. If you’re attaching multiple hose segments together, combine them using an aluminium duct connector.[11]
- To help hold joint pieces together, wrap foil tape around their connecting seam.
-
2Attach the hose to your dryer. Move your dryer out if necessary, then slide the bottom end of the hose, or the lower elbow piece, over your dryer’s rear exhaust port. If the connection seems loose, secure the seam with foil tape or a hose clamp.[12]
- If you’re using foil tape, simply cover the connecting seam with the tape.
- If you’re using a tube clamp, loosen up the clamp by unscrewing it. Put it on the hose and make sure it’s lined up with the connecting seam, then tighten it.
-
3Connect the hose to the vent hood. Take the top of the hose, or the upper elbow piece, and slide it over the vent hood’s cap extension. Cover the seam with foil tape or a hose clamp to make sure it doesn’t fall out.[13]
-
4Hold the vent hose down with pipe straps. When the dryer vent hose is fully attached, make sure all the seams are covered with foil tape. Then, press the dryer vent to the wall and hold it down using pipe straps and simple screws. For safety, use one pipe strap for every 6 to 8 in (15 to 20 cm) of hose.[14]


Adding a New Vent Hood if Necessary
-
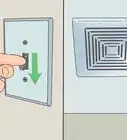
1Find a good spot to install the hood. Look around the room where you keep your dryer and search for a spot as close to the dryer’s exhaust port as possible. Select a spot made from material that you can cut through, like plaster, wood, vinyl, or aluminum. Remember to check both sides of the wall to make sure there are no obstructions on either end.[15]
-
2Drill a .25 in (0.64 cm) hole through the center of the spot. To make sure the spot will actually work, test it by drilling a small, .25 in (0.64 cm) test hole through the material. If the drill makes it from one end of the spot to the other without running into trouble, you’ve found a good location. If it did not, cover the hole with putty and try again.[16]
- If you’re drilling through stucco or brick veneer, make sure to use a hammer drill fitted with a masonry bit.
-
3Make a template on the wall by tracing the vent hood. Once you’re set on a location, place the pipe portion of your vent hood over the center of the test hole and trace the outside using a pencil. Make sure to repeat this process on both the inside and outside of your house.
-
4Remove stucco and brick veneer coverings using a hammer and chisel. Using the same drill as earlier, create a series of small holes around the vent hood template. Then, stick a cold chisel into each hole and hit the back of the chisel with a hammer, breaking the material. Take out the material and, if you’re getting rid of stucco, make sure to remove the wire mesh backing as well. Repeat this until you reveal the wood frame beneath.[17]
-
5Cut out vinyl and wood holes using a hole saw. Pick a saw that has a diameter .25 in (0.64 cm) larger than your template, then place it directly over the test hole. Saw slowly, tilting the tool as necessary until you’ve cut about halfway through the wall. Then, go to the other side and repeat the process. If necessary, remove any insulation from the newly formed hole.[18]
-
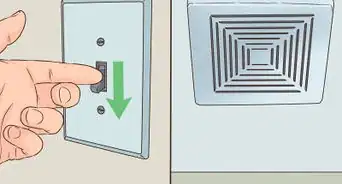
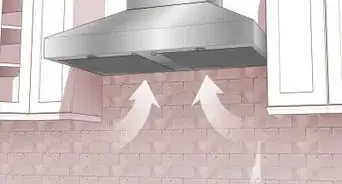
6Mount the vent hood. If your hood’s cap extension is not long enough to fit through the entire hole, attach a piece of dryer vent hose to the back and cover the seal with foil tape. Then, go outside and push the smaller end of the vent hood through the new opening. Press the hood firmly against the wall, then secure all 4 corners with screws. Finally, go back inside and apply caulk around the entire vent hood using a caulking gun.[19]
- If you’re mounting the vent hood on uneven vinyl siding, cover the area with a vinyl surface mounting block first.


Expert Q&A
-
QuestionHow do you keep a dryer vent hose in a tight space?
 Egor ShevtsovEgor Shevtsov is a Home Improvement Specialist and Managing Partner at Appliance Techie in Orange County, California. With over seven years of experience, he specializes in maintaining and repairing appliances. He earned a Bachelor of Arts in Business Administration and Management from the International American University and a Master of Business Administration from the Russian University of Cooperation, former Moscow University of Consumer Cooperation.
Home Improvement SpecialistI would definitely recommend using proper angles for the hard vent equipment so that it doesn't get jammed or broken when sliding the dryer back into the position. This is important to avoid jams and to not prevent the proper airflow from the dryer to the outside vent.
Warnings
- Make sure to wear heavy duty working gloves and protective goggles when using power drills, saws, and other tools.⧼thumbs_response⧽


References
- ↑ https://www.digitaltrends.com/home/shorten-dryer-hose-boost-efficiency-save-money/
- ↑ https://www.digitaltrends.com/home/shorten-dryer-hose-boost-efficiency-save-money/
- ↑ https://www.digitaltrends.com/home/shorten-dryer-hose-boost-efficiency-save-money/
- ↑ https://www.youtube.com/watch?v=7yQXmq_BdUY&feature=youtu.be&t=2m34s
- ↑ https://www.familyhandyman.com/laundry-room/how-to-install-a-dryer-vent/view-all/
- ↑ https://www.digitaltrends.com/home/shorten-dryer-hose-boost-efficiency-save-money/
- ↑ https://www.youtube.com/watch?v=MXgMebiFlZw&feature=youtu.be&t=4s
- ↑ https://www.digitaltrends.com/home/shorten-dryer-hose-boost-efficiency-save-money/
- ↑ https://www.digitaltrends.com/home/shorten-dryer-hose-boost-efficiency-save-money/
- ↑ https://www.youtube.com/watch?v=MXgMebiFlZw&feature=youtu.be&t=35s
- ↑ https://www.familyhandyman.com/laundry-room/how-to-install-a-dryer-vent/view-all/
- ↑ https://www.prettyhandygirl.com/installing-semi-rigid-dryer-hose-to-prevent-fire-hazard/
- ↑ https://www.prettyhandygirl.com/installing-semi-rigid-dryer-hose-to-prevent-fire-hazard/
- ↑ https://www.familyhandyman.com/laundry-room/how-to-install-a-dryer-vent/view-all/
- ↑ https://www.familyhandyman.com/laundry-room/how-to-install-a-dryer-vent/view-all/
- ↑ https://www.familyhandyman.com/laundry-room/how-to-install-a-dryer-vent/view-all/
- ↑ https://www.familyhandyman.com/laundry-room/how-to-install-a-dryer-vent/view-all/
- ↑ https://www.youtube.com/watch?v=9egwOazPJis&feature=youtu.be&t=3s
- ↑ https://www.youtube.com/watch?v=9egwOazPJis&feature=youtu.be&t=1m51s
About This Article

To install a flexible dryer vent hose, start by measuring the distance between your dryer’s exhaust port and the outdoor vent hood. Mark this measurement on your vent hose and, using snippers, cut through the marked area. Then, attach the hose to your dryer’s exhaust port and vent hood, securing the ends with foil tape or hose clamps. For tips on installing a rigid vent hose or a new vent hood, read on!