This article was co-authored by wikiHow Staff. Our trained team of editors and researchers validate articles for accuracy and comprehensiveness. wikiHow's Content Management Team carefully monitors the work from our editorial staff to ensure that each article is backed by trusted research and meets our high quality standards.
This article has been viewed 470,126 times.
Learn more...
VMware is a cloud based operating system that allows you to run multiple virtual machines from a single physical computer. Thus, VMware acts as the interface between your hardware and your various operating systems. If you are running out of disk space on your virtual machine, you will receive a notification every time you turn on your computer and you may even notice a decrease in your computer's speed and efficiency. To increase the size of your disk space, you can simply adjust the settings of your disk and allocate newly created space to that disk. Before using one of these methods, make sure that all snapshots have been removed and that the virtual machine is powered off.
Steps
Expanding the Disk within VMware's Settings
-
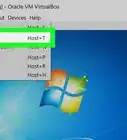
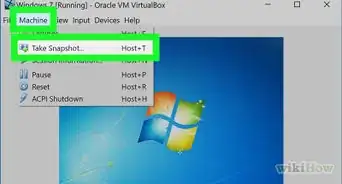
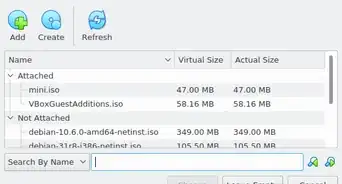
1Make sure some prerequisites are met. In order to increase the disk size in VMware, you must make sure that your virtual machine is powered off and that it has no snapshots. To determine whether it has snapshots, check "Information" under the "Summary" tab for the virtual machine.
-
2Go to "Settings." Do this within VMware.Advertisement
-
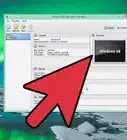
3Select the Hard Disk you wish to expand. You will find this under the column entitled "Hardware."
-
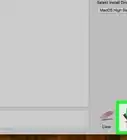
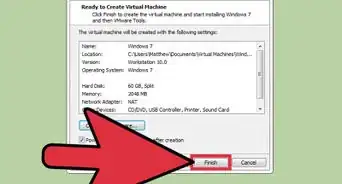
4Expand your disk. On the right-hand side of the window under "Disk Provisioning," set the new "Provisioned Size" of your disk. Some layouts will instead have a drop down menu entitled "Utilities." From here select "Expand." Generally, the disk will be anywhere from 30 to 40GB at this stage, so try resizing it to 45 to 55GB at first.[1]
-
5Click "OK." This will set the new maximum size for the virtual disk.
-
6Rescan your disk. While you have expanded the size of your disk, there are a few more steps you must take within the operating system. To rescan your disk, go to "Disk Management" and select "Rescan Disks."
-
7Resize the OS drive. Now that you have expanded and rescanned your disk, you will see the "Unallocated Space" that we have just created. We must now assign this space to your operating system's drive. To do this, right-click on the unallocated space and select "Expand Volume." This will prompt a simple wizard that will allow you to determine what to do with this newly created space. Assign it to your virtual disk.


Expanding your Disk in Workstation, Player, ACE Manager, Server, or GSX
-
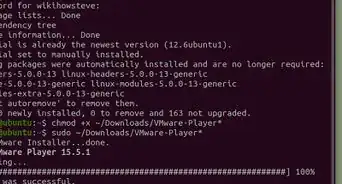
1Open the command Prompt. If you are using the VMware Workstation, Player, ACE Manager, Server, or GSX products, then follow this method. You can do this by going to "Start" and enter "cmd" without the quotation marks into the search bar. Select "Run."
-
2Go to the product's installation directory.[2]
- For Workstation enter:
\Program Files\VMware\VMware Workstationin Windows or:/usr/sbinfor Linux. - For Player and ACE Manager use:
\Program Files\VMware\VMware Playerfor Windows or/usr/sbinfor Linux. - For Server use:
\Program Files\VMware\VMware Serverfor Windows or/usr/binfor Linux. - For GSX use:
\Program Files\VMware\VMware GSX Serverfor Windows or/usr/binfor Linux.
- For Workstation enter:
-
3Enter the following code:
vmware-vdiskmanager –x 100Gb vm.vmdkand press “Enter.” This will resize your current disk.[3]- Replace "vm.vmdk" with the full path to the virtual machine’s virtual disk and 100GB with the disk size you want.
-
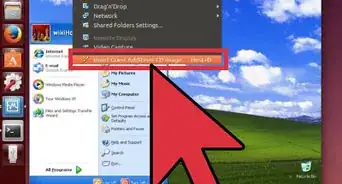
4Extend the disk partition. While you have extended the volume of your disk, you need to notify your operating system of the change. Go to "Computer Management" and select "Disk Management." Right-click on "Volume" and then select "Extend Volume."[4]


Warnings
- Before expanding your disk, you should backup your current data.⧼thumbs_response⧽
- If you attempt to resize your disk in Lab Manager, you will lose all of your data. If you need more space on your virtual machine, you should instead create a new virtual disk with the desired space and move your data to the new disk.⧼thumbs_response⧽


References
- ↑ https://www.pluralsight.com/blog/tutorials/resize-vmware-windows-server-drives
- ↑ https://kb.vmware.com/selfservice/search.do?cmd=displayKC&docType=kc&docTypeID=DT_KB_1_1&externalId=1003897
- ↑ https://kb.vmware.com/selfservice/microsites/search.do?language=en_US&cmd=displayKC&externalId=1004047
- ↑ https://kb.vmware.com/selfservice/search.do?cmd=displayKC&docType=kc&docTypeID=DT_KB_1_1&externalId=1004071
About This Article

1. Open Settings.
2. Select the hard disk to expand.
3. Click the Utilities menu and select Expand.
4. Choose a size.
5. Click OK.
6. Rescan the disk.
7. Assign the unallocated space to your OS.