This article was co-authored by Andrea Beaulieu. Andrea Beaulieu is a Professional Tailor, Fashion Designer, and the Owner of MOORE, a Brooklyn, New York based storefront and apparel workshop for gender-neutral, contemporary streetwear as well as custom-tailored products. Andrea has over 20 years in the fashion design and marketing industries and specializes in pattern making, draping, and the construction of garments. She holds a BS in Fashion Design and Merchandising from the University of North Carolina at Greensboro.
There are 13 references cited in this article, which can be found at the bottom of the page.
This article has been viewed 19,284 times.
If you’re fashion-conscious, few things are worse than realizing your favorite shirt has a big hole in it. Although you may think your favorite shirt is ruined, don’t throw it away yet. Most holes can easily be hidden, such as by ironing on a simple fabric patch. If you’re looking for a more permanent way to fill in or even decorate a hole, sew it shut with colored thread. Sometimes you can’t fix a hole right away, so get creative and find ways to hide it underneath clothing or other items. With the right fix, you can still look your best without having to bring along a change of clothes.
Steps
Trying Quick Fixes on the Go
-
1Tuck your shirt in if the hole is near them hem. Tuck the hem into your pants to cover a hole near the bottom part of the shirt. If the hole near the collar or sleeves, you still might be able to hide it in a natural way. For instance, if it’s near the collar, fold the collar down to cover it. For holes on shirt sleeves, roll the sleeves up.
- If the hole can’t easily be hidden this way, stay aware of it. For example, you may be able to hide a hole in the armpit just by keeping your arm down until you get home.
-
2Wear a matching color underneath the shirt to make a hole less visible. Try putting on something light, such as a thin T-shirt, underneath the damaged shirt. Make sure it is long enough to cover the hole. If both shirts match in color, people won’t be able to see the hole unless they look closely.
- Pants or other articles of clothing can also be used to mask some holes this way.
Advertisement -
3Wear a jacket over your shirt for holes that are difficult to hide. Put on a jacket to cover a hole anywhere on a shirt. Unless the hole is in the front, you won’t even have to zip up. Sweatshirts and button-ups are also good options. If you don’t have anything to wear, purchase an additional layer if you have the time.
- Layering clothing is easier during cold or stormy weather. People will notice if you’re wearing an extra layer during a heatwave, and you will end up sweating so much that you would rather leave the hole exposed.
-
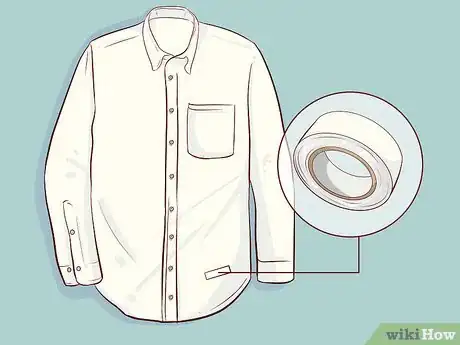
4Cover holes with matching colored tape if you have any. Pick tape that blends in well with your shirt. Try using a piece of masking tape cut to the size of the hole, for instance. Set it on top of the hole and press it flat. If it matches your shirt well enough, the tape can prevent people from noticing the hole.[1]
- Tape tends to work best on darker colors, such as black. It blends in better with the shirt.
- Tape is best used on less exposed areas, such as around the shirt’s hem. If the tape is in a very visible spot, people will be more likely to notice it.
-
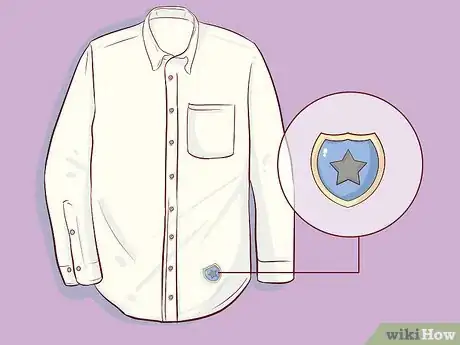
5Cover the hole with an accessory if you have one that fits. When you’re in a pinch, reach for any sort of decoration you can fit over the hole. For example, get a big button, a badge, or a brooch and pin it to your shirt. You could use a plastic flower or something equally colorful. Tuck the stem in, then pin the flower in place.[2]
- Some decorations may draw attention to your shirt. If the hole is well-covered, decorations can make your shirt look more stylish instead of damaged.
- Pins are also very useful for attaching fabric to holes. You could create a makeshift patch to use until you’re able to install a real one.
- When you’re in a pinch, you may not have many options. Find what you can. Consider carrying a spare clip or safety pin for emergencies.
Patching a Shirt
-
1Cut a patch of fabric 1⁄2 in (1.3 cm) bigger than the hole. Choose a piece of fabric that matches the color of your shirt. Try matching the texture and weight of the material as well. You can buy fabric patches or cut a patch from another piece of clothing.[3]
- If you’re trying to patch a multicolored shirt, use a color that blends in well. For example, choose a fabric color that matches the print on the shirt.
- You can buy iron-on shirt patches online and at many fabric stores.
-
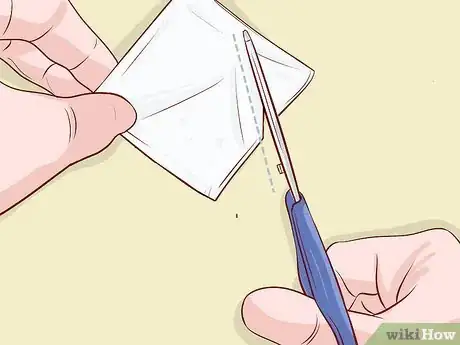
2Trim a piece of fusible web bonding to the same size as the patch. Place the patch on top of the fusible bonding to gauge how to cut it. Trace around it with pencil, then trim it to size with fabric scissors. The fusible bonding will be the adhesive that binds the patch to the shirt.
- In general, the fusible bonding should be the same size or a little smaller than the patch so it doesn’t bleed through the hole.[4]
- You can get fusible bonding online or at fabric stores. It comes in a sheet, similar to regular fabric.
-
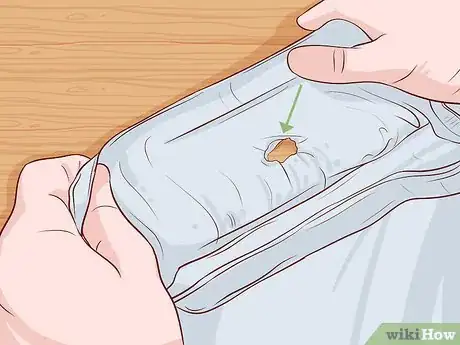
3Turn the shirt inside out and place the fusible bonding over the hole. Center the fusible bonding over the hole. Make sure the hole is completely covered. The fusible bonding should overlap the hole by at least 1⁄4 in (0.64 cm) on all sides. If it looks a little small, cut a bigger piece.[5]
- If you’re having a hard time getting the fusible bonding to lay flat, iron the shirt. Also, trim away any loose thread around the hole.
-
4Place the fabric patch on top of the fusible bonding. Line up the edges of the patch with the fusible bonding beneath it. If they are slightly different sizes, double-check that the patch completely covers the fusible bonding. If it doesn’t, cut a bigger patch or trim the fusible bonding a little smaller while still ensuring it covers the hole in your shirt.[6]
- The fusible bonding is the glue between the pieces of fabric. It can cause the shirt to stick to your ironing board.
- If you’re fixing a hole less than 1 in (2.5 cm) in size, you could heat the fusible bonding without the patch, then press the shirt’s threads together to cover the hole. It’s possible to fix the hole without making a patch, although the repair won’t be as sturdy as usual.
-
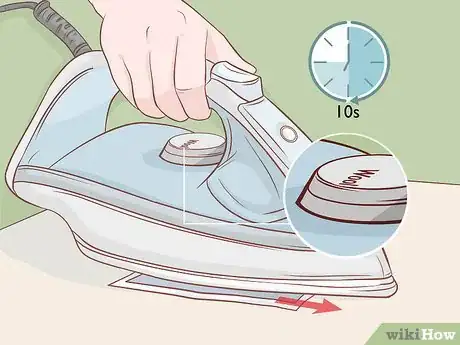
5Warm the patch with an iron on a low-heat wool setting for 10 seconds. Turn the iron to the wool setting and let it heat up for about 2 minutes. Once it is warm, place it on top of the patch. Hold it still so the patch can’t shift out of place. Then, turn the iron off, set it in a space spot to cool down, and check the patch.[7]
- If your iron doesn’t have a wool setting, mist the patch with lukewarm water to soften it and press out wrinkles.
- Consult the manufacturer’s instructions for specifics about how to heat the fusible bonding. It can vary a little depending on which product you buy.
Sewing a Hole Shut
-
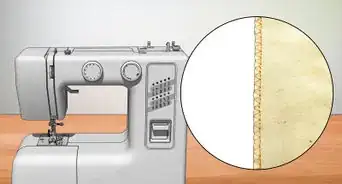
1Select a type of thread that matches your shirt’s color and texture. While you can use other colors if you wish, get thread that matches your shirt color so the stitching blends in as much as possible. For texture, cotton thread works well in most cases. If you’re trying to fix a thinner material like chiffon or satin, use nylon or silk thread instead.[8]
- Purchase thread online or from a fabric store. While you’re there, make sure you have a needle and other sewing supplies.
- If you’re trying to cover a hole more than 1 in (2.5 cm) in size, you could sew a patch onto the shirt. Another option is to darn the shirt by sewing across the hole.
-
2Thread a needle with at least 18 in (46 cm) of thread. Unroll the thread from its spool, then cut it off with a sharp pair of scissors. Take the end of the thread and slip it into the needle. Slide the needle until it’s about halfway along the thread. Then, knot the thread right behind the needle.[9]
- If you’re having trouble threading the needle, dampen the end of the thread a little bit. You could also get a needle threader to pull the thread through the needle’s eye.
-
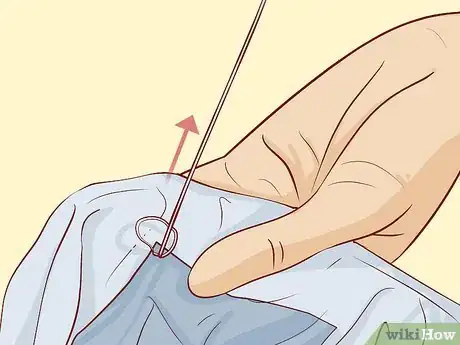
3Poke the needle up through the fabric near the hole. Start on the top right side of the hole. Position your needle inside the shirt, then pull it up through the fabric. Keep pulling it until it’s about 2 in (5.1 cm) above the shirt. Make sure the needle is about 1⁄2 in (1.3 cm) away from the hole so the stitches don’t fall apart.[10]
- If you’re having a hard time positioning the needle, turn the shirt inside out. Try lifting up one of the shirt’s threads and moving the needle underneath it to start the stitch.
-
4Move the needle through the fabric on the opposite side of the opening. Bring the needle down through the hole without touching the fabric first. While it’s inside the shirt, position it. Pull it up through the shirt again to finish the stitch. Doing this will pull the fabric closer together, covering part of the hole.[11]
- The positioning of the needle determines how big the stitches are. Smaller stitches are stronger, so don’t try to bridge the entire hole unless it’s very small.
-
5Stitch on opposite sides of the hole until it is completely closed. Follow the same steps to make subsequent stitches. From inside the shirt, position the needle to the left of where it initially passed through the shirt. After pulling it through, position the needle to the left of where you had it the second time to complete the initial stitch. Continue making as many stitches as needed to complete the repair.[12]
- Take your time and keep your stitches as even possible. Remember to keep them at the right distance from the hole so they are strong but well-hidden.
- If you’re darning a large hole, sew across the entire hole in one direction. Afterward, sew perpendicularly to the threads to create a woven net filling the gap in the fabric.
-
6Pull the needle inside of the shirt to knot the thread. Wrap the remaining thread around the needle about 3 times to create loops. Pull the needle through these loops to create knots. Make about 2 or 3 knots. When you’re done, pull the knots toward the shirt so they won’t be visible.[13]
- Test the knots afterward by pulling on the thread. If it seems loose, tie it again. Make sure the knots are secure so the hole doesn’t return.
-
7Cut the excess length of string to finish the repair. Pull the ends of the thread toward an opening on the shirt. Reach in and snip the thread underneath the knot. Remember that the thread has 2 “tails,” so cut both of them off before wearing the shirt again.[14]
- If you’re feeling creative, you could embroider a design on the shirt using different thread colors. It’s a clever way to mask stitching by making it part of a colorful design.
-
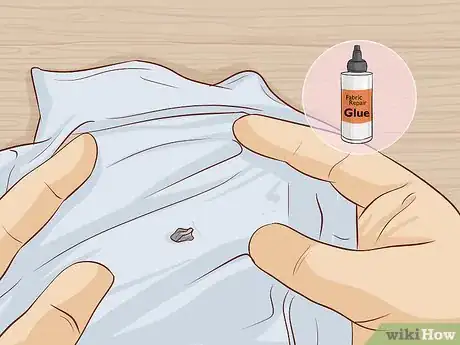
8Use a fabric repair glue if you are unable to stitch the hole shut. Lay the shirt facedown and trim away any loose threads around the hole. Squeeze a small amount of glue onto a separate surface, such as a piece of scrap paper. Then, use something small, like a plastic knife or toothpick, to spread the glue around the hole. Squeeze the fabric together afterward for about 2 minutes until it sticks in place.[15]
- Wait at least 24 hours before wearing or washing the shirt. Give the glue plenty of time to dry out.
- Note that glue only works for small holes and tears. It also won't be as permanent as stitching but can be less visible.
Expert Q&A
-
QuestionHow do you cover up holes in woven material?
 Andrea BeaulieuAndrea Beaulieu is a Professional Tailor, Fashion Designer, and the Owner of MOORE, a Brooklyn, New York based storefront and apparel workshop for gender-neutral, contemporary streetwear as well as custom-tailored products. Andrea has over 20 years in the fashion design and marketing industries and specializes in pattern making, draping, and the construction of garments. She holds a BS in Fashion Design and Merchandising from the University of North Carolina at Greensboro.
Professional Tailor & Fashion Designer You can use a rounded-tip needle on knits and a sharp tip on woven material.
Things You’ll Need
Trying Quick Fixes on the Go
- Colored tape
- Pins or clips
- Other clothing
Patching a Shirt
- Fabric matching your shirt
- Fusible web bonding
- Pencil
- Fabric scissors
- Iron
- Ironing board or another heatproof surface
- Spray bottle (optional)
Sewing a Hole Shut
- Colored thread
- Sharp scissors
- Sewing needle
References
- ↑ https://www.insider.com/best-emergency-useful-fashion-hacks-2018-7#a-button-fell-off-try-using-a-safety-pin-1
- ↑ https://www.insider.com/best-emergency-useful-fashion-hacks-2018-7#a-button-fell-off-try-using-a-safety-pin-1
- ↑ https://www.boisepubliclibrary.org/media/618294/patch_a_hole_in_a_piece_of_clothing.pdf
- ↑ https://www.thedailysew.com/2015/03/how-to-patch-a-hole-in-a-garment/
- ↑ https://www.thedailysew.com/2015/03/how-to-patch-a-hole-in-a-garment/
- ↑ https://www.youtube.com/watch?v=vvDdzD5pF3M&feature=youtu.be&t=130
- ↑ https://www.youtube.com/watch?v=IvxaCYaYnD4&feature=youtu.be&t=164
- ↑ https://www.youtube.com/watch?v=vvDdzD5pF3M&feature=youtu.be&t=195
- ↑ https://www.youtube.com/watch?v=FJJJoMhmuPI&feature=youtu.be&t=95
- ↑ https://www.youtube.com/watch?v=5ULhv5dNeew&feature=youtu.be&t=271
- ↑ https://www.youtube.com/watch?v=vvDdzD5pF3M&feature=youtu.be&t=224
- ↑ https://www.youtube.com/watch?v=clL-Hk2zCos&feature=youtu.be&t=137
- ↑ https://www.youtube.com/watch?v=V6lhx1d-o84&feature=youtu.be&t=87
- ↑ https://www.youtube.com/watch?v=V6lhx1d-o84&feature=youtu.be&t=92
- ↑ https://www.youtube.com/watch?v=7zIDLeILSEM&feature=youtu.be&t=60


