This article was co-authored by Martin Nepton. Martin Nepton is a Professional Hair Stylist and Colorist at Bang Bang LA in Los Angeles, California. With over 11 years of experience, Martin specializes in helping clients express their Queer identity through hair. Martin offers personalized haircuts and color and style services with non-gender prices based on hair length. Martin holds a BA from the University of Québec at Montréal and is a Licensed Hair Stylist in California.
This article has been viewed 298,022 times.
The wet look is a hairstyle that makes you look like you’re fresh out of the shower. The greatest advantage of this look is that it can be incorporated into any hair type, from messy curls to thinner, slicked-back hair. Creating wetness requires working in a little bit of a product such as mousse or pomade before combing washed hair into place. By picking a product that compliments your hair, you’ll light up a room all day long.
Things You Should Know
- Apply mousse to your hair after washing it and blotting it mostly dry with a towel.
- Comb wax or pomade into completely dry hair with your fingers. Reapply the product up to 3 more times per day if you need it.
- Choose pomade if you have thick hair, wax if you have short hair, or mousse if you want your hair to look thicker.
- Tame loose hairs with hairdressing cream or keep all of your hair in place with hairspray.
Steps
Styling with Mousse or Gel
-
1Shampoo and condition your hair. Getting your hair nice and moist is the first step to achieving the wet look. Shampoo clears out the debris, while conditioner smooths the surface. You can use whatever shampoo and conditioner you already have in your shower.
-
2Pat your hair mostly dry. Touch a towel to your head to start removing moisture. To use mousse and gel properly, your hair has to remain pliable. It shouldn’t be sopping wet, but stop before it dries.
- To remove excess moisture, try grabbing handfuls of hair gently through the towel, squeezing them, and releasing them.
Advertisement -
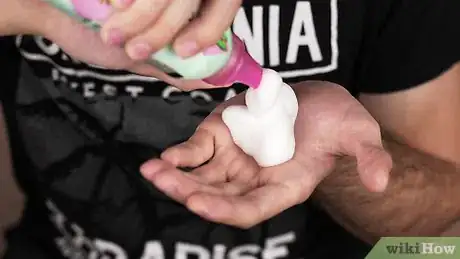
3Squeeze a dollop of mousse onto your fingers. To create a wet look, you will probably need a decent amount of product. However, it’s best to start by applying a little and then adding a little more. Start out with a pea-sized amount on your fingers. You can get more later if you need it. If you use too much, your hair will start looking stiff and greasy, which is difficult to reverse.[1]
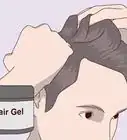
- Hair gel can also be used here.
-
4Massage the mousse into your hair. Your fingers are your best tool for working in the mousse. Use your fingertips to move the mousse all the way down to your roots. If you’re having a hard time, try using a comb to spread the product. When finished, the mousse should completely coat your hair.
-
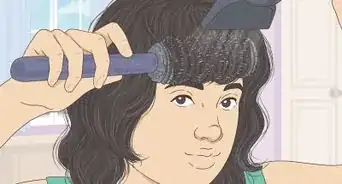
5Style your hair with a comb or your fingers. Run a comb or your fingers through your hair to style it into the general shape that you want. Style with a comb if you want a cleaner, more sculpted look. Use your fingers if you want a softer, less stiff finish. Mousse products give you a wide variety of stylistic options, so pick the one that looks best on you. It’ll make your hair look voluminous and wet no matter how you style it.
- For example, you can use your fingers to tousle your hair for a messy, bedhead look.
Applying Pomade or Wax
-
1Dry your hair completely. Washing your hair with shampoo and conditioner is still a crucial step. Unlike with mousses and gels, your hair should be completely dry before applying pomade. This means, however, you can reapply it throughout the day as needed. You can towel your hair dry, but consider blow drying it to give it extra volume.
-
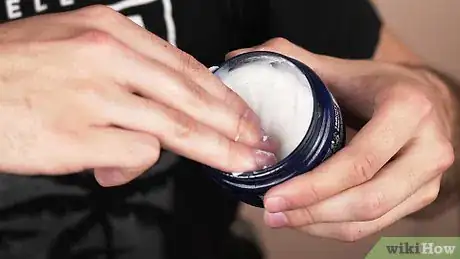
2Coat your fingers lightly with pomade. You can dip three of your fingers in the pomade to coat them thinly. Remember, less is more! Too much pomade makes your hair look limp and soggy. To avoid this unpleasant look, restrict yourself now and get more as needed later.[2]
- You can also use hair wax. It’s applied the same way as pomade. While it doesn’t necessarily create a shiny, “wet” look, wax tends to effectively control unruly hair textures. Also, wax can be more difficult to rinse out than pomade is.
-
3Work the pomade into your hair with your fingers. Rather than use a comb, use your fingertips like a comb. Run your fingers through your hair. You’ll give your hair a light coating, but make sure it’s evenly spread. It does not need to be worked down to the roots yet.[3]
-
4Comb your hair to style it. Styling with only your fingers is bound to make your hair look messy and greasy. Stick to using a comb for large patches of hair. Run the comb through your hair to smooth it and spread the pomade down to the roots. You can comb your hair to part it, slick it back, or make it a little messy on top.
-
5Use your fingers to shape your hair. Earn some extra style points by running your fingers through your hair to sculpt it. Instead of the slick look, try brushing your hair up and back. You can use a brush or comb to finish smoothing it back before patting it down. This is how you create a more voluminous slick or a pompadour.[4]
-
6Reapply the pomade throughout the day as needed. Carrying a small jar of pomade with you can be useful. If you ever notice that your hair is out of place, you’ll easily be able to put in some more pomade to fix it. Pomade usually needs to be used up to three times a day.
- For more holding power, spray on some hairspray after the first application of pomade. It’ll typically keep your hair in place until nighttime.
Picking Hair Products
-
1Get pomade to slick back thick hair. Pomades are great for creating a wet look since they don’t stiffen your hair much. A pomade will hold your hairstyle in a shape, useful for slicking back hair or creating a pompadour. Don’t use too much though or your hair will look greasy.
- Pomades are great for slicking back both thin and thick hair as well as styling a pompadour.
- Many pomades are oil-based. You can now find water-based ones that are easier to wash out and will give your hair extra volume.
-
2Use hair wax to hold shorter cuts. Hair wax is perfect for holding a short haircut in place or creating a bedhead look. Wax doesn’t leave as much of a sheen as pomades. It’s softer and looks more natural, but it can be difficult to wash out. Opt for a high quality wax in order to avoid this problem.[5]
- You can now find pomade waxes, which offer the best of both products.
-
3Pick gel for ease of use. Gel is the best-known styling product. Since it’s water-based, it’ll quickly give your hair a wet, sleek appearance. It can be used for any wet style. However, some gels may harden your hair in a noticeable way. You’ll need a larger amount of it to style your hair than you would when using wax or a pomade.[6]
- Gels come in different holding strengths, such as low hold for thin hair and strong hold for thicker hair.
-
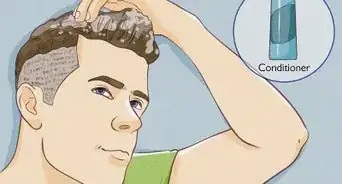
4Apply hairdressing cream to hold down loose hairs. Creams tame frizz and flyaway hairs that other products can’t prevent. The main benefit of a cream is that it moisturizes, which makes it perfect for styling curly hair into a wet look. It looks more natural than pomade, but offers less hold for slicked-back hair and similar styles.
-
5Make thin hair look thicker with mousse. Mousse works well with any type of hair. It provides a firm hold when you’re targeting a specific look, such as slicked-back or messy. It’s also the best option for fine, thin hair because it provides volume. Mousse is easy to use and provides a little bit of shine like pomade does.[7]
- Mousse is perfect for men with a lot of hair who desire a messy, rock star look.
- Quality mousse can be costlier than other options and provides less holding power than the strongest gels and waxes.
-
6Hold your hair in place with hairspray. Pick up a bottle of non-aerosol hairspray anytime you adopt a wet style that can come undone. If you have voluminous, messy hair or a pompadour, spray some on before you leave the house. Hold the bottle away from your head and spray it over your hair for a few seconds. It’ll keep your hair in place throughout the day.
- Hairsprays are designed to treat any type of hair. Use it as a compliment to whatever product you use to style your hair.
- Non-aerosol sprays are best for wet look styles. Aerosols will become sticky when they hit moisture.
Community Q&A
-
QuestionHow long should it take for me to do this?
 Community AnswerFor method one, it may take you 10 or 15 minutes to get it perfect. In method two, you will need to reapply, so it will take more time.
Things You’ll Need
- Shampoo and conditioner
- Water
- Towel
- Comb
- Gel or other hair-styling product
- Hairspray
References
- ↑ http://www.guystyleguide.com/blog/2009/04/haircare-101-guide-to-styling-hair/
- ↑ http://www.guystyleguide.com/blog/2009/04/haircare-101-guide-to-styling-hair/
- ↑ http://www.guystyleguide.com/blog/2009/04/haircare-101-guide-to-styling-hair/
- ↑ https://www.thetrendspotter.net/rock-pompadour-hairstyle/
- ↑ http://www.guystyleguide.com/blog/2009/04/haircare-101-guide-to-styling-hair/
- ↑ http://www.kinowear.com/a-quick-guide-on-mens-hair-products/
- ↑ http://www.guystyleguide.com/blog/2009/04/haircare-101-guide-to-styling-hair/
- ↑ Martin Nepton. Professional Hair Stylist. Expert Interview. 17 December 2020.
About This Article
If you’d like to try a wet look hairstyle, start with clean, wet hair and a styling product that will create a sleek appearance. For an easy wet look, try massaging in some hair gel all the way down to your roots. Finish by using your fingers or a comb to create the shape you want. Keep in mind, though, that some gels can give you a hard, flattened look, which may not be great for fine or short hair. If you have this kind of hair, try using hair mousse instead of gel, which will make your hair sleek while giving it a boost of volume. For more advice from our Beauty co-author, including how to use hair products, like wax or pomade, keep reading!











-Step-15.webp)


