This article was co-authored by Yaffet Meshesha and by wikiHow staff writer, Nicole Levine, MFA. Yaffet Meshesha is a Computer Specialist and the Founder of Techy, a full-service computer pickup, repair, and delivery service. With over eight years of experience, Yaffet specializes in computer repairs and technical support. Techy has been featured on TechCrunch and Time.
There are 7 references cited in this article, which can be found at the bottom of the page.
This article has been viewed 841,879 times.
This wikiHow teaches you how to format a hard drive in a Windows or macOS laptop. If you want to format the main hard drive (usually the Windows "C" drive or "Macintosh HD"), you will need to reinstall your operating system afterwards to continue using your laptop. If you installed a second hard drive in your laptop or connected an external hard drive, you can easily format it from within Windows or macOS. Since formatting a hard drive can take a while, make sure your laptop is plugged in to a reliable power source.
Steps
Formatting Your Main Hard Drive (Windows)
-
1Back up all of your important data. When you format a hard drive, you will lose all of the data on that drive. If there's anything on your hard drive that you want to keep, you'll want to back it up before you continue.
- Formatting your main hard drive is helpful if you don't like the way the disk is partitioned. If you just want to get a fresh start with Windows, see How to Reset Your Computer instead.
- If you are planning to dispose of the hard drive, consider using DBAN to permanently delete the data rather than simply reformat the drive.
-
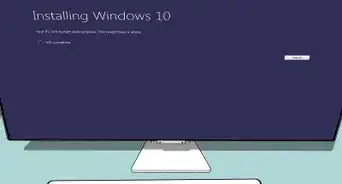
2Create Windows 10 installation media. Before you format your hard drive, you'll need to create a Windows install DVD or USB drive using special software. This ensures that you can reinstall Windows after formatting your hard drive.
- Go to https://www.microsoft.com/en-us/software-download/windows10.
- Click Download tool now and save the tool to your PC.
- Insert a blank USB flash drive (8 GB or more). If you don't have a flash drive, insert a blank DVD into your DVD burner.[1]
- If anything is on your USB drive or rewritable DVD, it will be deleted.
- Double-click the downloaded tool and accept the license terms.
- Select Create installation media for another PC and select Next.
- Select your language and version of Windows.
- If you want to create a USB flash drive, select USB flash drive and follow the on-screen instructions. If you want to create a bootable DVD, select Open DVD burner and follow the on-screen instructions.
Advertisement -
3Set your PC to boot from USB or DVD. Now you'll need to enter your PC's BIOS/UEFI and make sure your PC will try to boot from your recovery media before booting into Windows normally. Here's how:
- Press Windows key + S and type recovery into the search bar.
- Click Recovery options in the search results.
- Click Restart now under "Advanced startup."
- Click Troubleshoot.
- Click UEFI Firmware Settings and then click Restart.
- Select the Boot menu. The options in the BIOS will vary by PC. If you don't see a Boot menu, look for Startup, System > Boot sequence, or similar. Use the arrow keys to navigate, and the Enter key to select.
- If you created a USB drive, set Removable Drives or USB (or similar) to the first position in the boot order. If it's a DVD, set Optical Drive or CD/DVD-ROM to the first position.[2] The keys required to move these items around should appear at the bottom of the screen.
- Save and exit using the key noted at the bottom of the screen. This will reboot your PC.
-
4Select the option to boot from your USB drive or DVD. Depending on your computer, it may boot immediately to the initial Windows setup screen. You may be prompted to press a key to boot from the drive instead.
-
5Start the setup process and choose your language. Select your language, time, and keyboard preferences when prompted, and then click Next to continue. You'll also need to accept the license agreement.
-
6Select the Custom: Install Windows only (advanced) option. This will open the hard drive tool, which will display all of the partitions on your laptop's hard drive.
-
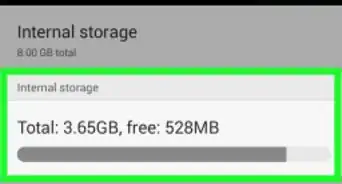
7Select the partition that Windows is installed on. "Partitions" are segments of the hard drive which allow you to use your single hard drives as multiple drives. Laptops typically have two or three partitions: a "Reserved" partition (usually around 100 MB), a "Recovery" partition (usually a few GB), and your main "Primary" partition. The "System" partition contains Windows and your programs and files. Formatting your "System" partition will delete Windows and all of your files.
-
8Click Format. It's at the bottom of the window. You will be prompted to confirm that you want to format the partition—remember, this will delete everything on it. Once you confirm, the partition will be formatted. This may take several moments to complete.
-
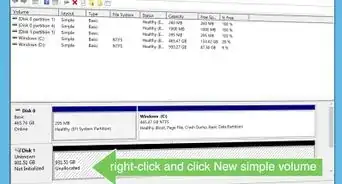
9Delete any other partitions you don't want (Optional). If there's a partition you don't want to keep, select it and click Delete. This turns the partition into "Unallocated space." Deleting two neighboring partitions will combine them into a single block of unallocated space.
- To combine the unallocated space with your main partition, select the main partition that you just formatted and click "Delete." This will combine all of the unallocated space into a single block.
-
10Select your formatted partition and click Next. This will begin the Windows installation process on the formatted partition. You'll need to reinstall Windows in order to use the computer.
- If you plan on installing another operating system, such as Linux, you can end the process here before installing Windows. Insert your Linux installation disc and boot from it to begin the Linux installation process.
-
11Follow the on-screen instructions to install Windows. After Window installs the system files, you'll be taken through a few prompts to complete the installation. This includes signing in to your Microsoft account (or creating a local user) and setting up your preferences.


Formatting a Secondary or External Drive (Windows)
-
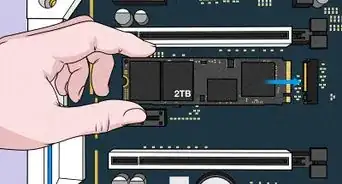
1Back up anything you want to keep. Formatting your hard drive will delete everything on it. If you have anything you want to keep, make sure you back it up before you continue.
- If you're formatting an external hard drive, make sure you connect it to your laptop before you continue.
-
2Press ⊞ Win+E. Pressing the Windows key + E on the keyboard opens the File Manager.
-
3Double-click This PC. It's toward the bottom of the left panel. All drives and external devices connected to your PC will appear.
-
4Right-click the drive and select Format. This opens the "Format" dialog window.[3]
-
5Select a file system type. The default is NTFS, which will generally work fine for most people. However, if you want to be able to use this drive on a Mac or with another operating system, change it to exFAT.
- exFAT works with macOS 10.6.5 and later, as well as all versions of Windows beginning with Windows XP SP3.
-
6Enter a name for the drive. You can type the drive name into the "Volume label" field. This is how the drive will be identified in This PC on your PC.
-
7Check the box next to "Quick Format." This option formats the drive without scanning it first for bad sectors.[4] If the option isn't available, that means the drive has never been formatted—in this case, you'll have to do a full format, which can take a long time.
-
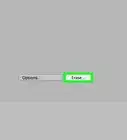
8Click Start. The drive will now be erased and formatted. If you aren't doing a Quick Format, expect the process to take a long time, and make sure you've plugged your laptop into a power source.


Formatting Your Main Hard Drive (Mac)
-
1Back up your important data. Formatting your MacBook will erase all of your documents and data. Back up any files you want to keep using Time Machine or iCloud before you continue.
-
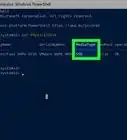
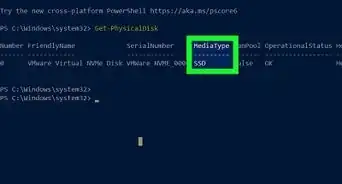
2Determine whether your Mac has an Intel or Apple silicon processor. This is because there are certain recovery steps that are different depending on your processor. To check, click the Apple menu and select About This Mac.[5]
- If you see a line that starts with "Chip" and ends with the name of the chip (e.g., Apple M1), you are using an Apple silicon processor.
- If you see a line that says "Processor" followed by the name of an Intel processor, you'll use the Intel instructions.
-
3Shut down your Mac. Click the Apple menu at the top-left corner and select Shut Down.[6]
-
4Reboot your Mac into Disk Utility. The steps are different depending on your processor:
- Apple silicon-based Macs: Press and hold the Power button to turn on your Mac—don't remove your finger until you see a hard drive and gear icon. Click Options (the gear), click Continue, and then log in as an administrator if prompted. You may also be asked to log in with your Apple ID. Finally, select Disk Utility and click Continue.
- Intel-based Macs: Turn on your Mac, and then press and hold Command + R until you see the Apple logo or are prompted to log in (and then log in as an administrator prompted). Click Disk Utility and select Continue.
-
5Select Macintosh HD in the sidebar. If you have an Apple silicon-based Mac and previously used Disk Utility to add internal volumes to your drive, delete those volumes before selecting the drive. To do this, select each volume and click the minus button.
-
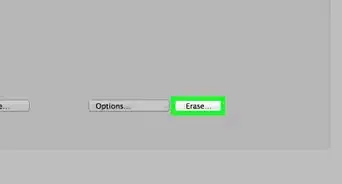
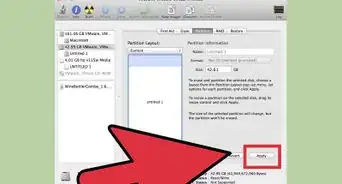
6Click the Erase button in the toolbar. Now you'll be prompted to select your formatting preferences.
-
7Choose how to format your drive. The drive will be called Macintosh HD by default, although you can change it. The recommended file system type will already be selected in the "Format" menu (usually APFS), but you can select something different if you have other requirements.
-
8Click the blue Erase Volume Group button. It's at the bottom-left corner of the window. You may be prompted to enter your Apple ID and password to continue.
- If you have an Apple silicon-based chip, click Erase Mac and Restart to confirm.
-
9Erase any internal volumes (Intel-based Macs only). Apple silicon-based Macs performed this step earlier. If you see any internal volumes listed in the sidebar (other than Macintosh HD), select them and click the minus sign to delete them.
-
10Reinstall macOS. Now that the drive is formatted, you'll need to reinstall macOS. Here's how:
- Apple silicon-based Macs: Once your Mac reboots, follow the on-screen instructions to select your preferences, connect to Wi-Fi, and activate your Mac. Then, click Exit to Recover Utilities, select the hard drive you just formatted, click Reinstall macOS, and then click Continue. Follow the on-screen instructions to set up your Mac like new.
- Intel-based Macs: Close the Disk Utility window to return to the previous screen. Then, select the drive you just reformatted and click Reinstall macOS. Click Continue, and then follow the on-screen instructions to set up macOS.


Formatting a Secondary or External Drive (Mac)
-
1Back up any data that's currently on the drive. Formatting your hard drive will erase the data that's on it. If there's existing data on the drive, make sure you save what you want to keep to your main hard drive (or your cloud drive) before you continue.
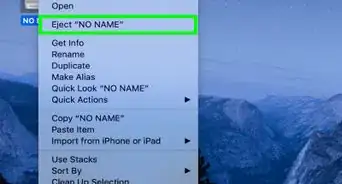
- If you're formatting an external hard drive, connect it to your Mac now.
-
2Open Disk Utility. A quick way to do this is to press the Command key and the Spacebar at the same time and then type disk utility into the search bar. Click Disk Utility when it appears in the search results.[7]
-
3Click the drive you want to format. It'll be in the left panel. If it's an external drive, it'll appear under "External."
-
4Click Erase. It's in the row of buttons at the top of the window. Disk Utility will display some default formatting options.
-
5Choose how to format your drive. You can enter a different name for the drive into the "Name" field if you'd like. The recommended file system type will already be selected in the "Format" menu (usually APFS), but you can select something different if you have other requirements.
-
6Select your security options. If you are planning on getting rid of the drive, you'll want to use the most secure formatting method to make sure no files remain hidden after formatting. Otherwise, a fast format will do the trick—it'll still delete your files from view, but they can technically be recovered by someone with advanced data restoration software. To adjust your preferences:
- Click the Security Options button.
- Drag the slider to "Most Secure" if you really need to destroy the existing data. You'll only need this option if you're planning on selling the drive or throwing it away. This will take a significant amount of time, so make sure you've plugged your Macbook into a power source.
- Drag the slider to Fastest (or a few notches up) for a speedier format. The second or third notch are safe options for securely deleting your files in a relatively quick amount of time.
- Click OK to save your changes.
-
7Click the Erase button. Your Mac will now begin to format your hard drive. Once the format is complete, you can start copying files to the drive.


Expert Q&A
-
QuestionCan I format my laptop by myself?
 Yaffet MesheshaYaffet Meshesha is a Computer Specialist and the Founder of Techy, a full-service computer pickup, repair, and delivery service. With over eight years of experience, Yaffet specializes in computer repairs and technical support. Techy has been featured on TechCrunch and Time.
Computer SpecialistYes, it's not hard to do it. I actually accidentally formatted a family member's phone when I was a child, so it can't be that tricky! -
QuestionWhy would you want to format a drive?Yaffet MesheshaYaffet Meshesha is a Computer Specialist and the Founder of Techy, a full-service computer pickup, repair, and delivery service. With over eight years of experience, Yaffet specializes in computer repairs and technical support. Techy has been featured on TechCrunch and Time.
Computer SpecialistIt's one of the easiest ways to erase everything on a drive, although it'll keep some of the really small files that are required for the drive to function. -
QuestionWill formatting my hard drive delete everything on it?
 Community AnswerYes, part of the formatting process involves deleting all of the data on the drive. This occurs because a new file system is being applied to the drive.


References
- ↑ https://www.microsoft.com/en-us/software-download/windows10
- ↑ https://www.dummies.com/computers/pcs/change-the-boot-order-on-your-pc/
- ↑ https://www.hellotech.com/guide/for/how-to-format-a-hard-drive-windows-10
- ↑ https://www.extremetech.com/extreme/80478-tech-myth-2-quick-format-vs-full-format
- ↑ https://support.apple.com/en-us/HT211814
- ↑ https://support.apple.com/en-us/HT208496
- ↑ https://www.macworld.co.uk/how-to/how-format-drive-for-mac-3541758/
About This Article

1. Back up your data.
2. Create Windows 10 installation media.
3. Boot from the installation media.
4. Start the setup process.
5. Select Custom: Install Windows only (advanced).
6. Select the partition.
7. Click Format.
8. Delete any other partitions.
9. Select the partition and click Next.
10. Follow the on-screen instructions.