X
wikiHow is a “wiki,” similar to Wikipedia, which means that many of our articles are co-written by multiple authors. To create this article, volunteer authors worked to edit and improve it over time.
There are 7 references cited in this article, which can be found at the bottom of the page.
This article has been viewed 75,882 times.
Learn more...
Fixing a water pump refers to the process of replacing an essential part of your vehicle's cooling system. It is one of the least complicated procedures to carry out, as far as auto repairs go, so almost anyone who can operate a wrench can do this on their own. Follow these steps for how to fix a water pump.
Steps
-
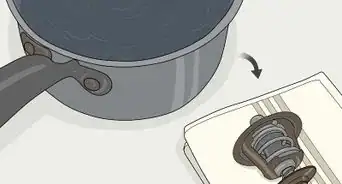
1Confirm that the water pump is nonoperational by examining the functionality of the bearings by manually jostling the fan blade.[1]
- This applies to fan operated cooling systems. The fan bearing should remain firmly seated if it is not in need of repair.
-
2Jiggle the pulley that operates the pump in the case of a motorized fan.
- The shaft should remain tight if it is working properly.
Advertisement -
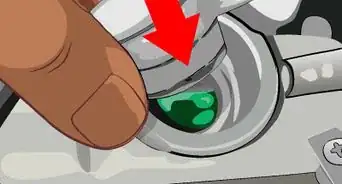
3Inspect the pump casing for splotches, caused by an inordinate amount of fluid leakage, which would indicate a faulty seal.
- A few drops of water should sweat from the vent hole over a long period of time, but a ruined seal will cause excessive overflow.
-
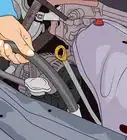
4Detach the negative battery line once the faulty water pump has been verified.[2]
-
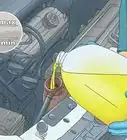
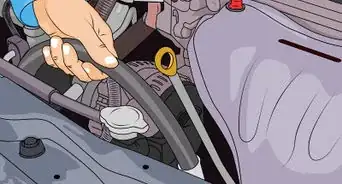
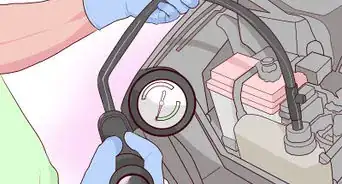
5Remove the radiator cap and empty the radiator by disengaging the valve under the front passenger's side.
-
6Remove the fan belt, if one is present.
-
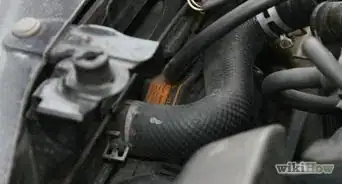
7Detach the radiator hoses.
-
8Unbolt the fan shroud, found on the water pump's shaft.
-
9Remove the fan shroud.[3]
-
10Remove the bolts from the fan and dislodge it.
-
11Disengage the bolts from the drive pulley and remove it.
-
12Dislodge the bolts from the dysfunctional water pump and remove it.
-
13Scrape any dirt and debris away from the area surrounding the gaskets.[4]
-
14Apply industrial cleaning solution to the area and clean it thoroughly.
-
15Follow the water pump manufacturer's instructions regarding sealant for the gaskets.
-
16Apply gasket sealant, if directed.[5]
-
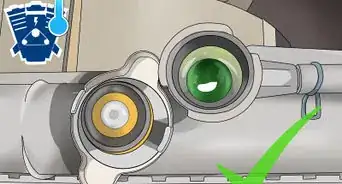
17Install the replacement gaskets.[6]
-
18Position the replacement water pump and secure the bolts.[7]
-
19Reinstall the drive pulley.
-
20Position the fan and the shroud and reinstall the bolts.
-
21Reattach the radiator hoses.
-
22Reinstall the fan belt, referring to the manufacturer's belt routing diagram.[8]
-
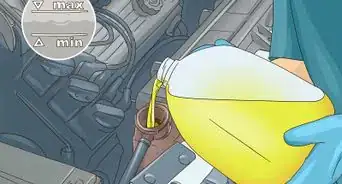
23Confirm that the radiator valve is closed and refill the radiator.
-
24Seal the radiator cap.
-
25Reconnect the negative battery cable.
-
26Start the car and verify that there are no irregular noises or leaks.


Advertisement
Community Q&A
-
QuestionHow do I know if my engine block got cracked?
 Community AnswerOpen the radiator cap and stick your finger in it when the engine is cold. If there is oil on your finger, this is one sign of a cracked block. Your engine will lose compression and overheat, this is another sign. Your vehicle might also lose or burn a lot of oil.
 -
QuestionHow do I find the water pump on my car?
 Community AnswerOpen the hood, follow the belt, and it should be underneath the main fan right behind the radiator.
 -
QuestionHow important is a temperature sensor?Community AnswerVery important, because without it the cooling fan cannot start at the right time, and also the car's main computer needs to know it for the right fuel air mixture.
Advertisement
Warnings
- Do not attempt this repair unless the engine is completely cool.⧼thumbs_response⧽
Advertisement

References
- ↑ http://knowhow.napaonline.com/6-signs-may-bad-water-pump/
- ↑ https://www.youtube.com/watch?v=xzG2tvp68mQ
- ↑ https://www.2carpros.com/articles/water-pump-replacement
- ↑ https://www.howacarworks.com/cooling-systems/replacing-a-water-pump
- ↑ https://www.youtube.com/watch?v=W9lM0Av0yeU
- ↑ https://www.youtube.com/watch?v=W9lM0Av0yeU
- ↑ https://www.howacarworks.com/cooling-systems/replacing-a-water-pump
- ↑ https://www.youtube.com/watch?v=O4aqIiWR9JU&vl=en
- http://www.popularmechanics.com/cars/how-to/maintenance/1272366
About This Article
Advertisement