This article was co-authored by Mia Rubie. Mia Rubie is a Nail Artist and the Owner of Sparkle San Francisco, a nail studio based in San Francisco, California. She has over eight years of nail artist and management experience and is known for her push-the-envelope designs and artistic eye for colors. Her clients include Sephora, Target, and Vogue. Her work has been featured in the San Francisco Chronicle and StyleCaster. She holds a BBA focusing on Entrepreneurial and Small Business Operations from San Francisco State University. You can find her work on her Instagram account @superflynails.
There are 10 references cited in this article, which can be found at the bottom of the page.
wikiHow marks an article as reader-approved once it receives enough positive feedback. In this case, 89% of readers who voted found the article helpful, earning it our reader-approved status.
This article has been viewed 801,545 times.
You can promote good nail health right at home by filing your nails to keep them healthy. You can have shapely and strong nails by using the correct nail file, choosing a good shape for your nails, and filing in the correct positions and directions.
Steps
Preparing
-
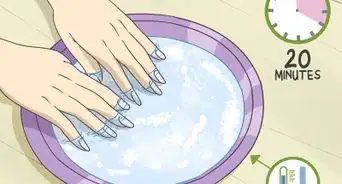
1Wash your hands. Before you file your nails, you should thoroughly wash your hands with soap and water to get rid of any film or oil that will disrupt your filing.[1]
-
2Thoroughly dry your hands. Make sure your hands and nails are dry before you begin. Liquid can dehydrate nails and make them more prone to breaking while filing.[2]Advertisement
-
3Choose a nail file. While there are several types of nail files you can choose, emery boards are both affordable and effective. Try using a file with a softer grit of around 180-200 to keep the edges from looking rough or scraggly.[3] If you want to use a separate file to finish your nails, choose one with a high grit, around 300-600, to get the smoothest edge.[4]
-
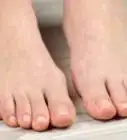
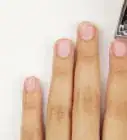
4Decide on your nail shape. There are many nail shapes to choose from, but the most basic shapes are oval, square, and almond. Deciding what shape you want will depend on what your preference is and what kind of nails you have.
- Oval-shaped nails are a great shape for growing out and maintaining your nails. It’s the most functional since your nails will be least likely to break off in this shape. Oval-shaped nails are symmetrically round at the tip. This type of nail gives an elongated, feminine look.[7]
- Square-shaped nails are a great statement and work well with people who have long nails. The square shape comes from filing the nail straight at the tip all the way across the nail.
- Almond-shaped nails are great for making your fingers look more slender. The shape mimics the curve at the base of your nail.[8]
- Have short nails that can’t be shaped? It’s no big deal. Use what you’ve got to work with and apply cuticle oil to them every night to help them grow for future shaping.[9]


Shaping
-
1Cut your nails before you begin. If your nails are on the longer side, cut them down taking into consideration the nail shape you want.[10]
- If, for example, you want square-shaped nails, you shouldn’t cut your nails much, if at all, since square-shaped nails require longer fingernails.
- You can cut your nails a little shorter if you desire an oval-shaped nail. However, be sure to cut your nails in that oval shape.
- If you’re aiming for almond-shaped nails, cut down the sides of your nails more than the tip.
-
2Hold the file parallel to the side of the nail. Hold the file parallel to the side of the nail when beginning your filing. This will prevent breakage.
- Be sure to not file too far into the side of your nail. If you do, this can make your nails more susceptible to breakage.[11]
-
3File by moving from the side of the nail to the center. It’s important to file your nail from the side to the center in one direction using a fluid motion. This will ensure that your nail is smooth, and not jagged.[12]
- You should never “saw” your nails back and forth with a nail file. This will cause peeling and breakage of the nail.
-
4Hold the file flat against the nail tip. When filing your nails from the side to the center, you should always hold the nail file perpendicular to the tip of the nail. This will prevent weakening the nail while filing.[13]
- Filing at an angle from above can cause the nails to thin.
- If your nails are already thin, hold the nail file flat to your nail, tilting it to file from slightly underneath your nail.[14]
-
5Finish filing by holding the file parallel to the other side of the nail. Move the file from its perpendicular position at the tip of the nail to the opposite side of the nail from which you began. Make sure that you hold the file parallel to the side of the nail.
-
6Lift the file away from your nail for another pass. Since you should never “saw” your nails back and forth, lift the file away from your nail and return to the side of the nail for another pass.[15]

Finishing and Maintaining
-
1Remove any nail filings still attached to the nail. If you’ve got some nail filings still attached to your nails, remove them by placing the tip of the file underneath your nails and flicking upwards.[16]
-
2Buff your nails. Give your nails a shine by buffing them after you finish filing. This will help show off your newly shaped nails![17]
- You can purchase a buffer at any beauty supply store.
-
3Apply cuticle oil and moisturize. Regularly apply cuticle oil to your nails and keep your hands moisturized to ensure healthy nails. Everytime you wash your hands, you should apply cuticle oil and moisturizer.[18]
- Keeping your cuticles moisturized will help prevent hangnails.[19]
- Keep cuticle oil and moisturizer next to the soap at your sink as a reminder to apply regularly.
-
4File your nails every couple of weeks. Only file your nails once every two to four weeks. Filing your nails too frequently can damage them as they won’t have time to grow properly.[20]

Expert Q&A
Did you know you can get expert answers for this article?
Unlock expert answers by supporting wikiHow
-
QuestionWhat kind of nail file should I use at home?
 Mia RubieMia Rubie is a Nail Artist and the Owner of Sparkle San Francisco, a nail studio based in San Francisco, California. She has over eight years of nail artist and management experience and is known for her push-the-envelope designs and artistic eye for colors. Her clients include Sephora, Target, and Vogue. Her work has been featured in the San Francisco Chronicle and StyleCaster. She holds a BBA focusing on Entrepreneurial and Small Business Operations from San Francisco State University. You can find her work on her Instagram account @superflynails.
Nail ArtistUse a softer nail file, around 180 grit. That's going to help your nails be nice and smooth, and you're not going to get scraggly edges around your nails.
Support wikiHow by unlocking this expert answer.
-
QuestionWhat is the best way to clean my nails?
 Community AnswerUse warm water with soap to remove oils or dirt. Use a nail brush to get under nails to remove dirt. Dry with a soft, fluffy towel. Add moisturizer or lotion.
 -
QuestionI used to bite my nails, but stopped. However, they still are short and jagged. How do I make them proper again?
 Community AnswerWait for the nails to grow out first; use moisturizing and nutritious products to make them healthier. After that, clip the jagged parts, and file your nails to create a smooth line and desired shape.
Warnings
- Avoid filing your nails too short, which can cause pain and bleeding.⧼thumbs_response⧽
Things You'll Need
- Nail file
- Buffer


References
- ↑ http://www.huffingtonpost.com/glamour/16-ways-youre-doing-your_b_8865276.html
- ↑ http://www.nailitmag.com/6-tips-for-filing-your-nails-2
- ↑ Mia Rubie. Nail Artist. Expert Interview. 23 April 2020.
- ↑ https://www.sallybeauty.com/There-are-so-many-types-of-nail-files.-How-do-I-know-which-one-to-use%3F/FAQ_NAILS_059,default,pg.html
- ↑ http://www.shape.com/lifestyle/beauty-style/diy-8-steps-salon-nails
- ↑ http://www.allure.com/story/all-about-glass-nail-files
- ↑ Mia Rubie. Nail Artist. Expert Interview. 23 April 2020.
- ↑ http://www.today.com/style/7-different-nail-shapes-how-find-right-one-you-t94761
- ↑ http://www.today.com/style/7-different-nail-shapes-how-find-right-one-you-t94761
- ↑ http://www.today.com/style/7-different-nail-shapes-how-find-right-one-you-t94761
- ↑ http://www.nailitmag.com/6-tips-for-filing-your-nails-2
- ↑ http://www.cosmopolitan.com/style-beauty/beauty/a8529507/how-to-file-nails/
- ↑ http://www.nailitmag.com/6-tips-for-filing-your-nails-2
- ↑ http://www.huffingtonpost.com/glamour/16-ways-youre-doing-your_b_8865276.html
- ↑ http://www.cosmopolitan.com/style-beauty/beauty/a8529507/how-to-file-nails/
- ↑ http://www.cosmopolitan.com/style-beauty/beauty/a8529507/how-to-file-nails/
- ↑ http://www.huffingtonpost.com/glamour/16-ways-youre-doing-your_b_8865276.html
- ↑ http://www.huffingtonpost.com/2013/08/07/grow-healthy-strong-nails_n_3714486.html
- ↑ Mia Rubie. Nail Artist. Expert Interview. 23 April 2020.
- ↑ http://www.dailymail.co.uk/health/article-2796528/filing-nails-daily-does-harm-good-lead-conditions-cause-crack-split-bend.html
About This Article

Before filing your nails, cut them short if they are on the longer side, unless you want square-shaped nails. To start filing, hold the file parallel to the side of your nail and file from the side to the center. As you file, be sure to keep the file flat against the nail tip to reduce the risk of breakage. To finish the nail, hold the file parallel to the opposite side of the nail from where you started. After you're done, get rid of any filings attached to your nails by flicking the nail file upwards from under your nail tips, then apply cuticle oil and moisturizer. If you want to learn how to buff your nails so they shine, keep reading the article!