This article was co-authored by wikiHow staff writer, Nicole Levine, MFA. Nicole Levine is a Technology Writer and Editor for wikiHow. She has more than 20 years of experience creating technical documentation and leading support teams at major web hosting and software companies. Nicole also holds an MFA in Creative Writing from Portland State University and teaches composition, fiction-writing, and zine-making at various institutions.
This article has been viewed 38,890 times.
Learn more...
Figma is great for designing website prototypes, but you can't turn your designs into workable websites without code. Fortunately, there are helpful Figma plugins that can help you transform your designs into HTML, CSS, and React code that your developers can actually use. This wikiHow article will teach you how to get the HTML code for your Figma designs using two popular plugins (pxCode and Anima), as well as how to view CSS for individual elements using tools built right in to Figma.
Steps
Using the pxCode Plugin
-
1Go to the Figma to HTML by pxCode plugin page. You'll find it at https://www.figma.com/community/plugin/946962210053893234/%F0%9F%9A%80-Figma-to-HTML-by-pxCode---Truly-Responsive%2C-React-%26-React-Native-Support. pxCode's Figma plugin will help you your design into pxCode, where you'll be able to view and download its HTML, CSS, and React code.
- While the pxCode plugin (and any Figma-to-HTML plugins) can display and export the code from your Figma project, you'll need more than just the code to transform your project into a functional website. Exporting code from Figma can be helpful to developers who are building sites from Figma prototypes, but if you're not a developer, you'll still need the help of one to transform that code into a usable, responsive website.
-
2Install the plugin. It's simple—just click the blue Install button, and then click Install plugin to confirm. When the installation is complete, the blue "Install" button will turn gray and say "Installed" instead.Advertisement
-
3Open your project in Figma. You can do so by clicking your profile photo or initial at the top-right, selecting Internal profile, and then clicking your project.
-
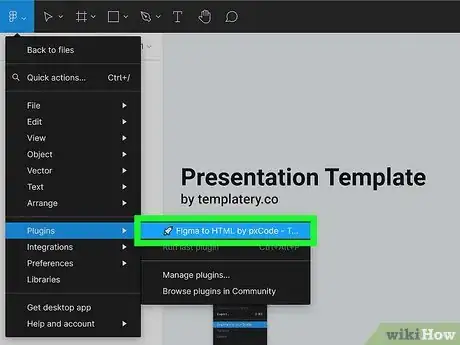
4Open the pxCode plugin. To do this, click the Figma menu (the "F" icon at the top-left corner of Figma), select Plugins, and then click the PxCode plugin.
-
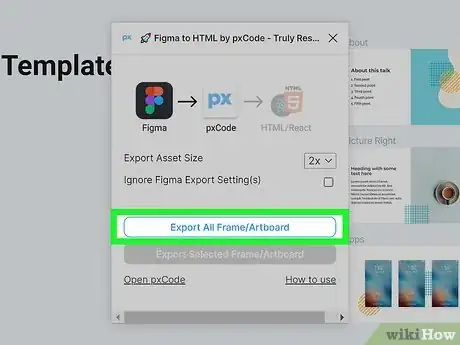
5Click the Export All Frame/Artboard button. This downloads the .pxcode file for your project.
-
6Go to https://www.pxcode.io in your web browser. Now that you have the necessary file from the plugin, you can import it into pxCode.
-
7Create an account. You'll need an account to use pxCode, so click Get Started at the top-right to create one now.
- Once your account is created, you'll be taken to a sample website design, where you'll see a tutorial for transforming your own design into responsive code. The video is just 3 minutes long, so take a few minutes to watch it so you know how to fix responsiveness issues in your code.
-
8Upload the .pxcode file to pxCode. After you watch the lesson, here's how you can add your own code:
- Click the back button at the top-left to go to the list of lessons.
- Click the back button again to go to All Projects.
- Click the +New Project tile.
- Drag the .pxcode file to the pink box, or click the box to select the file.
- Click Create Project. Once created, you'll be taken to your project, which has no components yet.
-
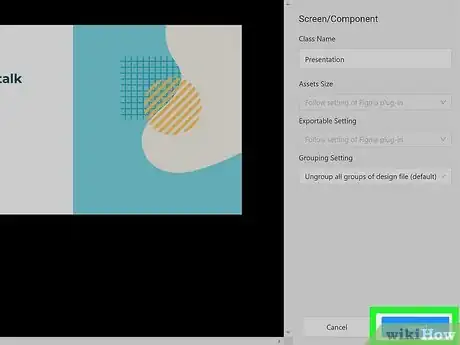
9Convert your design. Now that you've uploaded your .pxcode file, you'll need to convert it into an editable/exportable format. Here's how:
- Click + Convert Screen/Component from design file.
- Enter a name for the class so you can easily identify it in your project.
- Click Convert to parse the design file and open it in the pxCode editor.
- You can simply export the existing code without making changes, but this is a good opportunity for you to fine-tune your code before exporting.
-
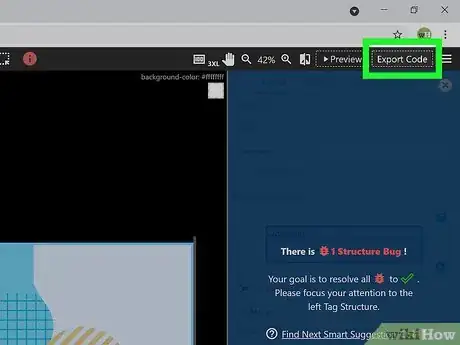
10Click the Export Code button. It's in the upper-right corner of your project. After a few moments, you'll see the Code Export screen.
-
11Click the HTML tab. It's the second tab at the top. Now you'll see the HTML for your design.
- To save the code to your computer, click Download at the top. Or, to paste it into your editor, just click Copy to copy it to your clipboard.
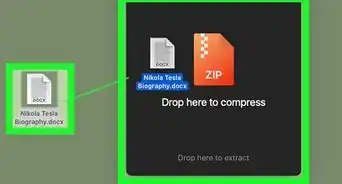
- Downloading the code creates a ZIP file that contains all CSS and assets, including images.
Using the Anima Plugin
-
1Go to the Anima plugin installation page. You'll find it at https://www.figma.com/community/plugin/857346721138427857/Anima---Figma-to-HTML%2C-React-%26-Vue-code. Anima is a Figma plugin that can easily export developer-friendly HTML, CSS, React, and Vue code from your Figma project. When you export code with Anima, you'll be downloading a ZIP file containing the HTML, CSS files, images, and fonts from your project.[1]
- While the plugin is free, you'll need a Pro account to export HTML and other code with Anima.[2] Accounts start at $31/month.
- Keep in mind that while Anima can export most of the code from your Figma prototype, just having the code isn't enough to build a functional website. Exporting the code can be valuable to developers who are working from a prototype, but if you're not a developer, you'll still need the help of one to transform that code into a usable, responsive website.
-
2Install the plugin. It's simple—just click the blue Install button, and then click Install plugin to confirm. When the installation is complete, the blue "Install" button will turn gray and say "Installed" instead.
-
3Open your project in Figma. You can do so by clicking your profile photo or initial at the top-right, selecting Internal profile, and then clicking your project.
-
4Create an Anima account. To export your code, you'll need to create an account with Anima so the plugin is ready to use. Here's how:
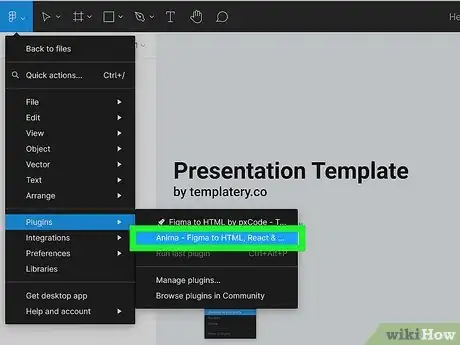
- Click the Figma menu (the "F" design at the top-left).
- Click Plugins on the menu.
- Select the Anima plugin.
- Click Sign up.
- Create an account. You can sign up with Google if you don't feel like making a new password.
- Click Back to Figma once the new account setup is complete.
-
5Select the frame you want to export. For example, if you want the code for an entire page, select the frame around the page.
-
6Open the Anima plugin. To do this, just re-open the Figma menu, select Plugins, and then click the Anima plugin. Now that you're signed into Anima, you'll see the Anima plugin window, which is open to the Prototype tab.
-
7Click Get Code. It's the orange button at the bottom of the Get Code tab.
-
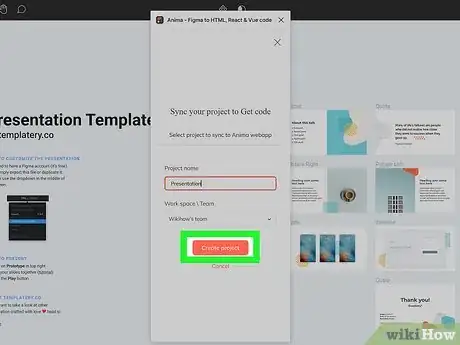
8Create a new Anima project. To do this, just click Create new, type a name for the project in Anima, and then click Create project. This creates and automatically selects your new project.
-
9Click the Sync & Get code button. It's near the bottom of the window. This syncs your design to Anima's web server and generates a code package for you to download.
- If you don’t have a Pro account, you'll be prompted to upgrade now. You can still sync your project to Anima without a Pro account, but you can't download code unless you upgrade.
-
10Click Save to download your code. This saves the ZIP file containing your code to your computer.
Viewing CSS for Individual Elements
-
1Open your project in Figma. Figma's built-in Inspect feature allows you to view the CSS code for colors, sizing information, and typography of individual elements in your design.[3] This is handy if you don't need all of the code for your site—just basic design information.
-
2Click the element you want to view. You can click a shape, text, frame, or even the background.
-
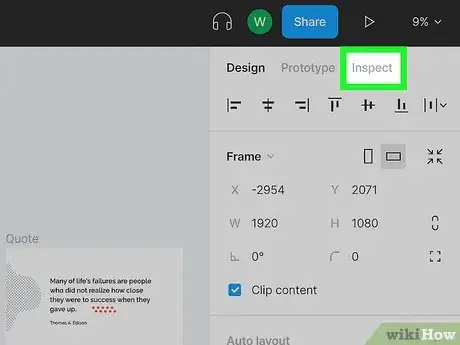
3Click the Inspect tab. It's at the top of the right panel.
-
4Select CSS under the "Code" header. The code for the selected element appears in the bottom portion of the right panel.
- To see the code for iOS or Android-specific development, select one of those options from the menu instead.
-
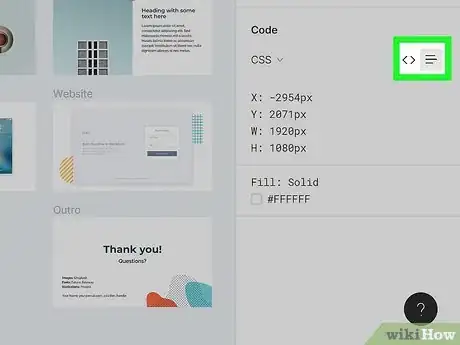
5Switch between code views. You'll see two icons in the Code section—one with two brackets, and another with three horizontal lines.
- The default view is the two brackets, which is Code view. Click this option if you want to easily copy the CSS code from Figma and paste it into your editor.[4]
- If you just want to view the code quickly, click the three lines for Table view.
References
- ↑ https://support.animaapp.com/en/articles/2627030-how-to-export-sketch-xd-or-figma-to-html
- ↑ https://www.animaapp.com/pricing
- ↑ https://www.figma.com/best-practices/tips-on-developer-handoff/an-overview-of-figma-for-developers/
- ↑ https://www.figma.com/best-practices/tips-on-developer-handoff/an-overview-of-figma-for-developers/
About This Article
1. Install the pxCode plugin.
2. Open your Figma project.
3. Open the pxCode plugin.
4. Click Export All Frame/Artboard and save the file.
5. Go to https://www.pxcode.io and create an account.
6. Upload the .pxcode file to pxCode.
7. Convert the design.
8. Click Export Code.


