This article was co-authored by Luigi Oppido and by wikiHow staff writer, Travis Boylls. Luigi Oppido is the Owner and Operator of Pleasure Point Computers in Santa Cruz, California. Luigi has over 25 years of experience in general computer repair, data recovery, virus removal, and upgrades. He is also the host of the Computer Man Show! broadcasted on KSQD covering central California for over two years.
The wikiHow Tech Team also followed the article's instructions and verified that they work.
This article has been viewed 2,402,485 times.
This wikiHow teaches you how to edit PDF files using Adobe's proprietary Acrobat Pro DC software or by converting a PDF file to Word format in Microsoft Word. If you are looking for a free option to edit PDF files, you can use LibreOffice Draw, though it doesn't have as many features as Adobe Acrobat Pro DC.
Things You Should Know
- If you want to use LibreOffice Draw, you’ll need to download the entire LibreOffice suite.
- You’ll need an Adobe Acrobat Pro DC subscription to edit PDFs using Adobe’s software.
- If you want to convert a PDF file to a Word document, you can open a PDF file in Microsoft Word to edit it.
Steps
Using Sejda
-
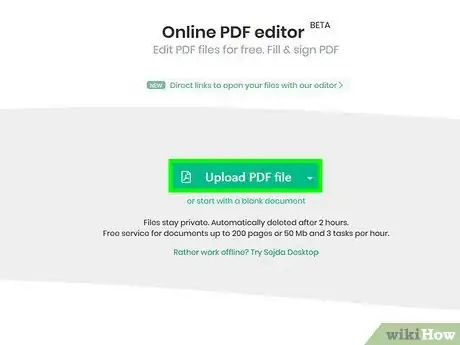
1Go to https://www.sejda.com/pdf-editor in a web browser. This is the website to a free online PDF editor called Sejda. You can edit 3 files per hour using Sejda. Files can be up to 200 pages or 50 MBs. The files you upload to edit are automatically deleted after 2 hours.
- If 2 hours isn't enough time to finish editing your document, you may consider using LibreOffice Draw as another free program that can edit PDFs. You can also use some of the features available in Sejda to edit your PDF and then open it in LibreOffice Draw to finish it.
-
2Click Upload PDF file. It's the green button in the center of the pageAdvertisement
-
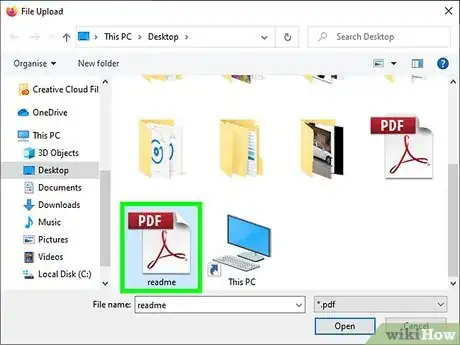
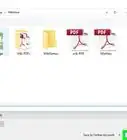
3Select a PDF file and click Upload. This uploads a PDF that you can edit using Sejda's online editor.
-
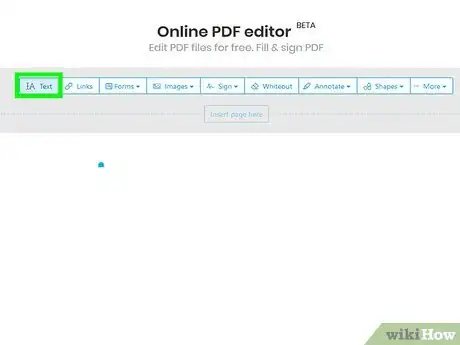
4Add text to your file. To text to your PDF, click the icon that says Text at the top of the page and then click where you want to add text. Then start typing.
-
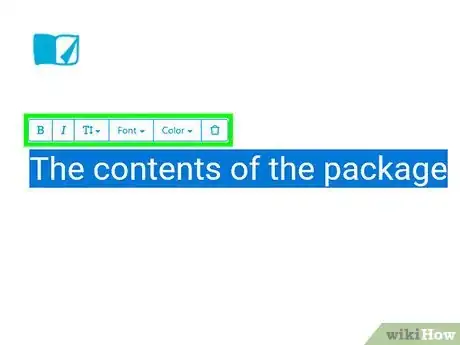
5Edit existing text. Unlike a lot of other free PDF editors, Sejda allows you to edit the existing text within a PDF as well as new text to your PDF. To edit text, simply click the text you want to edit and start typing. You can add more text, or delete text. Use the icons above the text box to change the text format. Your options to change the text format are as follows:
- Click B to add bold to the text.
- Click I to add italics to the text.
- Click the icon that resembles a "T" with an arrow next to it and use the slider bar to change the size of the font.
- Click Font to select a new font from the drop-down menu.
- Click Color to select a color for your text
- Click the icon that resembles a trashcan to delete the entire text box.
-
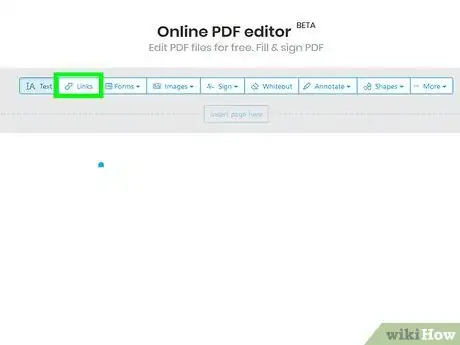
6Add a link to the page. A link allows you to provide a URL to an external website. Use the following steps to add a link to your PDF:
- Click Link at the top of the screen.
- Click and drag over the area where you want to add a link.
- Copy and paste the URL you want to link to in the field that says "Link to external URL."
- Click Apply Changes.
-
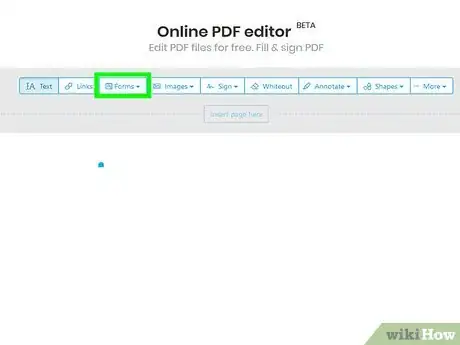
7Add form elements to your PDF. Click Forms at the top of the page to see a drop-down menu with form elements you can add to your PDF. These include interactive and non-interactive form elements. Click one of the form elements in the drop-down menu and then click where you want it to go in the PDF. The form elements in the drop-down menu are as follows:
- Click the "X" icon to add an X to your PDF.
- Click the checkmark icon to add a checkmark to your PDF.
- Click the dot to add a dot/bullet point to your PDF.
- Click the box that says "ABCD" to add a single-line text field to your PDF.
- Click the small box that says "ABCD" to add a multi-line text field to your PDF.
- Click the icon that resembles a circle with a dot to add a radio option to your PDF.
- Click the icon with a checkbox to add a checkbox option to your PDF.
- Click the icon that resembles a drop-down menu to add a drop-down menu to your PDF.
-
8Add an image to your PDF. Use the following steps to add an image to your PDF:
- Click Image at the top of the page.
- Click New Image.
- Select the image you want to add and click Open to upload it.
- Click where you want the image to go.
-
9Add a signature to the PDF. Use the following steps to add a signature to your PDF:
- Click Sign at the top of the page.
- Click New Signature.
- Type your name in the text field at the top.
- Click a signature style.
- Click Save
- Click where you want the signature to go.
-
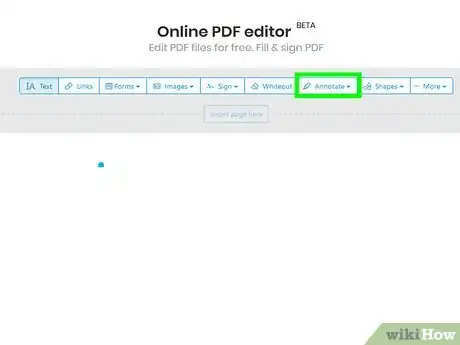
10Add Highlights, strike out, or underline to text. Use the following steps to add Highlight, strikethrough, or underline to text in your PDF:
- Click Annotate at the top of the page.
- Click one of the colored circles next to "Highlight", "Strike out", or "Underline".
- Click and drag over the text you want to highlight, or add strike-out or underline to.
-
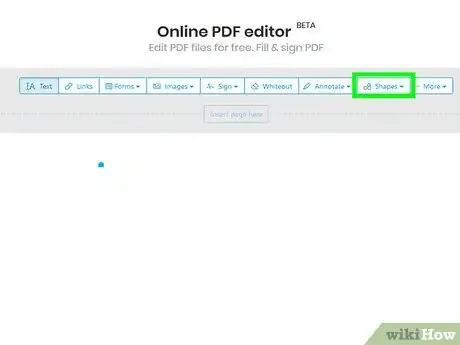
11Add a shape to the PDF. To add a shape to the PDF, click Shapes at the top of the page and click Ellipse or Rectangle. Then click and drag over the location you want to add the shape. Use the following options above the shape to edit it:
- Click the icon with a line to select the border thickness of the shape.
- Click the icon that resembles a square to select the border color of the shape.
- Click the icon that resembles a circle to select the shape color.
- Click the icon that resembles two overlapping squares to duplicate the shape.
- Click the trashcan icon to delete the shape.
-
12Draw on your PDF. Use the following steps to draw on your PDF:
- Click Annotate.
- Click one of the color circles next to Draw.
- Click and drag to draw freely on your PDF.
-
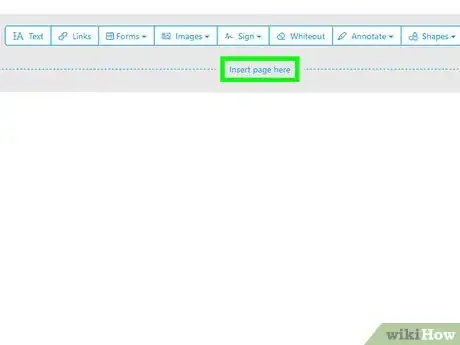
13Click Insert page here to add a new page. This button is at the top and bottom of each page. Click the button at the top of the page to add a new page before the current page. Click the button at the bottom of the page to add a new page after the current. page.
-
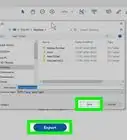
14Undo a Mistake. Use the following steps to undo a mistake:
- Click More at the top of the page.
- Click Undo.
- Click the checkbox next to the step you want to revert to.
- Click Revert selected.
-
15Click Apply Changes. It's the green button at the bottom of the page. Click this button when you are finished editing your PDF. The website will start processing your PDF.
-
16Click Download. It's the green button at the top of the page. This downloads the edited document to your computer.
- Alternatively, you can click one of the icons to save the document to Dropbox, OneDrive, Google Drive, rename the document, or print the document.
Using LibreOffice Draw
-
1Download and install Libre Office. LibreOffice is a free alternative to Microsoft Office. The Draw program has the ability to create and edit PDFs. To download and install LibreOffice, go to https://www.libreoffice.org/ and click Download Now. Open the install file and follow the instructions.
- You must download the entire suite to use LibreOffice Draw.
-
2Open LibreOffice Draw. LibreOffice Draw has a yellow icon that resembles with a triangle and circle on it. Click the icon in your Windows Start menu or Applications folder on Mac
- It may be located in the LibreOffice folder in your Windows Start menu or Applications folder.
-
3Open a PDF in LibreOffice Draw. The PDF may look different than originally intended. Use the following steps to open a PDF in LibreOffice draw:
- Click File
- Click Open.
- Select the PDF you want to open.
- Click Open.
-
4Move and resize an object. When you place the mouse cursor over an object, the cursor should turn into a cross-arrow. Click the object to select it. Use the following options to move and resize the object:
- Click and drag the object to move it.
- Click and drag the squares in the corner of the object to resize it.
-
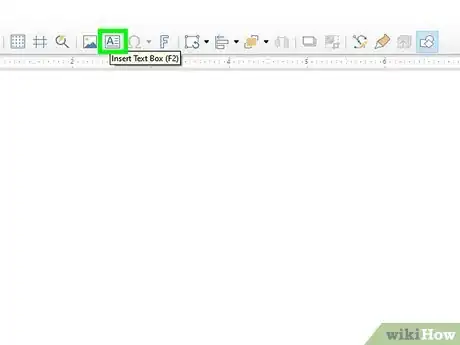
5Add new text. To add new text to a document, click the icon with an "A" next to lines at the top of the page. Click where you want to add text and start typing. Click and drag to create a text box of a defined size. Use the format options in the menu bar to the right to edit the text format.
-
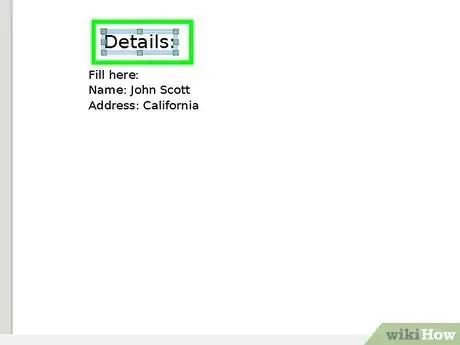
6Edit text. To edit existing text in a PDF, click the text and start typing. You can delete text, add new text, highlight text, or change the text format using the menu options in the menu bar to the right. The menu options are as follows:
- Use the drop-down menu below "Character" to select a font.
- Use the drop-down menu next to the font menu to select the font size.
- Click "B" to bold text.
- Click "I" to italicize text.
- Click "U" to underline the text.
- Click "S" to strike-through the text.
- Click "A" to add shadow to the text.
- Click the icons with 4 lines below "Paragraph" to align the text to the left, right, center, or fully justified.
- Use the spaces below "Spacing" to specify the line spacing, before and after a paragraph, as well as for indentations.
- Click the icon with dots next to lines below "Lists" to add a bullet-point.
- Click the icon with numbers next to lines below "Lists" to add a numbered list.
-
7Add an image to the document. Use the following steps to add an image to the document:
- Click the icon that resembles a picture of mountains at the top of the page.
- Select the image you want to add.
- Click Open.
- Click and drag to place the image where you want it to go.
- Click and drag the square dots around the image to change the image size.
-
8Add a shape to your PDF. Use the following steps to add a shape to your PDF.
- Click the icon with shapes overlapping at the top of the page.
- Click a shape in the menu bar to the left.
- Click and drag to draw the shape.
- Click the box next to "Color" in the menu bar to the right.
- Select a color for the shape.
-
9Rotate an object. Use the following steps to rotate and object:
- Click the icon that resembles a square with a circular arrow at the top of the page.
- Click the object you want to rotate.
- Click and drag the yellow dots in the corners around the object.
-
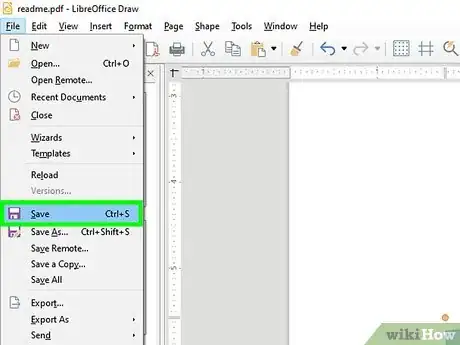
10Save your work. Use the following steps to save your work:
- Click File.
- Click Save.
-
11Export your PDF. Use the following steps to export the document in PDF format:
- Click File.
- Click Export as.
- Click Export as PDF.
Using Adobe Acrobat Pro DC
-
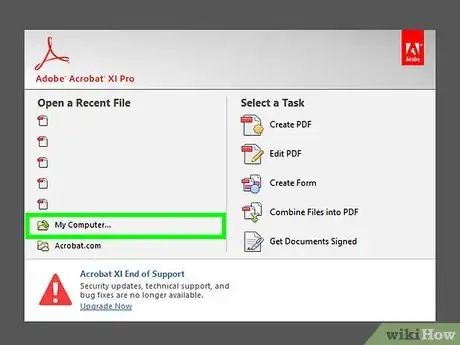
1Open a PDF document in Adobe Acrobat Pro. Do so by clicking the white Adobe Acrobat app with the stylized, red A icon.
- You can view PDFs for free using Adobe Acrobat Reader DC. To edit PDFs you need a subscription to Adobe Acrobat Pro DC. You can sign up for a subscription at acrobat.adobe.com
- Adobe software works the best for editing existing PDFs.[1]
-
2Open a PDF file. You can open a file by clicking Open on the Adobe Acrobat Pro title screen menu and select a file, or use the following steps to open a PDF in Adobe Acrobat Pro:
- Click File in the menu bar at the top.
- Click Open.
- Select a PDF file you want to edit.
- Click Open.
-
3Click Edit PDF. It's icon with pink boxes in the menu bar to the right. This displays an outline around all text boxes and objects in the PDF.
-
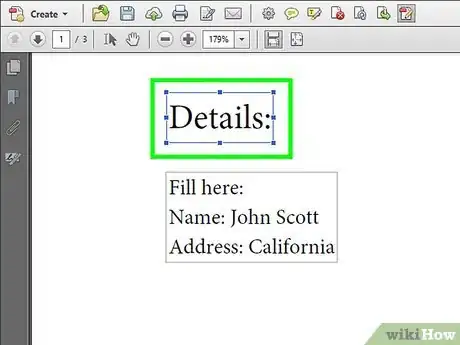
4Edit the text. To edit the text in the PDF document, click the text in a text box and start typing. You can delete or add new text, highlight text, or use the FORMAT menu to the right to change the text format.
-
5Add new text. To add new text to a PDF, click Add Text in the bar at the top. Then click where you want to add text and start typing. Click and drag to define the height and width of the text box you wish to add.[2]
-
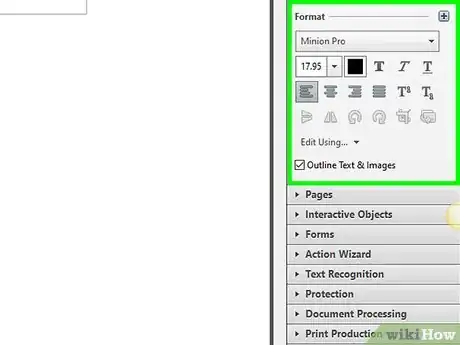
6Use the "FORMAT" tools to edit text. The Format tools are in the sidebar menu to the right. Highlight the text you wish to edit and use the following tools to edit the text format:[3]
- Click the drop-down menu below "FORMAT" to change the font
- Click the size drop-down menu below the font to change the text size
- Click the square color swatch next to the font size drop-down menu to change the text color
- Click the icons with the capital "T" in various styles to add bold, italics, underline, subscript, or superscript to your text.
- Click the drop-down menu next to the icon with three lines and three dots to create a bullet-point list.
- Click the drop-down menu next to the icon with three numbered lines to created a numbered list.
- Click the icons with 4 lines that resemble text to align the text left, center, right, or fully-justified alignment.
- Click the drop-down with the icon with a vertical arrow next to three lines to increase or decrease the space between lines of text
- Click the drop-down menu next to the icon with an arrow next to two sets of lines grouped together to increase or decrease the space between (after) paragraphs.
- Click the "Horizontal scaling" drop-down to increase or decrease the width (percentage) of the highlighted characters
- Click the drop-down menu with a horizontal arrow below an "A" and a "V" to increase or decrease the space between individual text characters
- Not all elements of a PDF may be editable.
-
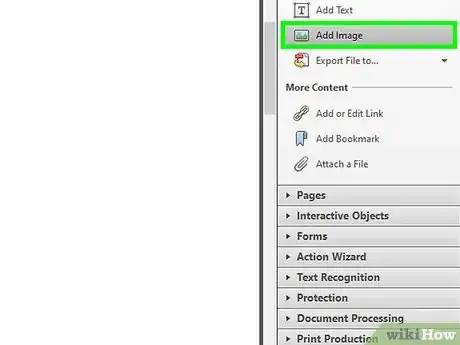
7Add an image to the PDF. Use the following steps to add an image to the PDF:
- Click Add Image at the top of the page.
- Select the image you want to add.
- Click Open.
- Click where you want the image to go or click and drag to specify the image size.
- Click and drag the blue dots in the corners of the box around the image to change the image size.
-
8Use the "OBJECTS" tools to edit images and objects. Select the object you wish to edit and use the following tools to edit an object:
- Click the icon with two triangles pointing right to invert the object up or down along a horizontal axis.
- Click the icon with two triangles pointing up to flip the object from one side or another along a vertical axis.
- Click drop-down next to an icon with two boxes next to a line to arrange multiple objects on the page with one another.
- Click the icon with a circular arrow pointing counterclockwise to rotate the object to the left.
- Click the icon with a circular arrow pointing clockwise to rotate the object to the right.
- Click the icon that resembles a stack of images to replace an image with another.
- Click the icon that resembles a stack of squares to change the object's page layer in relation to other text and objects.
- Not all elements of a PDF may be editable.
-
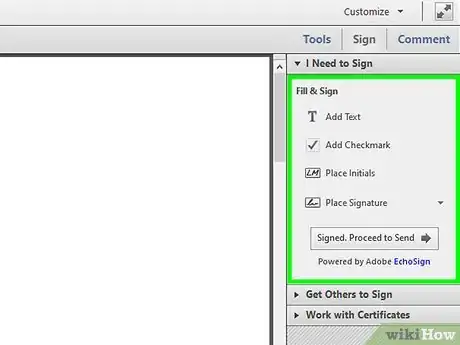
9Click Fill & Sign to add a signature to the PDF. It's next to the purple icon that resembles a pencil in the menu bar to the right. Use the tools at the top of the page to type your signature, add a checkmark icon, or click Sign to create or add an existing signature.
-
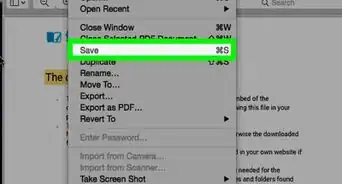
10Save your PDF. Use the following steps to save your PDF:
- Click File.
- Click Save.
Using Microsoft Word
-
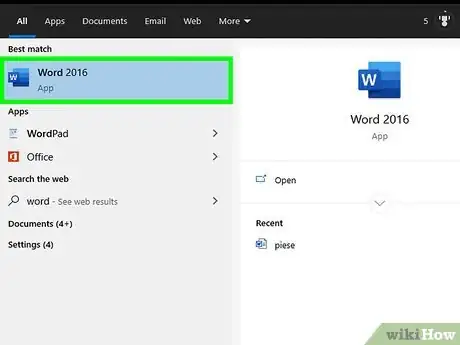
1Open Microsoft Word. Do so by clicking on the blue app containing or shaped like a W.
-
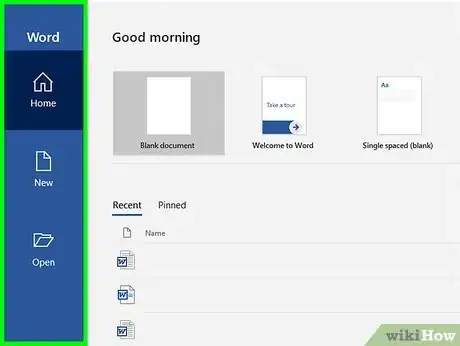
2Open a PDF in Word. The file you selected will be converted to an editable Word document.[4] Use the following steps to open a PDF in Word:
- Click File in the menu bar at the top of the screen.
-
3Click Open.
- Select the PDF file you want to convert to Word.
- Click Open.
- Click on OK.
-
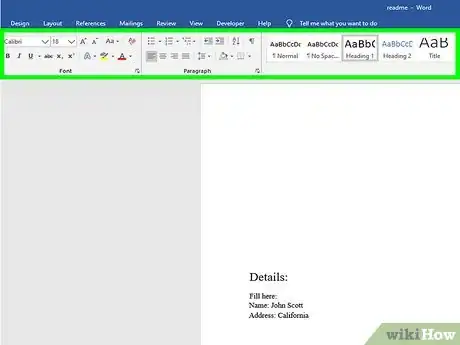
4Edit the file as you would a normal Word document.
- As with any PDF conversion, the converted document may look different from the original and some manual adjustment may be necessary.
Expert Q&A
Did you know you can get expert answers for this article?
Unlock expert answers by supporting wikiHow
-
QuestionWhat program can I use to edit a PDF?
 Luigi OppidoLuigi Oppido is the Owner and Operator of Pleasure Point Computers in Santa Cruz, California. Luigi has over 25 years of experience in general computer repair, data recovery, virus removal, and upgrades. He is also the host of the Computer Man Show! broadcasted on KSQD covering central California for over two years.
Computer & Tech Specialist
-
QuestionCan l download another PDF editor while Adobe Reader X is on my PC?
 Community AnswerYes. This may change your default program associated with PDF files, but the programs can coexist.
 -
QuestionHow do I edit an image in a PDF?
 Community AnswerStart by going into your PDF viewer and tag the image, and then copy and paste into Paint or another editing program.
References
- ↑ Luigi Oppido. Computer & Tech Specialist. Expert Interview. 31 July 2019.
- ↑ https://helpx.adobe.com/acrobat/using/edit-text-pdfs.html
- ↑ https://www.youtube.com/watch?v=SeW1tgj5_rw
- ↑ https://support.office.com/en-us/article/Edit-PDF-content-in-Word-b2d1d729-6b79-499a-bcdb-233379c2f63a
About This Article
1. Open a PDF in Adobe Acrobat Pro DC.
2. Click Add Text at the top of the page.
3. Click anywhere in the document and start typing to add a new text box.
4. Click an existing text box and start typing to edit an existing text box.
5. Use the menu options below "FORMAT" in the menu to the right to edit the format of the text.
6. Click Add Image at the top fo the page and select an image you want to add.
7. Click and drag to place the image.
8. Use the options below "Object" in the menu to the right to rotate and flip an object.
9. Click Fill & Sign in the menu to the right to add a signature.
10. Save your document in the File menu.
To learn more, like how to edit a PDF file using Microsoft Word or Preview on Mac, scroll down!

