This article was co-authored by wikiHow staff writer, Janice Tieperman. Janice is a professional and creative writer who has worked at wikiHow since 2019. With both a B.A. and M.A. in English from East Stroudsburg University, she has a passion for writing a wide variety of content for anyone and everyone. In her free time, you can find her working on a new crochet pattern, listening to true crime podcasts, or tackling a new creative writing project.
There are 7 references cited in this article, which can be found at the bottom of the page.
The wikiHow Video Team also followed the article's instructions and verified that they work.
This article has been viewed 8,841 times.
Learn more...
Bananas are a delicious fruit, but they tend to go bad pretty quickly. By drying your fruit, you can enjoy your bananas at your own pace. While a food dehydrator is a more convenient option, the oven may be a more realistic drying method for most households. Since fruit drying is a long-term process, set aside a day where you can stay home and keep an eye on your fruit. With enough patience and dedication, you can preserve your bananas for a lot longer!
Steps
Slicing and Preparing the Bananas
-
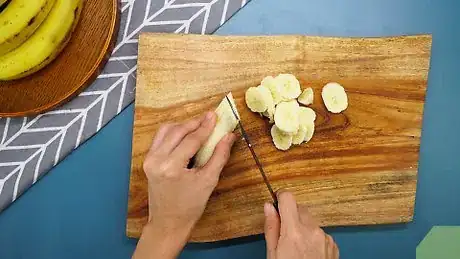
1Peel and slice your bananas into thin, 0.25 in (0.64 cm) chips. Set aside several bananas that you’d like to dry and store on a long-term basis. Peel each piece of fruit and use a knife to cut the bananas into thin, 0.25 in (0.64 cm) slices.[1]
- If you’d like to reuse or dry your banana peels, set them aside for later.
-
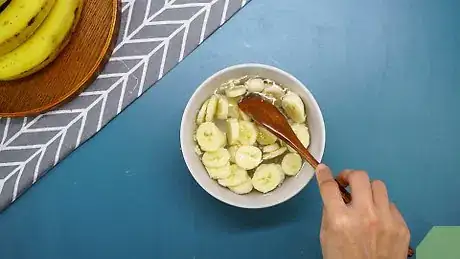
2Mix ascorbic acid in water to help preserve the fruit. Fill a large bowl with 2 cups (470 mL) of tap water. Pour in 1 tsp (4 g) of ascorbic acid into the water, then wait for the powder to dissolve.[2]
- You can purchase ascorbic acid online.
- You can also use 3 tablespoons (44 mL) of lemon juice if you don’t have ascorbic acid on hand.[3]
Advertisement -
3Soak the banana slices for 3-5 minutes. Drop your banana slices into the bowl and let them sit for several minutes. At this point, drain the bowl and place them on a flat surface.[4]
-
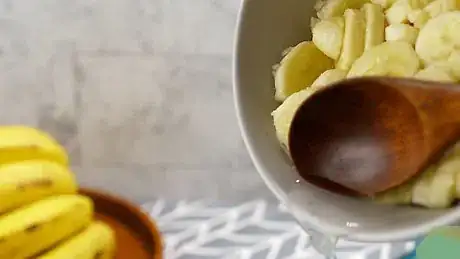
4Drain the banana slices to dry them off. Pour out the excess ascorbic acid solution into the sink, taking extra care to make sure that the banana chips don’t spill out. Double-check that all the extra solution is poured out so the slices are ready to go in the oven.[5]
-
5Cover at least 1 baking tray with parchment paper. Rip or cut a sheet of parchment paper that’s large enough to fit over the surface of your baking tray. Line the tray with a sheet so your bananas can dry without sticking the pan. If you’re drying a lot of banana chips, you may need more than 1 baking tray to get the job done.[6]
- Double-check the dimensions of your baking tray to make sure it can fit in your oven.[7]
-
6Space the banana chips out onto the baking trays in a single layer. Arrange your fruit slices on the tray so they’re several inches apart. Don’t let any of the chips overlap or touch, as this could slow down or hinder the drying process.[8]
- If needed, feel free to use more than 1 tray.
Dehydrating Banana Chips
-
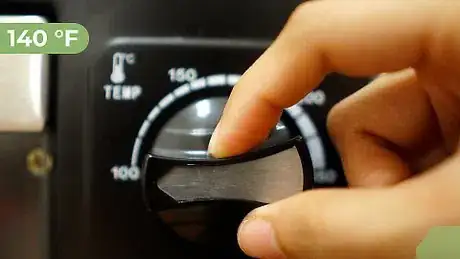
1Set your oven to 140 °F (60 °C) and let it heat up. Check your oven’s settings to see what temperature you can set the device to. Preheat the oven to the lowest possible temperature so your banana slices can dry without baking.[9]
- You can also set your oven up to 200 °F (93 °C), if it doesn’t have very low temperatures.[10]
-
2Place the tray in the oven with the oven door open. If you’re using multiple trays, arrange them 2 to 3 in (5.1 to 7.6 cm) above or below each other in the oven so the warm air can cycle through and evenly dry the bananas. To prevent your fruit slices from baking, leave the oven door open 2 to 6 in (5.1 to 15.2 cm).[11]
- If needed, set an oven thermometer close to your oven so you can monitor the temperature and lower it if necessary.
- To help the air cycle through your oven, set a box fan in your kitchen.
-
3Leave your banana chips in the oven for 6-24 hours. Set a timer or reminder to leave your bananas in the oven for a minimum of 6 hours, to ensure that they’re completely dried. If the fruit doesn’t look brown or crispy on the surface, leave it in the oven for another hour or so, or until the bananas look dried out.[12]
Tip: If you’d like to make chewier banana chips, set your oven to 120 °C (248 °F) and let the chips bake for 90 minutes. As an extra touch, add a pinch of sugar on top of each banana slice! With this recipe, note that baked banana chips will only last for 1 week or so when stored in an airtight container.[13]
-
4Flip over the banana slices with a spatula when they’re brown and crisp. Set a timer for 5 hours so you remember to monitor and turn over your bananas. When your chips look brown and crispy, flip them over with a spatula. If the bananas still look moist, continue checking on the fruit until it looks visibly dry on the surface.[14]
- Feel free to flip your bananas over earlier if they look crisp enough.
-
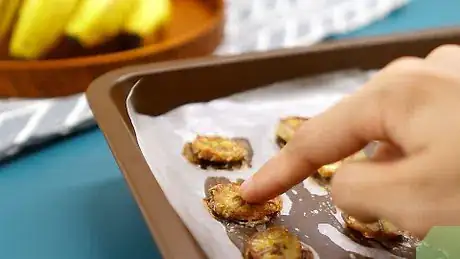
5Examine the surface of the bananas to see if they’re crisp or moist. Lightly tap the fruit to see if you notice any moisture in the chips. If so, place the trays back in the oven for a couple more hours. If the chips are completely dry, then they’re ready to be stored![15]
-
6Remove the fruit from the oven and let it cool for several minutes. Pull the trays out of the oven and arrange them in a flat, cool, and dry area. Wait at least 10 minutes for the chips to cool off, or until the fruit is cool to the touch.[16]
-
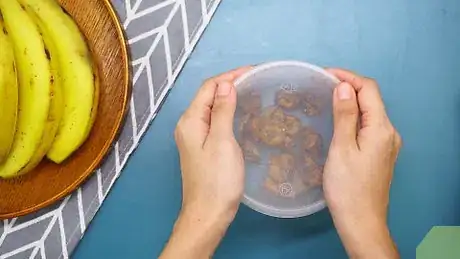
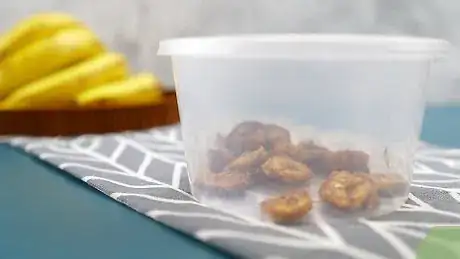
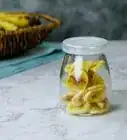
7Arrange the dried fruit into an airtight bin or bag. Stack your banana chips in a sealable plastic bag or container, then push out any excess air. Close the seal or lid on the bag or bin to keep your dried bananas as airtight and fresh as possible.[17]
-
8Store your dried bananas in a cool, dry area for 6-18 months. Leave the bananas in a dry, cool place, like a pantry or freezer. Be sure to label the container with masking tape and a marker so you remember how old the fruit is. Bananas can last for 12-18 months in a freezer, or 6-12 months in the pantry.[18]
- Avoid keeping your bananas near humid spaces, like a dishwasher.
Things You’ll Need
- Knife
- Ascorbic acid
- Water
- Bowl
- Paper towel or cloth
- Baking trays
- Parchment paper
- Spatula
- Plastic bag or container
References
- ↑ https://www.foodhero.org/recipes/dried-bananas
- ↑ https://nchfp.uga.edu/publications/uga/uga_dry_fruit.pdf
- ↑ https://www.superhealthykids.com/recipes/banana-chips-without-a-dehydrator/
- ↑ https://nchfp.uga.edu/publications/uga/uga_dry_fruit.pdf
- ↑ https://nchfp.uga.edu/publications/uga/uga_dry_fruit.pdf
- ↑ https://www.healwithfood.org/drying-fruit/dehydrating-bananas-in-the-oven
- ↑ https://nchfp.uga.edu/publications/uga/uga_dry_fruit.pdf
- ↑ https://www.healwithfood.org/drying-fruit/dehydrating-bananas-in-the-oven
- ↑ https://nchfp.uga.edu/publications/uga/uga_dry_fruit.pdf
- ↑ https://www.cnet.com/how-to/dont-have-a-dehydrator-use-your-oven/
- ↑ https://nchfp.uga.edu/publications/uga/uga_dry_fruit.pdf
- ↑ https://nchfp.uga.edu/publications/uga/uga_dry_fruit.pdf
- ↑ http://old.lilyvanilli.com/recipes/how-to-make-chewy-banana-chips/
- ↑ https://www.superhealthykids.com/recipes/banana-chips-without-a-dehydrator/
- ↑ https://www.healwithfood.org/drying-fruit/dehydrating-bananas-in-the-oven
- ↑ https://www.healwithfood.org/drying-fruit/dehydrating-bananas-in-the-oven
- ↑ https://stilltasty.com/fooditems/index/18824
- ↑ https://stilltasty.com/fooditems/index/18824
