This article was co-authored by Shun Pittman. Shun Pittman is a Master Cosmetologist, Author, Owner, and Founder of Corps d’Elite Salon and Corps d’Elite Beauty. With over 25 years of international experience, she is dedicated to and specializes in providing luxury salon services to all hair types and textures and every skin tone and shade. Her services include hair conditioning treatments, cutting, coloring, styling, extensions, and makeup application. Shun has experience working with, coaching, training, and mentoring beauty professionals from multiple companies including L'Oréal, Wella, Matrix, Paul Mitchell, Redken, Big Sexy Hair, and Toni & Guy. She is also a host for national and local media outlets and her work has been featured in The Washingtonian, The Cheddar Network, and WJLA Good Morning Washington's Beauty and Fashion Police segments. Shun is the author of “50 Things Your Hairdresser Wants YOU to Know (and a few things we don’t...)".
This article has been viewed 68,143 times.
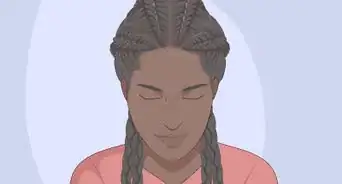
Micro braids, or zillion braids, are tiny braids that cover your head. The finished product is full, attractive, easy to maintain braids that are fun to wear. However, the process takes several hours to complete, and so it can be very helpful if you have a friend or someone to help you do your braids, especially the braids in the back of your head. In this article, learn what you need for micro braids, how to micro braids on natural hair and learn how to add extensions to your real hair to create beautiful braids.
Steps
Preparing to Braid
-
1Buy synthetic braiding hair. Go to your local hair care store, and you can find extensions for your hair of all different colors and textures. Choose whatever type of synthetic braiding hair suits your liking. Some popular brands for micro braiding are Wet and Wavy and Milky Way Que.
- The amount of hair you'll need depends on the style you're doing. The more braids you're doing, the more hair it will take.
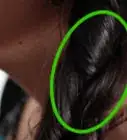
- Your hair extensions shouldn't exceed 2.5 times your natural hair length. Adding too much hair will pull on the hair follicle, which can lead to both hair breakage and hair loss.[1]
-
2Find a comb with sectioning tool. Rat tail combs are perfect, but any comb with a sectioning tool at the end will work. If you don’t have this kind of comb, you can buy one from a hair care store, or you can use a regular comb and the end of a pen or a bobby pin to part and section your hair.Advertisement
-
3Get out a pair of hair cutting scissors. You will use these scissors to trim the loose pieces of hair from the ends of the braids. If you do not have hair cutting scissors, you can use regular scissors as well.
-
4Find or buy a spray bottle for water. You will use the spray bottle to wet the roots of your hair so that you can part your hair into clean sections. If you do not have a spray bottle, you can wet the section of hair with your fingers and water.
-
5Get out your hair gel. Any silicone-based shine hair gel will work. You will use the gel to slick your hair before you add the extension to your hair and braid. The gel can also be used on the ends of your new braids to keep them slick.
-
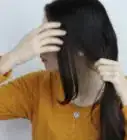
6Protect your hair prior to braiding. You want your hair to be as healthy as possible before you braid your hair because putting micro braids in your hair can damage it. Deep condition your hair a few times before you do your micro braids. You can also do a hot oil treatment on your hair to protect it against damage.
-
7Consider getting your hair trimmed. Once again, you want your hair healthy, and you don’t want to braid your hair with split ends. So go to a hairstylist, and tell him/her that you are getting your hair cut for micro braids. You will probably just want to get your ends trimmed.
- Avoid any hair cuts with layers or thinning.


Braiding Your Hair Without Extensions
-
1Section your hair with a comb. Start by sectioning off a ¼ inch section of hair at the nape of your neck for braiding first. Use your sectioning tool to create the layer at the nape of your neck. Clip the rest of your hair up so that it stays out of your way while you braid. You will put braids in this section of your hair first, and then you will section off another ¼ inch above the layer at nape of your neck and braid that section next. You’ll repeat the process by section until your whole head is braided.[2]
- This section method will help ensure that the hair for each of your braids is about the same length. This will also help make your braids more even.
-
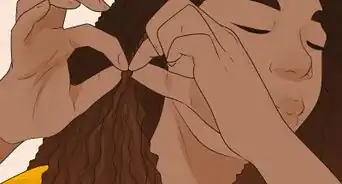
2Section off a piece of hair about ⅛ inch thick. Start at the far left or right side of the section at the nape of your neck, and with the tip of your comb, section off that piece of hair. You can also use the end of a bobby pin or a pen with cap to make a neat section about ¼ inch wide by a ¼ inch tall.
- Try to find a section of hair that is mostly even at the tips.
-
3Separate your hair into 3 equal sections, and do a classic braid. Braid your hair by braiding the left strand over the center strand and then right strand over center strand all the way down the hair. Pull your hair horizontally as you go to ensure the braids are secure and to keep the hair from slipping. But do not pull so tight that it strains at your scalp. Your head should not be in pain from the braids.
- If you have long nails, it may be helpful to clip them, or have someone else with shorter fingernails braid the hair for you. Because braiding these tiny braids with long fingernails can be difficult.
- Towards the end of the braid, hair may be in short supply, and strands will often become very thin. Depending on your preferences, you may stop braiding when there is not enough hair for you to braid, or you can move some hair from a larger strand to the thinning strand.
-
4Tie your braid off. At the end of your braid, use a small silicone hair tie to tie it off. Elastic hair ties that are slightly smaller in circumference than a dime and are made of a rubbery substance work best. Wrap the tie around the end of the braid several times until it is snug and secure on the end of the braid.
- You can leave your braids in during showers and swimming.
- Be careful, if you use heat on your hair, do not heat the band and accidentally melt it on the end of your braid.
- Make sure that your braids don't feel tight or uncomfortable. If your braids feel painful, you likely put too much tension on the hair during the braiding process, which can potentially lead to scalp trauma and hair loss.[3]


Adding Extensions to Your Braids
-
1Lightly mist the roots of your hair with water where you want to start braiding. You should start with the hair in front/above your ear on the right side of your head. Spraying water on your roots will make it easier for you to part your hair into clean sections. You don’t have to spray water on the strand of hair, just at the root.
-
2Section off a ¼ inch by a ¼ inch section of hair. Once again, start with the hair in front/above your ear on your right side. Use your sectioning tool at the end of your comb or a bobby pin to make a square that is even on both sides.
-
3Detangle the strand of hair with your comb and apply hair gel. Use the front part of your comb to gently detangle your hair so that it smooth and ready to be braided. Put a small amount of hair gel on the midsection and tips of your hair. The gel is going to help keep your hair smooth inside of the braid. [4]
-
4Take a piece of synthetic hair about ⅛ to ¼ inch in thickness. Pick off a piece and divide the piece of synthetic hair into two pieces. You should make one piece a third of the thickness of the strand and the other piece should then be two thirds of the thickness of the strand.
-
5Wrap the ⅓ piece of hair around the ⅔ piece of hair at the middle of both strands. Then bring the the ⅓ piece around together so that you have three equal parts of synthetic hair that are the same length and thickness.
- To make your micro-braids longer, take the two strands of hair, the ⅓ and ⅔ strands, and hold them both at the ⅓ mark, instead of at the half, so that the hair will hang down longer. Then wrap the ⅓ thickness strand of synthetic hair around the ⅔ strand of hair at the same ⅓ point on both strands. This will make your strands longer.
-
6Position your hands on the synthetic strands. You should have three strands of hair, and you should put your left index finger in between the two strands of hair that was the ⅔ piece, and make a fist with that hand. A V of the synthetic hair should be between your index finger and the point where the two strands are wrapped around each other. Then with your three fingers, thumb, forefinger, and middle fingers, of your right hand, hold the remaining strand of hair that was wrapped around the ⅔ strand so that it is secure.
-
7Position one hand on the synthetic strands. Twirl your right hand so that your hand is under the V. Going underneath the V, you should put your right index finger into the space where your left index finger is. With your right hand, pinch the strand of hair farthest from you in the V with your thumb and forefinger. Your left hand is now free.
- Keep the hair strands that are now correctly positioned in your right hand secure.
-
8Open your index finger and thumb and grab the section of real hair. Put your right hand holding the synthetic hair up as close to the root of your head as you can. With your left hand, pull the real hair for the section you are braiding so that it is taught but not tense. Then with your right hand, pinch the real hair with your index finger and thumb, and add it to the synthetic strand.
-
9Position your left arm over your head so that you can work better with your left hand. This position will help you work with both of your hands at the root of your braid.
-
10Start the braid. With your left hand, take the strand of the hair extension on the outside of your hand, and move it over your right hand so that it is close to the side of you head. Then rotate your right hand with your two strands of hair so that they cross and create a V. At the tip of the V, with your left hand, grab the bottom strand, and add it to your left hand, but keep the pieces separate.
- If you are braiding your hair and it hurts, loosen your grip. If you braid your hair too tight it can cause hair damage and hair loss.[5]
-
11Repeat the process 4-5 times. Every time you have two pieces of hair in one hand, you will rotate your hand in the direction of the hand they are in (right hand rotates right and left rotates left), crossing the hair so that it creates the V. Then you will insert your index finger of your other hand in the middle of the V and grab the bottom piece.
- Once you have braided the hair enough times in this way and your braid is secure, you can move your left arm from behind your head. Keep braiding you hair normally all the way down to the bottom of your hair.
- To braid it normally, move the right strand over center then left over center all the way down the hair to the end.
- When passing the strands between your hands, make sure to keep the strands separate unless you are adding hair to make one strand thicker.
-
12Add hair to the short strands. If you notice you are coming to the end of the braid and one strand of the braid becomes shorter than the others, pinch off a few pieces of hair from another strand, and add it to the short strand. Keep braiding it all the way down.
-
13Do a slipknot at the end of the hair. If you want to secure the end of your hair, you can make a slipknot. When you get to the end of your braid, make sure you have a good hold on the end of the hair with the index and thumb of your right hand.
- Grab a few of the synthetic hairs with your left hand to make a tie out of. Get enough to make a thin tie but not so few hairs that they could easily break.
- Loop the tiny strand over the inside of your right index finger that is holding the braid secure on the right side of the braid so that it comes all away around the finger. Then put your thumb inside the loop with your index finger.
- Bring the hair around the other side of the braid so that it wraps around the braid like a tie, and pinch the small section hair with your thumb and index finger, and bring the piece of hair through the inside of the loop to secure it in a knot.
- Repeat this process with that strand of hair 3-4 times. Then you can take half of the tiny strand that makes the knot, and make the slipknot 1-2 more times using the same process so that the braid is secure. [6]
- If the braid becomes less straight due to tying the knot, gently pull down on the braid to straighten it out.
-
14Clean up the braids with your scissors. Snip off the remaining hairs that are sticking out of the braid at the sides. Use your scissors and clean up the edges of the braid where there are stray pieces of hair sticking out.
- If you still have hairs sticking out, you can use hair gel to the ends of the braids to make the hairs slick to the braids.
-
15Continue sectioning and braiding using a brick pattern. While you are sectioning your hair, make a pattern so that after your first row you stagger the sections like bricks. So that above each parted section of hair there are two parted sections above/below on either side. This will help your hair look more full because you won’t be able to see as much of your scalp when the braids are laying flat on your head. Make braids around your whole head using the brick pattern. This process could take several hours if you are new to micro braiding.[7]
- Ask someone to help you with the braids at the back of your head.
- Practice makes perfect. These braids can be difficult to get the hang of at first, but be persistent because the experience and effort will pay off if you keep practicing.


Expert Q&A
-
QuestionHow do you clean your scalp with braids?
 Shun PittmanShun Pittman is a Master Cosmetologist, Author, Owner, and Founder of Corps d’Elite Salon and Corps d’Elite Beauty. With over 25 years of international experience, she is dedicated to and specializes in providing luxury salon services to all hair types and textures and every skin tone and shade. Her services include hair conditioning treatments, cutting, coloring, styling, extensions, and makeup application. Shun has experience working with, coaching, training, and mentoring beauty professionals from multiple companies including L'Oréal, Wella, Matrix, Paul Mitchell, Redken, Big Sexy Hair, and Toni & Guy. She is also a host for national and local media outlets and her work has been featured in The Washingtonian, The Cheddar Network, and WJLA Good Morning Washington's Beauty and Fashion Police segments. Shun is the author of “50 Things Your Hairdresser Wants YOU to Know (and a few things we don’t...)".
Master Cosmetologist, Global Salon Educator & AuthorApply witch hazel on your scalp with a cotton ball. Then, follow that with a very thing film of essential oil to lubricate the scalp. -
QuestionCan black men do this? I have hair type 4b.
 Community AnswerOf course you can do this! Any type of hair can be grown out. Look up 4b hair images and get a feel for what your hair looks like. Focus on hydrating and protecting your hair and soon it will be long and healthy.
References
- ↑ Shun Pittman. Master Cosmetologist, Global Salon Educator & Author. Expert Interview. 7 September 2021.
- ↑ http://hair.lovetoknow.com/Micro_Braids
- ↑ Shun Pittman. Master Cosmetologist, Global Salon Educator & Author. Expert Interview. 7 September 2021.
- ↑ https://www.youtube.com/watch?v=HncD0btAOVE
- ↑ https://www.youtube.com/watch?v=_I3LQRw6Q0Q&list=PLDTVr2hmqEgxnbwmxWlR7Le3IVfPa2oAK&feature=iv&src_vid=HncD0btAOVE&annotation_id=annotation_658975
- ↑ https://www.youtube.com/watch?v=d_TtBas3Z9w
- ↑ https://www.youtube.com/watch?v=_I3LQRw6Q0Q&list=PLDTVr2hmqEgxnbwmxWlR7Le3IVfPa2oAK&feature=iv&src_vid=HncD0btAOVE&annotation_id=annotation_658975
About This Article